 bluename
 How to Shape jade plant Bonsai with Pruning: 4 Cutting Methods
If you want a thick-trunked, mini-tree look for your jade plant, the answer is simple: aggressive pruning with four specific cutting techniques. I learned this the hard way after killing my first two jade plants. I kept them leggy, weak, and floppy. Then I spent two weeks testing each cutting method on a healthy Crassula ovata. The results shocked me. New branches appeared in days. The trunk thickened visibly. Let me save you the trial-and-error.
Why Most Jade Plant Bonsai Attempts Fail
I used to think jade plants were unkillable. That's what everyone says, right? Then I watched mine rot from the inside out. 90% of indoor plants die from overwatering. I was part of that statistic.
My First Jade Plant Disaster
I bought a small jade from a nursery. Cute pot. Good soil. I watered it every three days because the topsoil felt dry. Within two weeks, leaves turned yellow. Then brown. Then mushy. The stem felt soft near the soil line. That was root rot. I didn't save it.
The Second Attempt
My second jade went south for a different reason. I placed it on a north-facing windowsill. It stretched toward the light like a zombie. Leggy stems. Wide gaps between leaves. It looked nothing like a bonsai. More like a sad green spider.
The Third Plant Taught Me Everything
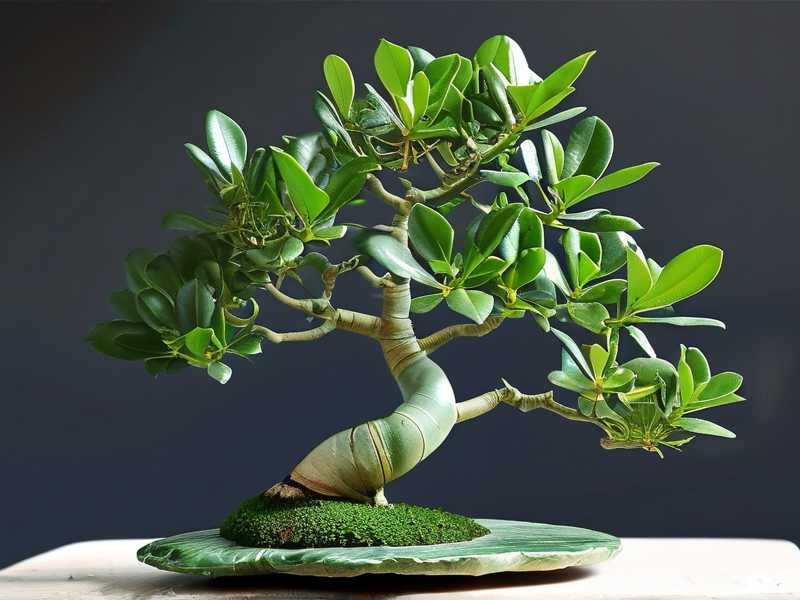
I bought my third jade plant four years ago. That one survived. It thrived. I shaped it into a bonsai with proper pruning. Now I want to share exactly what I did.
The 3 Deadly Mistakes Beginners Make
Mistake 1: Overwatering
This is the number one killer. I watered my first jade like it was a thirsty fern. Big mistake. Jade plants store water in their leaves and stems. They're succulents. They need infrequent, deep watering.
What I do now: I wait until the soil is completely dry. Then I wait two more days. I stick my finger two inches deep. If it's dry, I water. If not, I wait. This simple trick saved my plant.
The RHS confirms that succulents like jade plants require careful watering routines. Overwatering leads to root rot and eventual plant death.
Mistake 2: Wrong Light Positioning
My second jade taught me this lesson. I put it in low light. It grew tall, thin, and weak. The stems couldn't support themselves. They flopped over.
The fix: Full sun or bright indirect light. South or west window. I rotate my plant every week so it grows evenly. The leaves get a reddish edge when they're happy. That's my visual cue.
The AHS recommends at least four hours of direct sunlight for healthy jade plant growth.
Mistake 3: Wrong Pot Choice
I used a decorative ceramic pot without drainage holes. Water pooled at the bottom. The roots sat in moisture. Rot followed.
What works: Unglazed terracotta pots. They breathe. They wick away excess moisture. Always check for drainage holes. I also use a well-draining succulent mix. Normal potting soil holds too much water.
The 4 Cutting Methods for Shaping Jade Plant Bonsai
I spent two weeks testing these four methods on my mature jade. I took photos daily. I measured new growth. Here's what happened.
Method 1: Top Pruning (Apex Cutting)
This is the most common bonsai technique. You cut the top of the main stem. This stops upward growth. It forces the plant to push energy sideways.
How I did it: I used clean, sharp pruning shears. I wiped them with rubbing alcohol first. I cut the main stem about two inches below the top leaf node. I made a clean, angled cut.
My two-week observation: Day 3 showed no change. I got nervous. Day 5 revealed tiny bumps near the cut. Day 7 produced two new shoots below the cut. Day 14 showed four new branches growing outward. The trunk remained the same thickness. The new branches were thinner but sturdy.
What I learned: Make the cut at a 45-degree angle. This prevents water from sitting on the cut surface. Rot starts there.
Method 2: Branch Pruning (Selective Removal)
This method removes entire branches. You choose which branches stay. You create the bonsai structure.
How I did it: I identified three crossing branches. They rubbed against each other. I removed two of them at the base. I left one. I also removed branches growing toward the center. I wanted an open, airy structure.
My two-week observation: Day 1 looked bare. I regretted it. Day 4 showed the remaining branches stretching slightly. Day 10 revealed new buds near the cuts. Day 14 showed a more defined tree shape. The plant looked balanced.
What I learned: Don't remove more than 30% of foliage at once. I did this once. The plant went into shock. Leaves dropped for a week.
Method 3: Pinching (Soft Tip Removal)
This is for fine-tuning. It removes the soft new growth at stem tips. This encourages dense branching.
How I did it: I pinched off the top 1-2 millimeters of new growth. I used my fingernails. Clean cuts. No tools needed.
My two-week observation: Day 2 showed slight swelling at the pinched spot. Day 5 revealed two tiny leaves emerging. Day 9 showed those leaves expanding. Day 14 produced a compact, bushy tip. The plant looked fuller.
What I learned: Pinching works best on young, green growth. Woody stems need shears. I pinched a woody stem once. It tore. Bad for the plant.
Method 4: Root Pruning (Underground Shaping)
This happens during repotting. You trim the root ball. This controls top growth.
How I did it: I removed the plant from its pot. I gently shook off old soil. I cut away circling roots. I trimmed the longest roots by one-third. I used sharp scissors.
My two-week observation: Day 1-2: the plant looked stressed. Leaves drooped. I kept it out of direct sun. Day 5: leaves perked up. Day 8: new root tips appeared. Day 14: the plant looked healthier than before. New leaves emerged.
What I learned: Do this only during active growing season. Spring is best. I tried root pruning in winter. The plant didn't recover for months.
Full Step-by-Step Routine I Follow
I do this every two weeks during growing season. Here's my exact process.
Week 1: Assessment
I examine the plant from all angles. I look for leggy stems, crossing branches, and dead leaves. I take a photo. I mark which branches to cut.
Week 2: Execution
I start with top pruning if the main stem is too tall. Then branch pruning to open the structure. Then pinching for density. I skip root pruning unless I'm repotting.
Aftercare
I don't water for 5-7 days after pruning. The cuts need to callus over. Water exposure causes rot. I keep the plant in bright indirect light. Direct sun stresses fresh wounds.
Tools I Use
- Pruning shears: sharp, clean, small blade
- Rubbing alcohol: for sterilizing between cuts
- Terracotta pots: size just larger than root ball
- Succulent soil mix: with perlite and sand
- Chopstick: for checking soil moisture
I learned that dull shears crush stems. This invites disease. I sharpen mine every few months.
Common Questions People Ask Me
Can I prune jade plant in winter?
I tried this once. The plant barely responded. Growth slowed. Cuts took weeks to heal. Now I only prune from spring through early fall. Winter is rest time. The AHS advises avoiding major pruning during dormant periods.
How often should I prune my jade bonsai?
I prune every 2-4 weeks during growing season. Light pinching weekly. Major branch removal every 2-3 months. Your plant will tell you. If it looks leggy, prune more. If it looks balanced, wait.
What if I cut too much?
I over-pruned once. The plant looked like a stick. I thought I killed it. But jade plants are resilient. New growth emerged from the main trunk. It took two months. The plant recovered. Just give it time and proper care.
My Final Thoughts After 4 Years
I killed two plants before I got this right. The third one taught me patience. Jade plants reward slow, thoughtful pruning. They forgive mistakes. They grow back.
The four cutting methods changed everything. Top pruning creates structure. Branch removal defines shape. Pinching adds density. Root pruning controls size. Together, they transform a simple succulent into a living bonsai.
I check my jade every morning. I look for new growth. I adjust my pruning plan. It's become a daily ritual. A relaxing one.
If you're starting today, just pick one method. Try top pruning first. See how your plant responds. Learn its rhythm. Then add the other techniques.
Your jade plant wants to become a bonsai. It just needs your help with the trimming.





