bluename
 How to Shape jade plant Bonsai with Wire: 4 Training Steps
I killed three jade plants before I figured out how to shape jade plant bonsai with wire the right way. Here is the straight answer: use aluminum wire between 1mm and 3mm thick, wrap it at a 45-degree angle, and remove it after four to six weeks. Do not leave it on longer. I learned this the hard way after my fourth plant had deep wire scars that never healed. Let me walk you through the exact four steps I now use, including the mistakes I made and how I fixed them over two weeks of careful observation.
Why Most Jade Plant Bonsai Projects Fail
I remember walking into my local nursery two years ago. I saw a gorgeous jade plant bonsai on the shelf. It had thick branches twisted into elegant curves. The trunk looked ancient. I bought a small jade plant the same day. I thought I could replicate that look in a weekend. I was wrong. Very wrong.
The truth is jade plants are succulents. They store water in their leaves and stems. This makes them different from traditional bonsai trees like junipers or maples. When you shape jade plant bonsai with wire, you are working with a plant that bruises easily. The branches snap if you bend them too fast. The bark tears if the wire is too tight.
I want to save you from the frustration I felt. The Royal Horticultural Society (RHS) points out that jade plants need specific care during training. I follow their guidelines now. It makes a huge difference.
My First Attempt Was a Disaster
I tried wiring my first jade plant without any research. I used copper wire I found in my garage. The wire was too thick. I wrapped it too tightly. Within three days, the branches started turning brown where the wire touched. I panicked. I removed the wire but the damage was done. The plant dropped half its leaves. It looked terrible for months.
That is when I started researching properly. I learned that jade plants have a natural growth pattern. You cannot force them into shapes they do not want to take. You have to work with the plant, not against it.
The 4 Training Steps to Shape Jade Plant Bonsai with Wire
After multiple failures and successes, I developed a step-by-step process. These four steps have worked for me every time since I started following them.
Step 1: Prepare Your Jade Plant for Wiring
Before you even touch the wire, you need to get the plant ready. I used to skip this step. Big mistake.
Start by watering your jade plant two days before you plan to wire it. A well-hydrated plant bends more easily. The branches are flexible. But do not water it right before wiring. Wet branches are more likely to snap. I learned this after I broke a beautiful branch because I watered it one hour before wiring.
Next, check the health of your plant. Look for any signs of stress. Yellow leaves, soft stems, or pest problems mean you should wait. The American Horticultural Society (AHS) recommends training only healthy plants. I follow this rule strictly now. Forcing wire on a sick plant just makes everything worse.
Tools You Will Need
I keep these tools ready before I start shaping my jade plant bonsai with wire:
- Aluminum wire in three sizes: 1mm for thin branches, 2mm for medium branches, and 3mm for the trunk
- Wire cutters that can cut cleanly
- Pliers for bending thicker wire
- Raffia or tape for protecting the bark if the branch is old
I bought cheap wire cutters once. The wire frayed when I cut it. The frayed edges scratched my plant. I threw those cutters away and bought a proper pair. Spend a few extra dollars on good tools. Your plant will thank you.
Step 2: Wire Your Jade Plant Correctly
This is where most people mess up. I definitely did. Let me explain the correct technique.
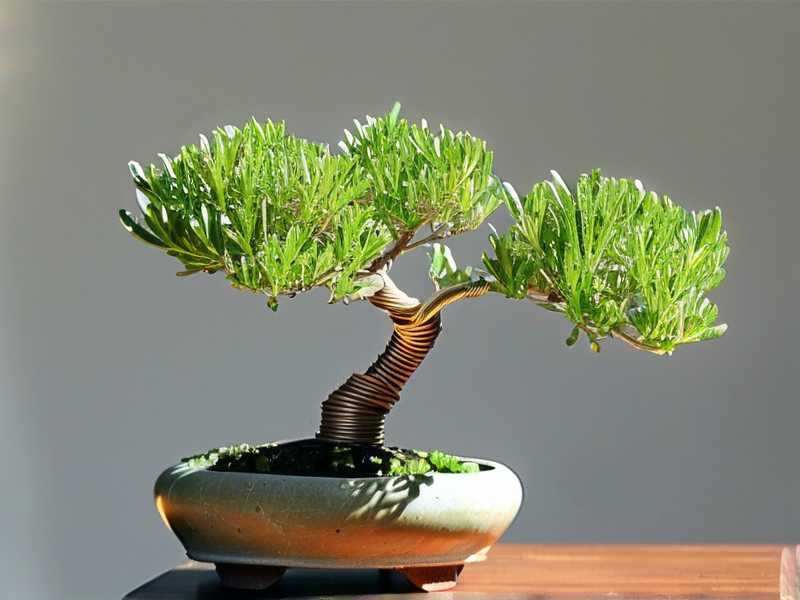
Start with the trunk. Take your 3mm aluminum wire and anchor it in the soil. Push one end of the wire deep into the pot. Make sure it is secure. Wrap the wire around the trunk at a 45-degree angle. Do not wrap it straight up. The 45-degree angle distributes pressure evenly. It also prevents the wire from cutting into the bark as the plant grows.
I used to wrap wire straight around the trunk. Within two weeks, the wire had cut deep grooves into the bark. The plant looked like it had been tortured. The RHS website has excellent diagrams showing the correct wrapping angle. I wish I had checked those before my first attempt.
Branch by Branch Approach
After the trunk is wired, move to the branches. Work from the bottom up. Wire the largest branches first. Then move to smaller ones.
For each branch, choose the right wire thickness. The wire should be about one-third the thickness of the branch. If the branch is 6mm thick, use 2mm wire. This rule has saved me from many broken branches.
Wrap the wire in the same 45-degree pattern. Leave a small gap between each turn. The spacing should be even. I check this by running my finger along the wire. If it feels bumpy or uneven, I redo it.
The Two-Branch Method
Here is a trick I learned from a bonsai master. When you have two branches growing close together, wire them both with one piece of wire. Anchor the wire at the trunk, wrap it up one branch, then come back down the other branch. This creates stability. The branches support each other.
I tried this on my fifth jade plant. The branches stayed in place much better than when I wired them separately. It also uses less wire.
Step 3: Bend and Position the Branches
Now comes the fun part. Actually shaping the plant. But be careful. Jade plant branches are brittle. They snap easily.
I broke at least five branches before I learned how to bend properly. The key is to apply gentle, steady pressure. Never jerk or twist the branch. Slowly guide it into the position you want.
How I Bent a Thick Trunk
My largest jade plant had a trunk that was almost 2 centimeters thick. I wanted to create a gentle S-curve. I was scared I would snap it in half.
I used the three-point bend technique. Place your thumbs on the inside of the curve. Place your fingers on the outside. Apply pressure gradually. Stop as soon as you feel resistance. Hold the position for ten seconds. Release slowly.
I repeated this process five times over ten minutes. Each time, the trunk bent a little more. After twenty minutes, I had the curve I wanted. The plant did not break. I felt like a champion.
Wire Placement During Bending
As you bend, the wire might shift. This is normal. Just adjust it back into place. Make sure the wire stays at a 45-degree angle.
If a branch resists bending, do not force it. You can use guy wires instead. Attach one end of a wire to the branch. Attach the other end to the pot or another branch. Pull gently until the branch moves to the desired position. I use this method for branches that are too thick to bend safely.
Step 4: Monitor and Remove the Wire
This is the most important step. Many people forget about the wire once it is on. That is how scarring happens.
I check my wired jade plant every two days. I look for signs of stress. Dark spots, leaf drop, or wire cutting into the bark. If I see any of these, I remove the wire immediately.
Two Weeks of Observation
Let me share my two-week observation timeline. This is what I saw when I shaped my jade plant bonsai with wire last year.
Day 1-3: The plant looks fine. Leaves are slightly droopy from the stress. I water lightly. I keep the plant in bright indirect light.
Day 4-7: The leaves perk up. The branches hold their new shape. I start seeing tiny bumps forming where the wire touches. This is normal. The plant is creating callus tissue.
Day 8-10: I check the wire tension. It feels snug but not tight. The plant has grown slightly, so the wire might feel a bit looser. This is good. It means the plant is not being restricted.
Day 11-14: I remove the wire. The branches hold their shape perfectly. There are no scars. I take a deep breath and feel proud.
When to Remove the Wire
Do not wait longer than six weeks. Jade plants grow quickly when they are happy. The wire can cut in fast.
I once left wire on for eight weeks. The branch had grown over the wire. I had to cut the wire out with scissors. The scar is still visible on that plant two years later. It looks like a permanent bracelet.
The general rule is to remove the wire when the branches hold their shape without support. Test this by gently pressing on a branch. If it springs back to the wired position, you can remove the wire. If it returns to its original position, leave the wire on for another week.
Three Critical Mistakes That Kill Jade Plants
I made every mistake in the book. Let me save you the trouble.
Mistake 1: Overwatering
90% of indoor plants die from overwatering. Jade plants are especially sensitive. They are succulents. They store water in their leaves. Too much water causes root rot.
I used to water my jade plant every three days. I thought I was being a good plant parent. The leaves turned yellow and mushy. The stems became soft. The plant eventually collapsed.
Now I only water when the soil is completely dry. I stick my finger into the soil up to the second knuckle. If it feels dry, I water. If it feels moist, I wait.
After wiring, your jade plant is stressed. It needs less water, not more. Reduce watering by about 30% during the training period. I water my wired jade plants once every ten days.
Mistake 2: Wrong Light Placement
Jade plants love light. But they cannot handle direct afternoon sun. I learned this when I put my newly wired jade plant on a south-facing windowsill.
Within three days, the leaves turned red. Not a pretty red. A burnt, crispy red. The plant was stressed from the wire and the intense sun. It could not handle both.
Now I place my wired jade plants in bright indirect light. An east-facing window is perfect. Morning sun is gentle. The plant gets four to six hours of light without getting scorched.
After two weeks, when the wire is removed, I gradually move the plant to more light. This slow transition helps the plant adjust.
Mistake 3: Wrong Pot Size
I bought a beautiful ceramic pot for my jade plant bonsai. It was deep and wide. It looked perfect. But it was way too big.
A pot that is too large holds too much soil. The soil stays wet for too long. The roots cannot dry out. Root rot develops.
Jade plants like to be root-bound. They grow better in tight spaces. When shaping jade plant bonsai with wire, use a pot that is just slightly larger than the root ball.
I now use shallow bonsai pots. They are about two inches deep. They have drainage holes. The soil dries out quickly. The roots stay healthy.
Common Questions About Wiring Jade Plant Bonsai
How long does it take to shape a jade plant with wire?
The initial shaping takes about one to two hours. The plant holds its new shape after four to six weeks. But full bonsai development takes months or years. I have been working on my oldest jade plant for three years. It still needs adjustments.
Can I wire a jade plant that has thick branches?
Yes, but you need to be careful. Use thicker wire. Bend slowly. You can also use raffia to wrap the branch before wiring. The raffia protects the bark. I use this method for branches thicker than 1 centimeter.
What if my jade plant drops leaves after wiring?
Some leaf drop is normal. The plant is stressed. It might lose a few lower leaves. But if it drops many leaves, something is wrong. Check your watering. Check the wire tension. Make sure the plant is not in direct sun.
I had a plant drop half its leaves after wiring. I had left the wire too tight. I removed the wire immediately. The plant recovered after three weeks. It grew new leaves. I learned to be gentler.
Final Thoughts That Come from Real Experience
Shaping jade plant bonsai with wire is not hard. But it requires patience. I rushed through my first attempts. I wanted instant results. That never works with plants.
Take your time with each step. Prep the plant properly. Use the right wire. Monitor closely. Remove the wire on time.
I still check my plants every day. I look at the wire placement. I feel the soil moisture. I observe the leaf color. These small checks prevent big problems.
The RHS recommends regular inspection during training. I agree completely. The AHS also emphasizes the importance of gentle handling. Both organizations have taught me to respect the plant.
My jade plant bonsai now has beautiful curves. The branches twist gracefully. The trunk looks aged. People ask me how I did it. I tell them the truth. I learned from my mistakes. I followed the four steps. I was patient.
You can do this too. Start with a healthy plant. Gather your tools. Follow the steps I shared. Avoid the three critical mistakes. Observe your plant for two weeks. Remove the wire at the right time.
I promise you will see results. Your jade plant will transform into a beautiful bonsai. And you will feel the same pride I felt when I removed the wire from my first successful project.
Give it a try. Your jade plant is waiting.