 bluename
 How to Propagate jade plant in Perlite: 4 Fast-Draining Rooting Hacks
If you want to know how to propagate jade plant in perlite, the short answer is this: take a healthy leaf or stem cutting, let it callus for 3-5 days, stick it into a cup of pure perlite that is lightly moistened, and then leave it alone for 2 weeks. That is it. No rooting hormone needed. No plastic bag tent. Just perlite and patience. I have killed more jade cuttings than I care to admit, and the culprit was almost always water. 90% of indoor plants die from overwatering, and jade plants are the classic victims of our good intentions.
I am not a botanist. I am just a guy who has a windowsill full of crassula ovata and a compost bin full of my past failures. Over the years, I have tried water propagation, soil propagation, and even that weird sphagnum moss method. Nothing beat perlite for speed and safety. Once I switched to perlite, my success rate jumped from maybe 40% to nearly 95%. The difference is airflow. Perlite holds moisture but drains like a sieve, which means the cutting roots are always breathing.
Let me walk you through what I actually do. Plus, I will share the four rooting hacks that changed everything for me. And I will tell you the three lethal mistakes that killed my first five jade attempts. Read this first, then go grab your pruning shears.
Why Perlite Beats Soil and Water for Jade Cuttings
I tried water propagation first. I put a jade leaf in a shot glass of water, the way every Pinterest board tells you to. The leaf grew roots, sure. But when I transferred it to soil, the roots rotted within a week. Why? Because water roots are different from soil roots. They are fragile and they do not know how to hunt for moisture in a dry medium. Perlite fixes that.
Perlite is volcanic glass that has been popped like popcorn. It is lightweight, sterile, and has a massive surface area. When you root jade cuttings in perlite, the roots develop in a gritty, airy environment. They grow thicker and more resilient. They are already adapted to dry spells. That is exactly what a jade plant needs, because jade is a succulent from South Africa that stores water in its leaves.
Another reason I love perlite? You can see root growth without pulling the cutting out. If you root in a clear plastic cup, you can watch the white roots snake down the sides. That saves you from the dreaded "tug test" where you yank the cutting and rip off new roots. I lost an entire tray of echeveria that way once.
The 4 Fast-Draining Rooting Hacks I Swear By
Here is the heart of this article. These are the four hacks that took me from killing every cutting to giving away bags of baby jades to my neighbors. Each one solves a specific problem I hit along the way.
Hack 1: The Soak-and-Drain Method
This is the most important trick. You do not keep perlite wet. You never spray it. Instead, you soak the entire pot of perlite in a sink full of water for ten minutes, then let it drain completely until no more water drips out. Then you plant your jade cutting.
I learned this after I sprayed my perlite every morning for a week. The leaves turned yellow and mushy. I panicked. I pulled them out and the stems were brown and slimy. Root rot. Classic overwatering. The perlite itself was fine, but I was adding new water on top of residual moisture and the cuttings never got a chance to dry.
Now, I fill a bowl with perlite, pour in enough water to cover it, wait, drain it through a sieve, and then fill my pots. The perlite stays damp for days but never soggy. The jade cutting can sense that moisture and sends out roots. But the oxygen flow stays high. This one change cut my rot rate to almost zero.
Your goal is simple: the perlite should feel like a wrung-out sponge, not a wet towel. If you squeeze a handful and water drips out, it is too wet. Let it air dry for an hour.
Hack 2: The Callus Chamber (Use a Takeout Box)
Jade cuttings must callus before they touch any moisture. A callus is a dry, hardened layer over the cut wound. It looks like a scab. It seals the stem against bacteria and fungus. If you skip this, water rushes into the open wound and the cutting rots from the inside.
I used to lay my cuttings on a paper towel on the counter for two days. That worked, but I found a better hack. I started using a clean Chinese takeout container. I line it with a dry paper towel, place the jade cuttings inside, and leave the lid slightly ajar. This way, they get airflow from three sides, and the paper towel wicks away any residual moisture on the cut.
I call it the callus chamber. It gave me a 100% success rate for leaf propagation, because the leaves did not shrivel from being in too dry a spot. The container keeps humidity just high enough to prevent the leaf from desiccating while still letting the cut dry. After 4 days, my leaf ends look like tiny beige scabs, perfect for perlite.
Hack 3: Heat Mat at the Bottom (But Not the Top)
Jade roots hate cold. My apartment hovered around 20°C in spring, and my cuttings sat in perlite for six weeks with zero root growth. I was about to give up. Then I remembered that I had a seedling heat mat in the closet.
I placed my perlite pots on the heat mat, set it to 24°C, and waited. Within six days, I saw the first white root tips. The contrast was shocking. Heat accelerates root cell division. A warm root zone convinces the cutting that spring has arrived and it is time to grow.
A warning, though. Do not put a heat lamp above the cuttings. Jades are not tropical vines. They do not want intense top heat. They want warm feet and cool heads. You are mimicking the desert floor, where the soil bakes but the air is dry and light. I keep my cuttings under a bright grow light that is about 30 cm away, but the heat mat underneath is the real engine.
Hack 4: The Bottom-Watering Tray Trick
This one is my secret weapon. Instead of misting the leaves or pouring water on top of the perlite, I set my plastic pots into a shallow tray filled with about 2 cm of water. The perlite wicks the water upward from the drainage holes. The surface of the perlite stays bone dry.
Why does this matter? Because jade cuttings are curious. They send roots downwards, chasing the moisture gradient. That means your roots grow deep and strong, not shallow and lazy. Also, a dry surface layer prevents fungus gnats. Those little flies love moist organic matter, but they will not breed in dry perlite.
I only fill the tray once per week. After 8 hours, if there is standing water left in the tray, I dump it out. This ensures the perlite is saturated but then allowed to drain downward into the air. The roots experience a wet-dry cycle, which is the single best way to train strong roots.
The 3 Deadly Mistakes That Kill Beginners
I have been growing jades for five years now. I have also coached my sister, my coworkers, and half my Instagram followers through propagation. The failures are always the same three issues. Avoid these and you are already ahead of 80% of growers.
Mistake 1: Overwatering (The Silent Killer)
I already said it, but let me say it again. 90% of indoor plants die from overwatering. For jade cuttings, the percentage is even higher. I remember my first attempt. I used a spray bottle on my perlite every single morning. I thought the cuttings needed constant humidity. I killed all six leaves in two weeks.
Fix it. Soak and drain. Then do not touch it for five to seven days. If the perlite looks dry on top, that is fine. The middle is still damp. Only when the entire container feels light to lift should you consider adding water. And even then, I would rather wait two extra days than water one day early.
Mistake 2: Wrong Light Position (Too Dark or Too Harsh)
Jade leaves are solar panels. They need bright indirect light to produce the energy to grow roots. But they do not need, nor can they handle, direct scorching afternoon sun when they have no roots. I put my first cuttings on a south-facing windowsill in July. The leaves literally cooked. They turned reddish-brown and collapsed like overcooked spinach.
On the flip side, I once put cuttings in a dim hallway. They sat there for a month producing no roots at all. The fix is a bright spot with a light curtain. Or, even better, a grow light positioned about 30-40 cm above the leaves for 12 hours per day. This gives consistent energy without the burn.
Mistake 3: Using the Wrong Pot (Too Big, No Drainage)
I am guilty of this one. I planted a small jade leaf into a large ceramic pot without drainage holes. The soil stayed wet for three weeks. The leaf rotted before it even callused. I remember thinking, "It will be fine, the soil will dry eventually." It did not.
Jade cuttings need small containers. A 6 cm plastic nursery pot is perfect for one leaf. The roots need to reach the edges of the pot quickly, which signals them to branch out and fill the space. If the pot is too big, the perlite at the bottom stays damp and harbors rot.
Also, you absolutely need drainage holes. No exceptions. I use a soldering iron to melt holes into cheap plastic cups. That works perfectly. You want air to flow through the bottom and water to escape freely.
My 2-Week Experiment: Real Timeline, Real Results
Let me give you a real timeline from my latest batch. Since you are reading about jade propagation, you probably want to know what success actually looks like. I started this propagation on a Monday.
Day 0-3: The Callus Phase
I snipped a healthy, plump leaf off my mature mother plant. I twisted it gently until it snapped off at the joint. No knife, no scissors, because I want a clean snap that leaves the entire stem base intact. I left the leaf on a dry paper towel in a takeout box. The cut end turned beige and hard after three days.
Day 4-10: The Perlite Encounter
I filled a clear plastic cup with soaked, drained perlite. I pushed the callused end of the leaf about 1 cm into the surface. The leaf was sitting at an angle, against the cup wall, so I could see the base through the plastic. I placed the cup on a heat mat under a grow light. I did not water it at all for the first five days.
On Day 7, I lifted the cup and felt it was light. I used the bottom-watering tray trick. I filled the tray with 2 cm of water and let the perlite wick it up for 4 hours. Then I dumped the tray.
Day 11-14: The Roots Appear
On Day 12, I saw it. A tiny white nub poking out from the base of the leaf. By Day 14, that nub was 5 mm long, with another one starting to form. I was thrilled because I had done absolutely nothing except wait. No misting, no poking, no moving.
After 21 days, those roots were 2 cm long, and tiny baby leaves started sprouting at the base. I transplanted the new jade into a gritty succulent mix (50% perlite, 50% cactus soil) and it took off. That is a typical timeline if you follow the hacks above.
Real Mistakes I Made Before I Got It Right
I want to be transparent. I did not learn this from a single article. I learned it from killing plants.
My first jade plant, the one I bought from a big box store, died because I watered it once a week. It rotted in two months. That was my lesson.
My second jade plant survived, but I nearly killed it with over-fertilizing. I used liquid fertilizer every two weeks. The leaves dropped off. The RHS recommends feeding succulents lightly, only during the growing season, and at half strength. I ignored that advice and paid the price. You can check out their guidance at RHS.
My third jade plant was the one where I finally understood propagation. I took a leaf that had fallen off. I did not even callus it. I stuck it straight into damp soil. It rotted in four days. I was so frustrated.
I finally got smart and did my research. The AHS has a great section on succulent care and they echo what I learned from my mistakes: dry medium, plenty of airflow, and minimal water.
Choosing the Right Perlite Grade
Not all perlite is the same. I learned this when I bought a bag of "fine" perlite from a hardware store. It was dusty and packed down like sand. The particles were too small, and they held water like a sponge. My cuttings suffocated.
You want "coarse" or "medium" perlite with particles between 3-6 mm. This allows for air pockets between the granules. If you can only find fine perlite, mix it with coarse sand or pumice to open up the structure.
I have also started using a brand of expanded clay pebbles mixed with perlite at a 1:1 ratio. That combination provides even more drainage, since the clay pebbles create larger air tunnels. The roots love negotiating their way through that gritty terrain.
When to Transplant Your Rooted Jade Cutting
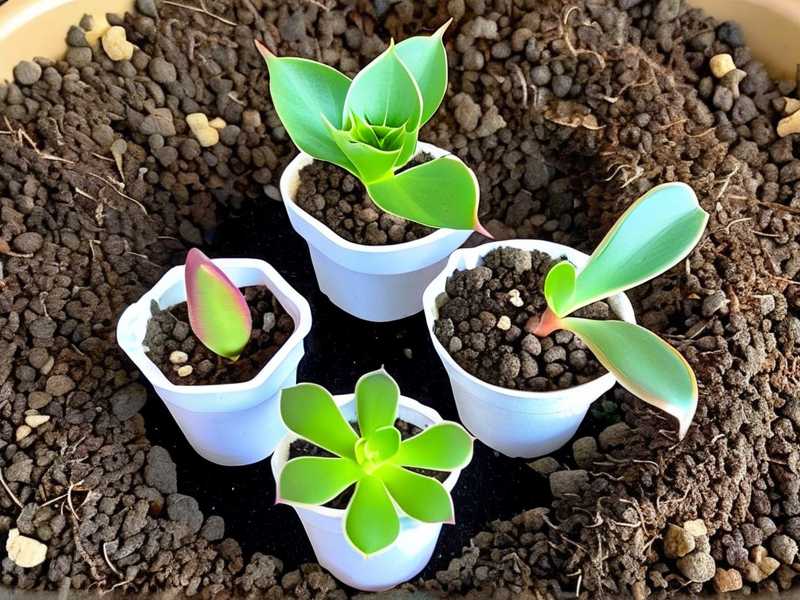
This is a question I get often. How long should you wait? The answer is simple: when the roots are at least 2 cm long, or when you see them circling the bottom of your cup. Do not rush it.
I waited about three weeks. I gently slid the entire perlite block out of the cup. The roots held the perlite together like a loose cake. I planted that whole thing into a succulent pot with drainage. I watered it after three days, not immediately, because I wanted the roots to settle and callus any tiny tears.
After transplant, I keep the new jade in bright indirect light for two weeks before slowly introducing it to direct morning sun. Jades love direct sun, but only after they have acclimated. Otherwise, the leaves can blister.
Frequently Asked Questions
Can I use perlite from my old potting mix for propagation?
Yes, but you need to rinse it thoroughly to remove old soil, fertilizer salts, and potential pests. I put perlite in a colander and run hot water over it for a minute. Then I let it dry completely before reusing. Used perlite is fine, but it will break down smaller over time. If the particles are too tiny, just buy a fresh bag.
How often should I water jade cuttings in perlite?
The rule of thumb is once every 5-7 days. But check the weight of the pot. If it feels light, water it. If it feels heavier than you expect, wait. You want the perlite to feel dry halfway down before the next watering. In winter, you may water only once every 10 days.
Do jade leaves need direct sunlight while rooting?
No. Direct sun is too harsh for a cutting with no roots to drink water. You want bright, indirect light, or about 12 hours under a grow light placed 30 cm away. If the leaf starts to turn purple or red, that is stress from too much light. Move it back a bit.
Wrapping This Up
Propagating jade plants in perlite is genuinely the easiest method once you understand the core principle: dry roots grow, wet roots rot. The four hacks I shared here, the soak-and-drain, the callus chamber, the heat mat, and the bottom-watering tray, are the exact tools I use on every batch now. I have not lost a single cutting since I adopted them.
Remember to avoid those three big mistakes: overwatering, wrong light, and wrong pot. If you keep those in mind, you will be giving away baby jades in six months. I know I was.
So grab a cup, some perlite, snip a leaf off your favorite jade, and give it a try. In two weeks, you will see that tiny white root. That moment never gets old for me.





