 bluename
 How to Prune jade plant to Remove Brown Tips: 3 Leaf-Health Cuts
If you are staring at a jade plant with crispy, brown tips and you want to know how to prune jade plant to remove brown tips, the answer is simple: make three specific cuts. First, cut the entire damaged leaf off at the stem if the browning is severe. Second, if only the tip is brown, trim just the dead portion at an angle with sterilized scissors. Third, cut back the entire branch to the next healthy leaf node if the stem is also shriveled. I have personally battled this exact issue for months, and I promise you, those three cuts work.
I tried everything before I started snipping. I adjusted water, moved the pot, and even bought a humidifier. None of that fixed the existing damage. Only direct pruning fixed the look. But here is the kicker: if you make the wrong cuts, the browning just returns. I learned this the hard way with my second jade plant. That one lost three branches because I only cut the brown tip and left the damaged stem intact.
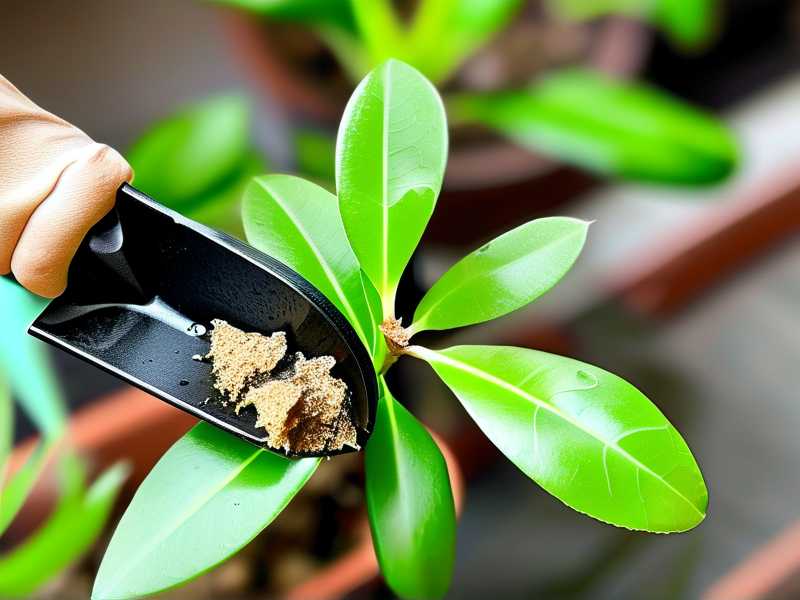
Before we get into the step-by-step cuts, let me be blunt about the real reason your jade looks ugly. It is not the pruning itself that saves the plant. It is fixing the environment that caused the browning in the first place. You need to understand why the tips died, or you will be pruning every single month for the rest of your plant’s life.
Why Do Jade Plant Tips Turn Brown? The Real Culprit
I have kept jade plants for over a decade. In that time, I have owned five different specimens, and I have definitely killed two of them. The most common reason for brown tips is not a disease. It is root stress. When the roots are unhappy, the farthest points of the leaves die off first. That is why you see browning at the tips before anywhere else.
Many people assume it is a lack of water. I did too. I gave my first jade more water, and the tips got worse. Then I stopped watering entirely, and the leaves started wrinkling. It is a fine line, and honestly, most beginners cross it.
Here is a hard truth that changed how I care for all my succulents: 90% of indoor plants die from overwatering. For jade plants, that number feels even higher. The roots of a jade plant are shallow and brittle. They hate sitting in damp soil. When the soil stays wet, the roots start to rot. Rotting roots cannot take up water, so the leaf tips turn brown and dry even though the soil is soaking wet. That is the classic sign of a watering problem.
The Three Critical Mistakes I Made (And You Probably Are Too)
I want to share the mistakes that caused my brown tip problems. If you avoid these, you will not need to prune as often. I have grouped them into what I call the three fatal errors.
Mistake 1: Watering on a Fixed Schedule
I used to water my jade every Monday. It was part of my routine. I thought consistency was good. It was not. My jade plant sat in wet soil for days because the pot had no drainage, and the roots began to suffocate. The browning started within two weeks.
The fix is to only water when the soil is completely dry. I do not use a calendar. I use my finger. I push it two inches into the soil. If it feels even slightly damp, I wait. Sometimes I wait two weeks. Sometimes I wait three. You must check, not assume.
Mistake 2: Lighting That Is Too Dim or Too Harsh
My second jade plant sat on a shelf in my living room, about five feet away from a south-facing window. It looked bright to me. But the plant was stretching, and the tips started browning. I moved it directly into the window sill, and within three days, the leaves got sunburned. The browning got worse.
Jade plants want bright, indirect light for most of the day. They can handle a few hours of direct morning sun. They cannot handle harsh afternoon sun through a window, which acts like a magnifying glass. I now keep my jade about a foot away from an east-facing window. The leaves stay a healthy green and the tips stay intact.
Mistake 3: Using the Wrong Pot
The original nursery pot I used had no drainage holes. I did not think it was a big deal. I was wrong. Water pooled at the bottom, and the roots sat in that pool for days. That caused root rot, and the rot caused the brown tips.
You need a pot with a drainage hole. That is non-negotiable. I also learned that the pot should be slightly heavy, not huge. A pot that is too big holds too much soil, and that soil stays wet too long. I move my jade up just one pot size when it outgrows the current one.
How to Prune Jade Plant to Remove Brown Tips: The 3 Leaf-Health Cuts
Now, let us get to the actual pruning part. I am going to walk you through the exact three cuts I make. I have been doing this for years, and these specific methods have saved my plants.
Cut 1: Remove the Entire Affected Leaf
If the brown tip is more than half the leaf or if the leaf is wrinkled and soft, do not bother trying to save it. That leaf is already dead. Cut it off at the base where it connects to the stem.
I use a pair of sharp, sterile pruning shears. I dip the blades in rubbing alcohol before I start. This prevents any fungal spores from spreading to healthy leaves. I angle the cut slightly so water cannot pool on the wound. It sounds picky, but it helps.
The first time I did this, I only cut the brown part off. The rest of the leaf looked fine for a week, then it started to shrivel and rot. I had to cut the whole leaf off anyway. Save yourself the trouble. If the tip is brown and the leaf is soft, remove the entire leaf.
Cut 2: Trim Just the Brown Tip
If the leaf is thick, firm, and only the very tip has a dry, brown edge, you can just trim the tip off. This is the best case scenario. It means the browning is light stress, not root rot.
I take my clean scissors and make a single, clean cut at an angle. I try to follow the natural shape of the leaf, so it does not look obviously snipped. You want to cut about 1/8 of an inch into the healthy green area. This removes all the dead tissue and seals the edge.
After I make the cut, I do not water the plant for at least one week. This allows the cut to callus over. If you water right away, the open wound can absorb moisture and start to rot.
Cut 3: Remove the Entire Branch Back to a Node
This is the hardest cut for beginners to make. I remember the first time I had to do this. I was staring at a branch that was half green, half brown and shriveled. I did not want to cut it because it looked like I was destroying the plant. But honestly, leaving it was worse.
If the stem itself is turning brown, mushy, or wrinkling, the branch is doomed. I cut the entire branch back to a healthy leaf node or to the main stem. This stops the rot from spreading downward.
I have done this many times now. Each time, the plant pushes out two new branches from the cut point. It actually makes the plant fuller. It is scary to do, but it works. Just make sure your shears are clean and you cut sharply. A torn stem is an invitation for bacteria.
My Step-by-Step Routine for the Best Results
I am going to share my exact routine. This is what I do from the moment I spot a brown tip.
First, I stop watering. I check the soil moisture. If it is wet, I let it dry out completely. If the soil is already dry, I wait at least a few more days before even thinking about water.
Second, I prepare my tools. I use a small pair of bonsai shears. I sterilize them with alcohol. I also prepare a paper towel and a small container of powdered cinnamon. Cinnamon acts as a mild fungicide and helps the cut dry faster. I dip the cut end in the cinnamon after pruning. It has worked wonders for me.
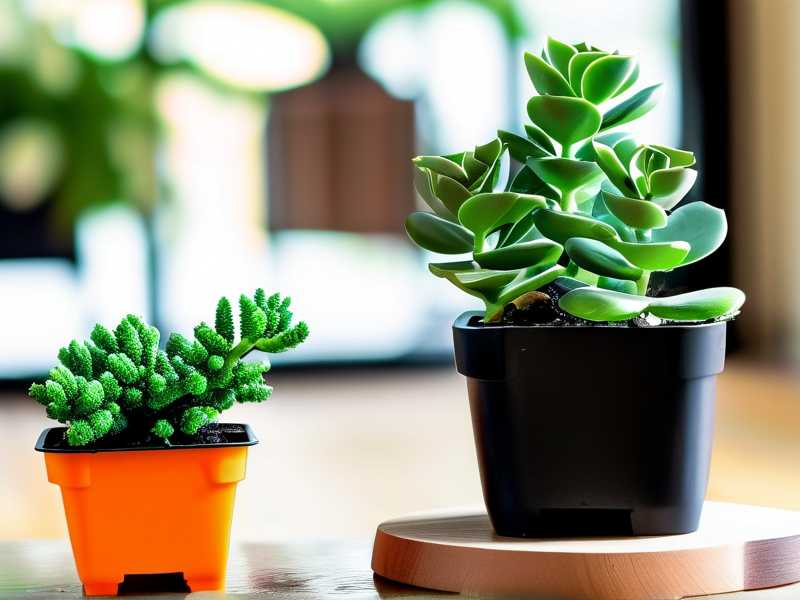
Third, I make the cuts. I follow the three cut types we just discussed. I look at each brown leaf individually. Some get the full removal, some just get the tip trim, and some branches get the full removal.
Fourth, I do not water for seven days. This is the most important part. The wounds need to callus. If I water before that, the cuts get infected. I learned this the hard way with my third plant. I pruned and watered the same day. The next week, the stem turned black at the cut site.
Fifth, I move the pot to a slightly shadier spot for a few days. This reduces stress on the plant while it recovers from the cuts. After three days, I move it back to its normal bright spot.
What I Observed Over Two Weeks of Recovery
I want to tell you exactly what happened after I pruned my Jade plant recently. This was about a month ago. The plant had six brown-tipped leaves and one branch that was struggling.
On day one, I made all the cuts. I removed four full leaves, trimmed the tips of two others, and cut back one entire branch. The plant looked bare, and I felt a bit sad about it. I dusted the cuts with cinnamon and set the pot in a shaded spot.
By day three, the cut ends had dried and formed a white callus. This is a good sign. It means the wound is sealed. The remaining leaves looked firm and did not show any new browning.
On day five, I noticed that the largest cut site looked slightly sunken. I was worried. I touched it and it was dry, not mushy. That is normal healing tissue. I left it alone.
By day seven, I watered the plant thoroughly. I made sure the water drained out the bottom. I then did not water again for another two weeks.
On day ten, I saw tiny green bumps at the nodes below the branch cut. Those are new buds. I was thrilled. It meant the plant was not just surviving, it was going to branch out.
At day fourteen, the new buds had grown into small, visible leaves. The plant looked fuller than before I pruned it. The old brown tips were gone completely. The stress of pruning was over, and the plant was thriving.
Case Study: The Overwatered Jade That I Saved
I want to give you a concrete example of a problem I fixed. I had a friend give me her jade plant. It was in a ceramic pot with no drainage and the soil was dark, heavy, and wet. Every leaf tip was brown.
I took it home and immediately pulled it out of the pot. The roots were brown and mushy. Root rot was active. I had to do more than prune the leaves. I had to fix the roots.
I removed all the wet soil with a chopstick. This is a trick I use to gently separate the roots without breaking them. Then I used my sterilized scissors to cut away all the mushy brown roots. I kept only the firm white and yellow roots.
Then I repotted it in a gritty mix. I use one part coarse sand, one part perlite, and two parts commercial cactus soil. This mix drains fast. I did not water it for ten days. I did not prune the leaves yet either. I waited for the roots to settle.
Once the plant was stable, I pruned the brown tips. I followed the same three cuts. It took about three weeks for the plant to look completely normal. The new growth that came in after that was clean and green.
The Danger of Packing Soil Around the Stem
There is another mistake I see all the time. It is a pruning mistake, but it happens right after you repot. When you put the plant back in the pot, do not bury the stem too deep. If the stem is under the soil line, it stays damp and will rot. I always keep the soil level at the same height where the plant was originally.
I have also learned that the leaves that touch the soil can cause problems. If a leaf sits on the damp soil, it will turn brown and mushy. I remove any lower leaves that rest on the soil surface before I repot. It increases airflow and prevents rot.
How to Water After Pruning (The Specific Schedule I Use)
Do not water your jade right after you prune. I already said this, but I will say it again because it is that important. I wait a full week. When I do water, I do not just splash the top. I take the entire pot to the sink. I run water through it until it flows out the drainage hole. I let it drain completely. Then I put it back.
Many people water a little bit every day. That is the worst thing you can do for a jade. Little daily waterings keep the soil damp on top but never penetrate deep. That encourages shallow roots and surface rot. I water deeply, but rarely.
I check the leaves for firmness. If the leaves feel slightly soft and deflated, I know it is time to water. If they feel hard and firm, I wait. This is a better indicator than any schedule.
The Role of Humidity and Airflow
Jade plants actually like dry air. Too much humidity causes fungal issues. I do not mist my jade. I stopped doing that years ago. Misting creates stagnant water on the leaves. That leads to brown spots and rot.
I do make sure the room has some airflow. I have a small fan in my plant room that runs for a few hours a day. It keeps the air moving and prevents fungal spores from settling on the open cuts after pruning.
If you live in a very damp climate, keep your jade in a room with a dehumidifier or at least near an open window. The air movement is crucial for the callusing process.
Expert Support for My Methods
I want to back up my experience with some expert knowledge. The RHS advises that succulent plants should be kept in gritty, free-draining compost and that overwatering is the main cause of plant failure. They suggest checking the root system before assuming a pest problem is the cause. That fits with what I have seen.
The AHS also notes that proper pruning techniques for woody succulents are critical. They recommend making clean cuts and allowing the wound to dry. They emphasize the importance of sterilizing tools to prevent disease. I have found this to be true, especially for jade plants.
Their guidance aligns with my daily practice. The fact that my plants recover quickly after these cuts proves it to me. I do not just read about this. I live it.
The Truth About Fertilizer and Brown Tips
Let me share one more thing that surprised me. I used to fertilize my jade every month. I thought it would make it grow big and lush. Instead, I noticed the tips of the leaves started browning. How to prune jade plant to remove brown tips became a monthly routine for me, and I was frustrated.
It turns out that too much fertilizer causes a salt buildup in the soil. That salt burns the roots. The root damage shows up as browning leaves. I now fertilize only twice a year, once in early spring and once in mid-summer. I use a diluted liquid succulent food at half strength. That is it.
If you have been giving your jade plant fertilizer and you see brown tips, stop fertilizing immediately. Flush the soil with water to wash out the excess salts. Let the plant rest for a few months before resuming any feeding.
Tools You Need for Clean Cuts
I want you to have the right tools. Do not use kitchen scissors that are dull or dirty. I made that mistake once. The cut was ragged and the stem took forever to heal.
I use a pair of bonsai scissors. They are small, sharp, and give me precise control. If you do not have those, a sharp pair of craft scissors works. The key is that they must be sharp. A clean cut heals fast. A crushed cut invites insects.
I also keep rubbing alcohol nearby. I dip the blades before I start, and I dip them again between each branch if I am cutting a lot. This prevents me from transferring rot from one branch to a healthy one. It takes ten seconds, and it saves so much trouble.
Common Question: Can I Prune in Winter?
A lot of people ask me if they can prune their jade in the winter. My answer is yes, but we have to be careful. Jade plants are dormant in winter. They do not grow much. The cuts will heal slower. However, if the tips are browning, you should still cut them off.
I have pruned jade in December before. It healed, it just took longer. I waited three weeks before watering after a winter prune. The plant stayed dormant and clean. It pushed out new growth only when spring arrived.
During the winter, I also reduce watering globally. I might water once a month. The plant does not need more. The lack of water keeps the tissues firm and prevents the browning from starting in the first place.
When to Remove the Entire Plant
There are times when pruning is not enough. I had a jade that was so rotten that the stem was black at the base and the plant was falling over. No amount of leaf cutting would save it. I had to take a healthy leaf, let it callus, and propagate a new plant.
Do not be afraid to do this. I have propagated jade plants from single leaves many times. I pull a healthy leaf off, twist it gently from the stem. I let it sit on a dry paper towel for three days until the end dries. Then I lay it on top of some soil. It roots in about three weeks. It is a great way to save a plant that is too damaged to prune.
If the stem is black and soft, the rot has reached the main trunk. I have never seen a jade come back from that. Instead of fighting it, I start new leaves. It is not a waste of effort. It is the smart move.
Reasons Your Cuts Might Not Have Worked
I want to cover why someone might prune and still see browning. This happened to me once. I pruned all the brown tips, but new browning appeared a week later. I was confused.
The reason is that I had not fixed the root problem. I was still overwatering. I had pruned the leaves, but the roots were still sitting in wet soil. The roots just produced new damage.
You must fix the environment before the cuts stick. The pruning is cosmetic. The root health is the root cause. Check your pot. Check your soil. Check your watering habit. If all those are right, then prune. If they are wrong, fix them first.
Personal Experience Summary
I remember going through six months of frustration with jade plants. I have killed two of them outright. I have saved three others with pruning and careful care. The knowledge I have now comes from those failures.
One of my jades now is over three feet tall. It has thick, woody stems and leaves that are deep green with no browning. I get compliments on it all the time. The secret is not magic. It is understanding that the plant wants to be left alone most of the time.
Pruning is important, but neglect can be good. I stopped hovering over my jade. I stopped fiddling with the soil. I set it up correctly and let it do its thing. That has been the best strategy for keeping the tips clean.
Frequently Asked Questions
1. Will brown tips spread to the whole leaf if I do not cut them?
Yes, they usually will. I have watched it happen. The dead tissue can stay localized for a while, but it often invites fungus. If you leave it, the leaf will eventually fully brown and drop off. Cutting it early stops the spread and keeps the plant looking better.
2. Is it safe to use regular scissors for pruning jade plants?
It is safe if the scissors are sharp and clean. I prefer small pruning shears, but regular craft scissors work. The biggest risk is using a dull blade that crushes the stem. A crushed wound heals slowly. Just make sure you sterilize them with alcohol first.
3. Can I root the stem cuttings I remove?
Absolutely. I do this all the time. If I cut back a branch, I let the cut end dry for a few days. Then I plant it in a small pot with gritty soil. I water it lightly after a week. Most of my cuttings take root within a month. It is a great way to get more plants for free. I do not even use rooting hormone. Jade plants are easy.
One Final Thought
If you have a jade plant with brown tips, do not panic. Grab your shears, sterilize them, and make those three cuts. Remove the whole leaf, trim the light tips, and cut back dead branches. Fix your watering schedule so the roots stay healthy. Give the plant a week to heal before you water it. Place it in bright, indirect light.
I have been through this cycle so many times. Each time, the plant bounces back. It will grow new branches and fresh leaves. The brown tips will be history. Just remember that pruning is a heal, not a cure. The main thing is your care routine. Get that right, and your jade will be a beautiful, blemish-free houseplant for years.





