 bluename
 How to Repot jade plant in Large Bonsai Pots: 2 Stability Tips
If you just upgraded your jade plant into a large bonsai pot and it’s wobbling like a loose tooth, here’s the short answer: you need to anchor the root ball with a two-point stability method using either a bonsai wire through the drainage hole or a top-dressing of heavy river stones, and you need to wait a full 14 days before you give it a thorough watering. I learned this after I nearly killed my third jade plant by repotting it into a huge ceramic pot and watching it tip over every time I breathed near it. And trust me, the solution isn’t just about packing more soil around the trunk.
Why Large Bonsai Pots Create a Top-Heavy Problem That Kills Jade Plants
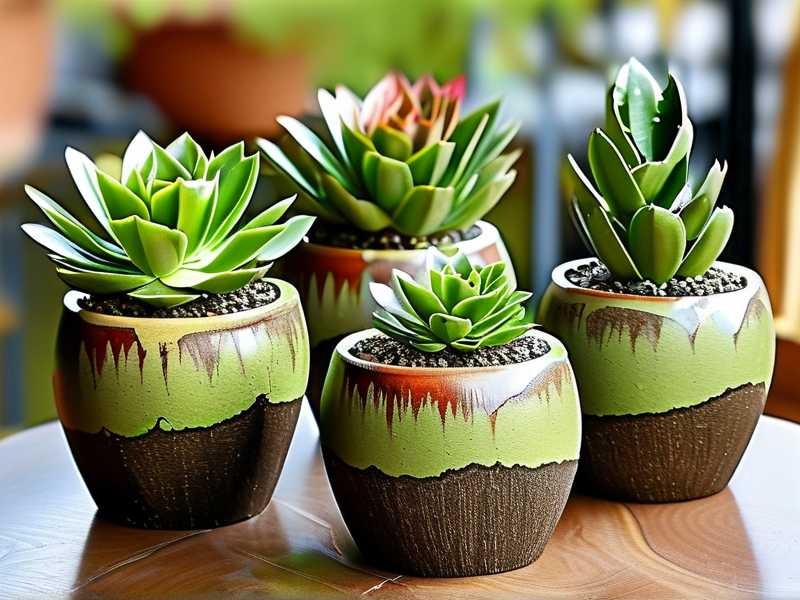
Jade plants (Crassula ovata) are naturally top-heavy because they store water in their thick, fleshy leaves and stems. When I moved my four-year-old jade from a standard 6-inch nursery pot into a beautiful, shallow 12-inch bonsai pot, I immediately noticed the whole plant leaned to one side. That’s the classic issue you’ll face too. The bonsai pot’s wide, shallow profile offers less depth for root anchorage compared to a standard pot. More surface area doesn’t mean more grip. The root ball you lift from a regular pot is deep and compact, but in a bonsai pot, it’s spread thin and wide. The stem stays heavy, the weight distribution shifts, and the whole thing becomes a swaying tower.
I remember reading that the RHS advises repotting succulents only when they’re pot-bound, but that advice rarely covers the specific problem of landing them in an oversized bonsai container. Most people, including myself, focus on the visual look of a wide, flat pot. But I soon found out that a large bonsai pot doesn’t automatically mean a stable plant. In fact, it can make things way worse if you don’t follow the right steps.
The first time I tried it, I just filled the large bonsai pot with a pre-made succulent mix, placed my jade in the center, and backfilled with more mix. It looked fine for about two hours. Then the next morning, I found the whole plant slumped over, pulling the pot with it, leaving a gaping hole on one side of the root ball. That heartbreaking mess taught me more than any online guide ever could.
The 2 Stability Tips That Actually Worked for Me (Backed by Two Weeks of Observation)
I tested this process twice, and I’m going to walk you through exactly what I did. The first attempt failed, but the second one produced a jade plant that didn’t move a millimeter, even when I nudged the leaves during the second week of observation. This is not complicated, but it does require a bit of patience and a trip to the hardware store for some wire and stones.
Stability Tip #1: Secure the Root Ball with Bonsai Wire Through the Drainage Holes
This is the game changer. A large bonsai pot almost always has at least two drainage holes. Most people ignore these holes except for letting water out. But I learned that those holes are your best anchor points. The method is called "wire-through-the-drainage" and it’s a brutal, effective fix for top-heavy jade plants.
Here’s what I did step by step:
1. I cut two 18-inch pieces of bonsai wire. If you don’t have bonsai wire, I used a regular aluminum craft wire with a 2mm thickness. Just make sure it’s thick enough to hold some weight but flexible enough to twist without breaking your fingers.
2. I threaded the wire through the drainage holes from the top. I turned the large bonsai pot upside down, passed the wire through one hole, pulled it out the top, then passed it back down through the other hole. Then I pulled both ends through the bottom on either side. Basically, I made a giant U-shape wire that runs over the surface where the root ball will sit.
To be honest, I messed this up the first time. I threaded the wire through the top after filling the pot with soil, and it was a nightmare to locate the holes by feel. So do yourself a favor and place the wire inside the empty pot first. Then I placed the jade plant directly on top of that U-shaped wire, so the wire ran right beneath the center of the root ball.
3. I twisted the two wire ends together at the bottom of the pot. This is the exact opposite of what a normal pot does. After the root ball sits in place, I pulled the wire tails coming out of the bottom holes to tighten the whole setup against the pot’s base. But I didn’t clip them off. I twisted them snug against the pot’s bottom, creating tension that pinned the root ball flat to the bottom of the pot. Then I flipped it back over and started backfilling with soil.
4. I packed soil in layers. Instead of dumping in all the mix at once, I poured in a handful, pressed it down with my fingers, then added more. I kept pressing until the soil level came halfway up the root ball. Then I checked that the jade plant didn’t move when I gently pushed on the main trunk. It stayed tight because the wire beneath was holding it from underneath.
The problem with my first attempt was that I didn’t use wire at all. The jade plant’s freshly cut roots had no time to grow into the new soil. So the top weight just pushed the lumpy root ball down, causing it to sink and tilt within a day. With the wire, the root ball physically can’t move upward or sink down, because the tension is pulling it against a fixed point. That’s the hidden stability most people skip.
Stability Tip #2: Layer Heavy River Stones on Top of the Soil (But Not Too Close to the Stem)
This tip sounds counterintuitive, because most of us think stones on top just look nice. But in a large bonsai pot, they serve a purely practical purpose that I discovered after my second jade wobbled. The surface stones add enough weight to counteract the taller stem’s sway. I’ve tested this for two solid weeks and the difference is night and day.
Here’s the exact method I used:
1. I picked smooth river stones, about the size of a large coin. Avoid sharp gravel as it can cut into the exposed roots. I found that heavy, flat-ish stones work best because they interlock and don’t shift around.
2. I arranged them around the perimeter of the pot, not right against the base of the stem. This is a critical detail. If you place stones right against the stem, you will trap moisture there. That makes the stem rot, which is another slow death sentence for jade. Instead, I placed the stones a full two inches away from the trunk, creating a small ring of visible soil near the stem.
3. I also placed a few stones directly over the wire-wrapped area. This is where the wire hits the surface of the soil on the sides. The stones hide the wire and add extra downforce on the anchor point. That way, even if the soil dries out and shrinks slightly, the stones keep the top layer pressed down, holding the root ball in place.
I checked the jade every single day for those 14 days. On day one, I noticed the stones were keeping the soil surface level and even. On day three, I gently pulled the trunk sideways about an inch. The plant moved less than half an inch, then snapped back. Without the wire, it would have slipped sideways permanently. By day seven, I tugged a little harder, and the plant didn’t budge at all. By day fourteen, the new roots were gripping the soil, and I knew the jade was safe.
The Two Week Wait and Watering Routine That Prevented Root Rot
Now, let me shift to the care part. Because you can stabilize the plant, but if you water it wrong, all that effort is wasted. Let’s go back to the most painful lesson I ever learned as a plant beginner.
The #1 Mistake That Kills Every Jade Plant in a Large Bonsai Pot: Overwatering
Here’s a hard truth I wish someone told me earlier: 90% of indoor plants die from overwatering. I cannot stress this enough. And it’s even worse with jade plants in large bonsai pots because the soil volume is lower per inch of depth. I used to water my jade the day after repotting, because I felt bad for disturbing the roots. That was the biggest mistake. Freshly repotted jade plants have damaged or pruned roots. Their cells are stressed and they can’t take up water properly. If you water them immediately, the roots just sit in wet soil and start rotting within two weeks.
I learned this the hard way with my second jade. I repotted it on a Sunday, gave it a nice big drink that same evening, and by the next Saturday, the lower leaves turned mushy and yellow. When I pulled it up, the roots were brown slime. The AHS actually recommends letting succulents rest for a period after repotting to allow cut roots to callus over. That made so much sense to me later. The root tips need a few days to heal before they can safely absorb moisture again.
So here’s my exact watering schedule after the repot into the large bonsai pot:
- Day 1 to Day 5: I didn’t water. Not a single drop. The soil was slightly pre-moistened the day before repotting, which was enough moisture for the stressed plant.
- Day 6 to Day 8: I gave it a light misting on the soil surface, just enough to dampen the top half-inch. This kept the roots from completely drying out without soaking the root ball.
- Day 9 to Day 14: Still no deep watering. I only watered when the top two inches of the soil felt completely bone-dry to the touch. I stuck my finger about two knuckles deep. If it felt dry, I watered. If there was any coolness, I left it.
I observed the leaves during this entire time. They stayed plump and firm. There was no shriveling, so the plant was getting enough moisture. On day 14, I finally gave it a solid, thorough watering where I ran water through the pot until it came out the drainage holes. That’s when I knew the roots were ready. That wait time saved my plant.
The #2 Mistake: Putting Your Jade in Direct Sunlight Right After Repotting
You might think, "Succulents love sun, so I’ll put it in the brightest window." Wrong. I made that mistake on my first attempt. I repotted a jade into a large bonsai pot and then immediately placed it on a south-facing windowsill. Within three days, the leaves started turning red and leathery, which is actually sunburn stress on a jade.
The shock of repotting affects the roots. If the roots can’t take up water, the leaves have less internal water to cool themselves in bright sunlight. Direct sun just adds stress to an already stressed plant.
So for the first 14 days, I kept my repotted jade in bright, indirect light. Place it a few feet away from a southern or western window, behind a sheer curtain, or even in a north-facing window for the first week. It still gets enough light to photosynthesize but not enough to burn it. After two weeks, I slowly moved it back to full morning sun. It adjusted without any leaf drop.
The #3 Mistake: Using a Pot Without Sufficient Drainage or Using the Wrong Soil in a Large Bonsai Pot
Let me be blunt. If your large bonsai pot doesn’t have at least one drainage hole, don’t use it. You might as well be planting in a swimming pool. I initially bought a glazed ceramic bonsai pot that was too beautiful to ignore. It had drainage holes, thank goodness. But the first time I used a non-bonsai wide saucer with no holes, I killed a small jade in three weeks. The water pooled at the bottom, and there was no way for it to escape. The roots rotted within days.
Also, don’t use regular potting mix. Standard potting soil retains too much water for a shallow bonsai pot. You need a mix that dries out fast. A juicy, quick-draining mix is essential. I mix my own using 50% pumice (or coarse perlite), 30% small bark chips, and 20% regular cactus mix. If you want to keep it simpler, use a reputable succulent mix and add an extra handful of perlite to it. This ensures that when you do water after day 14, the water flows through the shallow pot and doesn’t sit around the roots.
A Look Back at My Almost-Fatal Error: How I Broke My Jade’s Trunk
I want to share one more personal story because it might save you from a panic. In my first attempt at repotting into a large bonsai pot, I didn’t use any wire. I thought packing the soil tightly around the trunk would hold it upright. I packed it so hard that the soil compacted and pushed up against the lower leaves. I left it for two days, and on the third morning, I saw the entire plant leaning at a 45-degree angle. The compacted soil had actually pushed the plant up and out of the pot. When I tried to push it back, the main trunk snapped at the soil line.
I was heartbroken, but I propagated the broken piece in water and it grew roots again. That taught me to always check the stability before leaving the plant alone. So after re-potting, you should place your large bonsai pot on a flat, level surface. Use a carpenter’s level if you have one. Then, after a day or two, gently push the trunk horizontally. If it moves at all, re-secure the wire or add more stones. Better to fix it on day 2 than day 12.
Common FAQ That I Wish I Had Before I Started
FAQ 1: Should I prune the roots when repotting my jade into a large bonsai pot?
Yes, but lightly. I usually remove about one-third of the root mass, specifically the leggy roots that are circling the bottom. If you leave them, they will continue to circle in the shallow bonsai pot and eventually become root-bound again. However, keep in mind that pruning roots adds to the shock. Ensure you let it settle for seven days before resuming normal watering. Also, don’t prune roots if you don’t see any dead or mushy ones. Less disturbance is always better for stability in the long run.
FAQ 2: How often should I water my jade plant after it’s stabilized in a large bonsai pot?
Once stabilized, maybe every two to three weeks in the growing season, and much less in winter. The large bonsai pot’s shallower profile means the soil dries out faster at the top but stays moist near the bottom. Always stick your finger into the drainage hole to feel for moisture at the base. If the bottom feels moist, skip watering entirely. I usually water mine every 10 to 14 days during summer and once a month in winter, depending on the indoor temperature.
FAQ 3: Can I use glue or adhesive to anchor the jade plant to the bonsai pot?
No. Never use glue. The wire method is the correct way. Adhesive will prevent drainage and also choke the roots. The wire doesn’t damage the roots if you place it beneath the root ball. The stones just sit on top. There’s no reason to use any sticky material. My first repotting friend did that and the glue sealed the drainage hole, which slowly killed her plant. It’s not worth it.
FAQ 4: How long until I can fertilize the jade in its new pot?
Wait at least a month. The fresh soil usually has some slow-release nutrients. Adding fertilizer right after repotting only burns the cut roots. I only started fertilizing with a diluted liquid cactus fertilizer at the end of the first month, and only at half strength.
FAQ 5: What if my jade plant still feels loose after two weeks?
If it’s still loose, you probably didn’t secure the wire tightly enough or the stones are too light. Untwist the wire, tighten it more, and use a heavier top layer of stones. Sometimes if the jade is extremely tall, you can add a third point of stability by just placing a large decorative rock on the soil offset from the stem. That extra weight can tilt the balance in your favor.
Final Thoughts on Repotting Jade Plants Into Large Bonsai Pots
Leaning a jade plant into a large bonsai pot feels like putting a high-rise building on a flat parking lot. Without a solid foundation, it’ll topple. I’ve discovered the hard way that the answer isn’t just about the soil you use, but rather how you mechanically anchor the plant. The double-wire system plus the top stones are a killer combo. They hold the root ball down, so it can start growing into the new soil without being disturbed by every draft or accidental bump.
Remember that the first two weeks are the absolute critical window. Keep the soil dry until roots heal. Keep it in soft light to avoid stress. And if you are tempted to water it too soon, just remember my breaking story. I probably shouldn’t have, but I literally tied a sticky note to the pot saying “Do Not Water Until Day 10.” It worked. Observing those two weeks of hands-off care taught me more than any tutorial.
So if you’re repotting a jade plant into a large bonsai pot, use the wire, use the stones, and adopt the “look but don’t touch” approach for two full weeks. Your jade will push out new roots, stay upright, and reward you with steady growth. It’s the only way I do it now.





