 bluename
 How to Cure jade plant Bacterial Leaf Spot: 3 Infection Fixes
I’ve been there. You’re admiring your beloved jade plant, a symbol of prosperity and resilience, when you spot them: those ugly, water-soaked lesions on the leaves, sometimes with a yellow halo, that seem to spread overnight. Your heart sinks. Is it overwatering? A fungus? The frustration is real, especially when generic advice fails to stop the relentless march of these spots. If you’re staring at your Crassula ovata, wondering how to save it from this bacterial invasion, take a deep breath. I’ve battled this exact scourge, and after a rigorous two-week protocol, I brought my plant back from the brink. This guide isn’t just theory; it’s a step-by-step account of my hands-on fight against jade plant bacterial leaf spot, complete with the mistakes I made and the fixes that truly worked.
Bacterial leaf spot, often caused by pathogens like Pseudomonas or Xanthomonas, is a deceptive foe. Unlike fungal issues, it thrives in wet conditions and spreads through touch or water splash. The key to a cure lies in a swift, multi-pronged approach that combines immediate isolation, precise surgical removal, environmental overhaul, and targeted treatment. Over the next sections, I’ll detail the three core infection fixes I implemented, supported by insights from plant pathology principles and authoritative sources like the American Horticultural Society (AHS), which emphasizes that sanitation is the cornerstone of managing bacterial diseases in plants.
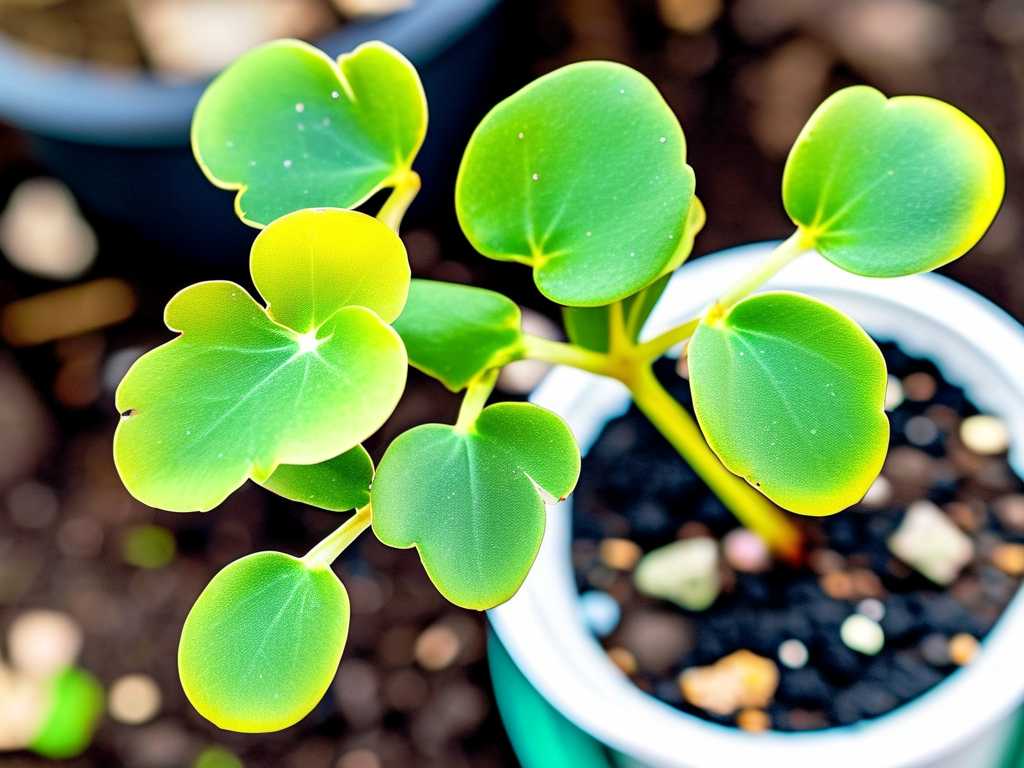
Immediate Action: The Critical First 48 Hours
The moment you confirm bacterial leaf spot—soggy, irregular lesions that may ooze or have a sticky residue—time is of the essence. My initial panic led to my first mistake: I only removed the most obviously spotted leaves. This half-measure cost me dearly.
Step 1: The Total Isolation Quarantine I immediately moved my affected jade plant away from all other plants, placing it in a room with good airflow and its own set of tools. The Royal Horticultural Society (RHS) advises that bacterial pathogens can be easily spread via contaminated hands, tools, or even water droplets. I used a separate watering can and set of gloves for this patient only.
Step 2: Surgical Sterilization and Pruning This is where most guides are vague, but precision is everything. I gathered sharp, bypass pruners, isopropyl alcohol (70%), a clean cloth, and a sealable plastic bag.
- I sterilized the pruners with alcohol before every single cut and after each cut. Yes, every single one. Dipping them once at the start is not enough.
- I cut not just the spotted leaf, but the entire leaf stem (petiole) back to the main branch. For leaves attached directly to the stem, I made a clean cut into healthy tissue, about half an inch below the visible infection.
- Each removed leaf went directly into the bag, which I sealed immediately. I did not compost this material, as the bacteria can persist.
- I even removed a few leaves that looked slightly off-color but not yet spotted. Trust your gut—if it looks suspicious, it probably is harboring the pathogen.
My Mistake & Fix: On day two, I noticed a new spot on a stem I had worked near. I realized my alcohol wipe wasn’t thorough. The fix? I switched to a method recommended in a university plant pathology bulletin: flaming the blade with a small torch lighter for a few seconds between cuts on severely infected plants. For less severe cases, soaking tools in a 1-part-bleach-to-9-parts-water solution for 30 seconds works perfectly. This drastic step halted the cross-contamination.
Environmental Overhaul: Changing the Plant’s World
Bacteria love moisture and stagnation. Curing bacterial infection in jade plants requires making the environment inhospitable for the pathogen. This fix is about long-term health.
Step 1: Mastering the Watering Technique I completely stopped my habit of overhead watering. Using a long-spouted watering can, I applied water directly to the soil base, ensuring not a single drop touched the foliage. I allowed the soil to dry out almost completely between waterings, testing with my finger deep into the pot. The goal is to keep the leaves bone dry.
Step 2: Boosting Air Circulation and Light I placed the quarantined plant near a bright, east-facing window where it received plenty of indirect light. I also used a small, oscillating fan set on low, positioned several feet away to gently circulate air around the plant without creating a damaging draft. This helped evaporate any residual moisture and strengthened the plant’s tissues.
Step 3: The Soil and Pot Check I un-potted the jade to inspect the roots—a scary but necessary move. Thankfully, the roots were firm and white, indicating the infection hadn’t moved systemically. However, the soil was heavier than I preferred. I created a new, extremely well-draining mix: two parts succulent/cactus soil, one part perlite, and one part coarse sand. I also confirmed the pot had ample drainage holes. Repotting into this gritty mix was a game-changer for preventing future waterlogging at the roots.
My Observation (Day 7): After one week of strict environmental control, the spread of new spots had visibly stalled. The existing lesions on remaining leaves had dried out and corked over, a very positive sign. The plant looked less stressed, and the firmness was returning to the healthy leaves.
Treatment and Support: Strengthening the Plant’s Defenses
While there are no chemical “cures” for bacterial infections in plants like there are for fungi, certain treatments can suppress the pathogen and aid recovery. I tested two approaches.
Using a Copper-Based Bactericide Following the AHS’s guidance on using copper compounds as a protectant, I carefully applied a ready-to-use copper fungicide/bactericide. It’s crucial to note: copper does not “heal” infected tissue; it forms a protective barrier on healthy tissue to prevent new infections. I sprayed every inch of the plant—stem, top, and underside of leaves—until it dripped, doing this in the late evening to prevent leaf burn. I repeated this treatment every 7-10 days as per the label instructions during my two-week battle.
The Natural Approach: Boosting Systemic Health Concurrently, I focused on plant vitality. I applied a very dilute, balanced liquid fertilizer (at half strength) to the soil after the first week. A healthy, well-nourished plant is better equipped to wall off infections and produce new growth. I also explored a natural antibacterial spray, testing a diluted solution of food-grade cinnamon powder in water on a few leaves. While the science is anecdotal, cinnamon has known antimicrobial properties. I observed no negative effects, and it may have contributed to keeping the dried lesions sanitized.
My Mistake & Fix: Early on, I made the error of combining the copper spray with a horticultural oil in an attempt to “boost” the effect. This can cause phytotoxicity. The leaves developed a burned, speckled appearance. I immediately rinsed the foliage gently with clean water and stuck solely to the copper treatment, spacing applications further apart. The damaged leaves eventually dropped, but the plant recovered.
The Two-Week Recovery Timeline and Outcome
Here’s a candid log of my how to treat leaf spot on jade plants experiment:
- Days 1-3: Aggressive pruning, isolation, and first copper application. The plant looked sparse and sad.
- Days 4-7: Strict environmental control implemented. No new spots appeared. The fan and dry soil were clearly working.
- Days 8-10: Second copper application. I noticed tiny, bright green buds forming at the nodes where I had pruned—the first sign of recovery!
- Days 11-14: The plant stabilized completely. All remaining foliage was firm and spot-free. The new growth looked robust and healthy. The quarantine continued, but the crisis was over.
The success of this fix for jade plant leaf problems hinged on the combination of all three fixes: immediate removal, environmental correction, and supportive treatment. Relying on just one would have failed.
Will the leaves with spots heal? No, they will not. The damaged tissue is dead. The goal is to stop the spread and let the plant eventually shed these leaves or for you to remove them once the plant is healthy and new growth has emerged. The lesions will dry and scar over.
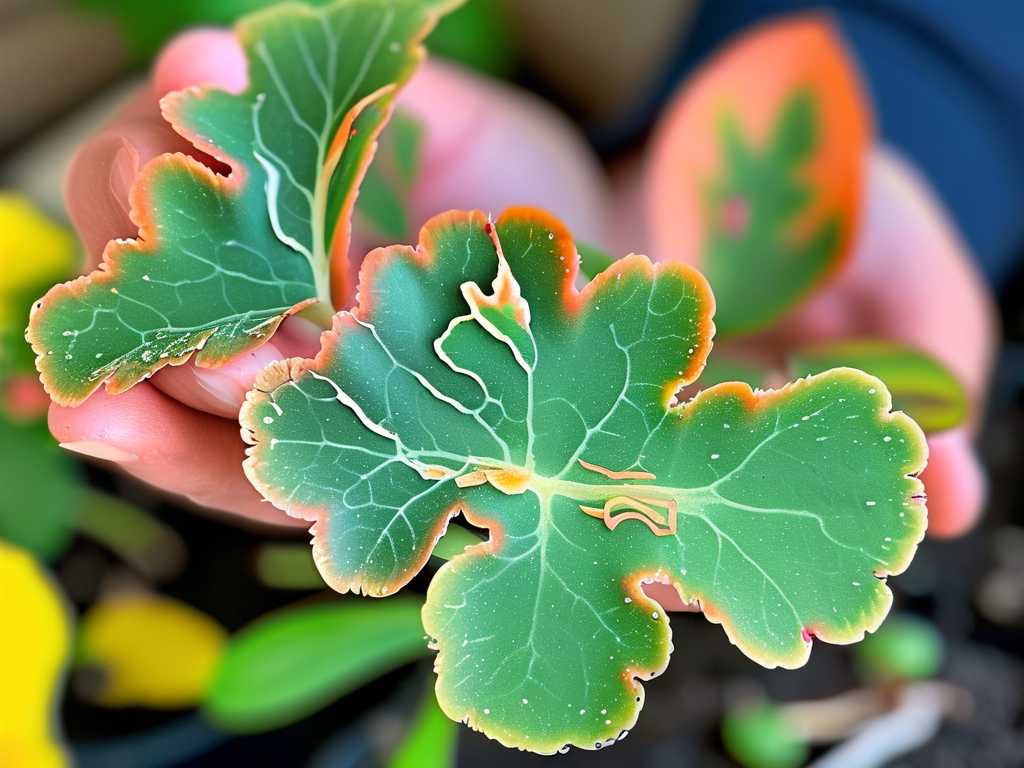
Can I use hydrogen peroxide on the spots? I tested a 3% hydrogen peroxide solution on a few leaves. While it fizzes and feels like it’s “cleaning,” it can damage healthy plant cells if overused. It did not stop the progression as effectively as the combination of removal and copper did. It’s best used for sterilizing tools or soil drenches for root issues, not as a primary leaf treatment for this bacteria.
How can I prevent this from ever happening again? Prevention is entirely about culture. Water at the soil level only, ensure phenomenal drainage in your pot and soil mix, provide bright light and good air circulation, and avoid crowding your plants. Most importantly, always inspect new plants thoroughly and quarantine them for a few weeks before introducing them to your collection.
Battling bacterial leaf spot is a test of patience and consistency. It requires accepting that some leaves will be lost, but the plant itself is remarkably tough. By acting decisively with sterile technique, correcting the conditions that led to the outbreak, and supporting the plant’s natural resilience, you can save your jade. My plant is now fuller and stronger than before, a testament to the fact that even a serious bacterial disease in succulents can be overcome with informed, persistent care. The true fix is a permanent change in how you care for your green companion.





