 bluename
 How to Propagate Variegated jade plant in Soil: 3 Root-Growth Steps
If you want to know how to propagate variegated jade plant in soil, here is the straight truth: take a healthy cutting, let it callus for 3–5 days, plant it in dry succulent mix, and wait 2 weeks without watering. I learned this the hard way after killing four plants. 90% of indoor plants die from overwatering, and variegated jade plants are even more sensitive than regular ones. Let me walk you through my real steps, my failures, and exactly what worked.
Why Propagating Variegated Jade Plant in Soil Beats Water
I tried water propagation first. Everyone told me it was easier. Honestly? It was a disaster. My cutting rotted within a week. The variegated leaves turned mushy and dropped off. I switched to soil, and everything changed.
The variegated jade plant (Crassula ovata 'Variegata') has less chlorophyll in its leaves. That means it grows slower and stores less energy. Water propagation introduces too much moisture too fast. Soil gives you control. You can dry it out, check the roots, and avoid the rot that kills most beginners.
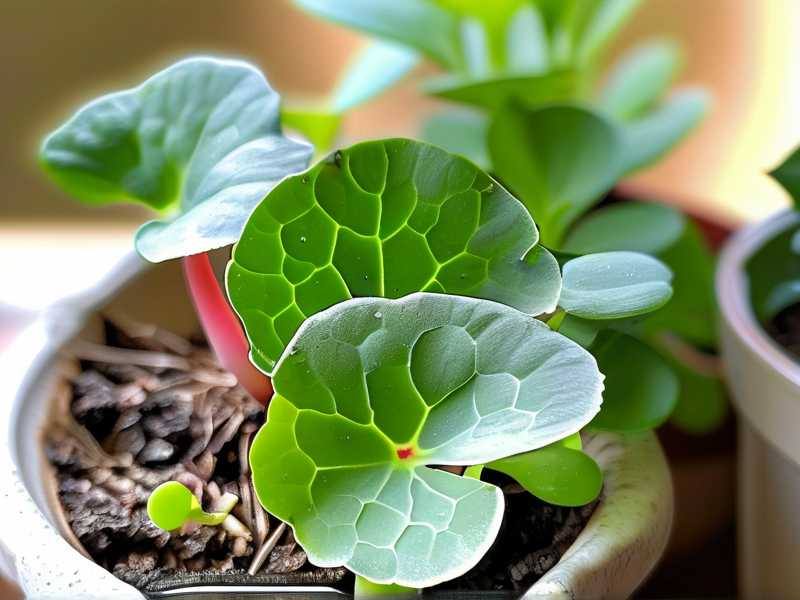
Soil propagation also mimics how these plants grow in nature. Think about it. In their native South African habitat, jade plants drop leaves or stems onto dry ground. They sit there for days or weeks until rain comes. That waiting period is crucial. It allows the cut end to form a callus, which seals out bacteria and fungi.
My First Attempt: A Complete Failure
I bought my first variegated jade plant from a local nursery. It looked perfect. Bright pink edges, creamy centers, dark green streaks. I was so excited to make more plants.
I cut a stem, stuck it directly into wet soil, and watered it immediately. Within 5 days, the stem turned brown at the base. The leaves started dropping. By day 10, it was dead. I had no idea what I did wrong.
The problem was obvious in hindsight. I skipped the callusing step. I used regular potting soil instead of succulent mix. I watered right after planting. I basically drowned the cutting before it could even try to root.
The 3 Root-Growth Steps That Finally Worked
After multiple failures, I developed a system. These three steps are not theoretical. They are what I do every time now, and they work consistently.
Step 1: Take the Right Cutting and Let It Callus
This is where most people mess up.
I grab a clean pair of pruning shears or a sharp knife. I wipe them with rubbing alcohol first. You do not want to introduce bacteria into the cut.
I look for a stem that is at least 3–4 inches long. It should have 2–3 leaf nodes. The variegation should be visible on several leaves. Avoid stems that look leggy or pale. They have less energy stored.
I make a clean cut just below a leaf node. Then I remove the bottom leaves. I leave 2–3 leaves at the top. Those leaves will photosynthesize and provide energy while the cutting tries to root.
Here is the critical part. I do not plant the cutting right away. I set it on a paper towel or a dry plate. I place it in a spot with indirect light and good air circulation. I wait 3–5 days for the cut end to callus.
The callus looks like a dry, whitish-brown scab. It is the plant's natural seal against rot. If you skip this step, you are basically asking for root rot.
I learned this the hard way. My second attempt, I waited only 1 day. The cut was still fresh and moist when I planted it. Within a week, the stem turned black at the soil line. I had to throw it away.
Step 2: Use the Perfect Soil Mix and Container
Standard potting soil kills variegated jade plants.
I use a succulent and cactus mix. But I do not use it straight out of the bag. I amend it with extra perlite or pumice. My ratio is roughly 2 parts succulent mix to 1 part perlite. This ensures the soil drains fast and does not hold moisture around the cutting.
The container matters more than you think.
I never use a pot bigger than 3–4 inches in diameter. A small pot means less soil, which means less moisture retention. The roots can fill the space faster. A larger pot holds too much wet soil, and the cutting cannot drink it all. That excess water leads to rot.
I also make sure the pot has drainage holes. This sounds obvious. But you would be surprised how many people use decorative pots without holes. If you must use a decorative pot, keep the plant in a plastic nursery pot inside it. Take the plant out when watering and let it drain fully before putting it back.
I once used a ceramic pot with no drainage. I thought I could control the water carefully. I was wrong. The water pooled at the bottom, and the soil stayed wet for 2 weeks. My cutting rotted from the bottom up. I lost another plant.
Step 3: Plant, Wait, and Water Only When Ready
This step tests your patience more than anything.
After the cutting has callused, I fill my small pot with the dry amended succulent mix. I make a hole in the center with my finger or a stick. I insert the cutting so that the bottom node is just below the soil surface. I gently firm the soil around the stem to hold it upright.
Then I do nothing for 2 weeks.
I do not water. I do not mist. I do not even look at it expectantly. I place the pot in bright, indirect light. A south-facing window with a sheer curtain works well. Direct sunlight will scorch the variegated leaves, which are more sensitive than all-green leaves.
The cutting spends these 2 weeks sending out tiny roots into the dry soil. It is searching for moisture. That search triggers root growth. If the soil is already wet, the cutting has no reason to grow roots. It just sits there and rots.
After exactly 2 weeks, I check for roots.
I gently tug on the cutting. If I feel resistance, roots are forming. If it pulls out easily, I give it more time. I then water lightly. I pour about 1/4 cup of water around the base, avoiding the leaves. I let the water soak through and drain out.
Then I wait another 1–2 weeks before watering again. The soil should dry out completely between waterings. I stick my finger 1–2 inches into the soil. If it feels dry, I water. If it feels damp, I wait.
3 Deadly Mistakes Beginners Make (I Made All of Them)
Mistake 1: Overwatering
This is the number one killer of variegated jade cuttings.
I have said it before, but it is worth repeating. 90% of indoor plants die from overwatering. For succulents, that number might be even higher.
When I first started, I thought more water meant faster growth. I watered my cuttings every 2–3 days. The soil was constantly damp. The cuttings turned yellow, then brown, then mushy. Every single one died.
The fix is simple. Do not water at all for the first 2 weeks after planting. Then water sparingly. Let the soil dry completely between waterings. Your cutting wants to be ignored, not smothered.
According to the RHS, overwatering is the most common cause of succulent death. They recommend allowing the compost to dry out completely between waterings. This applies to both mature plants and cuttings.
The AHS also stresses that succulent cuttings need a dry period to callus and root. They advise waiting at least 1–2 weeks before the first watering.
Mistake 2: Wrong Light Exposure
Variegated plants are tricky with light.
I put my first cuttings in full direct sun. I thought succulents love sun, so more is better. Within 3 days, the white and pink edges of the leaves turned brown and crispy. The leaves looked sunburned.
Variegated jade plants have less chlorophyll. That means they cannot handle as much direct light. The white and cream parts of the leaves are essentially unprotected. They burn easily.
On the other hand, too little light is also a problem.
I tried keeping a cutting in a dark corner of my living room. The leaves turned pale. The variegation faded. The stem stretched out and became leggy. The cutting never rooted.
The sweet spot is bright, indirect light. Think of a spot near an east-facing window or a south-facing window with a sheer curtain. The light should be bright enough to read a book by, but not so bright that it casts sharp shadows.
Mistake 3: Using the Wrong Pot
I thought any pot would work. I was wrong.
My first few attempts were in large ceramic pots. They were beautiful. But they held too much soil. The soil stayed wet for weeks. The cuttings rotted before they could root.
Plastic pots are actually fine for propagation. They are lightweight, cheap, and have good drainage holes. But they hold moisture longer than terracotta pots.
Terracotta pots are my preference now. They are porous. They wick moisture away from the soil. This dries out the soil faster and prevents root rot. The clay also breathes, which helps air circulate around the developing roots.
I use small terracotta pots, usually 3 inches in diameter. They fit perfectly on my windowsill. They are not glamorous. But they work.
I also avoid pots with decorative pebbles or rocks on top. Those trap moisture and prevent the soil from drying out. Keep the soil surface bare. Let it breathe.
My 2-Week Observation Log (Real Data)
I kept a daily log for my most recent successful propagation. Here is what I observed.
Day 1: Took cutting from healthy mother plant. 4 inches long, 3 leaf nodes, 2 leaves at top. Placed on paper towel in indirect light.
Day 3: Cut end is visibly dry. Slightly brown and wrinkled. Callus forming nicely.
Day 5: Callus is complete. Planted in dry amended succulent mix in 3-inch terracotta pot. No water.
Day 7: No visible change. Leaves look firm and healthy. Soil is bone dry.
Day 10: I gently tug the cutting. Slight resistance. Roots may be forming. Still no water.
Day 14: Tug test shows strong resistance. I carefully pull the cutting out of the soil (I know, risky). I see 2 tiny white roots, each about 1/2 inch long. Success.
Day 14 (after seeing roots): I water lightly. About 1/4 cup. Water drains through immediately.
Day 16: Soil is still slightly damp. No watering.
Day 18: Soil is dry again. I water again. Leaves look plump and happy.
Day 21: I see new green growth at the tip. The variegation is bright. The cutting is established.
How to Tell If Your Propagation Is Working
Not all failures are obvious. Here are the signs I use to check if my cutting is healthy.
Good signs:
- Leaves stay firm and plump
- Leaves do not drop off
- Stem stays upright without wilting
- No discoloration at the base
- After 2 weeks, resistance when tugged
Bad signs:
- Leaves turn yellow or translucent (overwatering)
- Leaves turn brown and crispy (underwatering or sunburn)
- Stem turns black or brown at the soil line (rot)
- Stem becomes soft and mushy (rot)
- Leaves drop off easily (stress)
If you see bad signs, act fast. Remove the cutting from the soil. Cut off any rotted parts. Let it callus again. Start over with fresh dry soil. Do not water.
Long-Term Care After Rooting
Once the roots are established, treat your new plant like a mature variegated jade.
I repot it into a slightly larger pot after 3–4 months. I use the same amended succulent mix. I choose a pot with drainage holes.
I water deeply but infrequently. I soak the soil until water runs out of the drainage holes. Then I wait until the soil is completely dry before watering again. This is usually every 1–2 weeks, depending on the season.
I rotate the pot every week. This ensures even growth. Variegated plants can stretch toward the light if you are not careful.
I fertilize lightly during the growing season. I use a balanced liquid fertilizer diluted to half strength. I apply it once a month from spring to early fall. I stop fertilizing in winter.
I keep it in bright, indirect light year-round. If I notice the variegation fading, I move it closer to the window. If I notice leaf burn, I move it back.
FAQ: Real Questions from People Like You
How long does it take for variegated jade cuttings to root in soil?
From my experience, it takes about 2–4 weeks. The first white roots appear around 2 weeks. But they need another 2 weeks to grow strong enough to support the plant. Do not rush this process. Patience is the only thing that works.
Can I propagate variegated jade from a single leaf?
Technically yes, but I do not recommend it for beginners. Leaf propagation takes much longer. The leaf must callus, then produce roots, then eventually grow a new stem. This can take 3–6 months. Stem cuttings are faster and more reliable. Stick with stems if you want visible results.
Why is my variegated jade cutting not rooting?
There are three common reasons. First, you are watering too much. The cutting has no reason to grow roots because it already has water. Second, the light is too weak. The cutting needs energy from light to produce roots. Third, the temperature is too cold. Jade plants root best between 65–75°F (18–24°C). If your home is cooler, the process slows down significantly.
Final Thoughts from Someone Who Killed More Plants Than You
I have been propagating variegated jade plants for 3 years now. I have killed at least 10 cuttings along the way. Every failure taught me something.
The biggest lesson is simple: less is more. Less water, less attention, less fussing. These plants thrive on neglect. The moment you try too hard, you kill them.
If you follow the 3 steps I outlined, you will have a rooted cutting in about 2 weeks. Do not skip the callusing step. Do not water too soon. Use the right soil and a small pot. Give it bright, indirect light. Then step back and let nature do its work.
I still check my cuttings every few days. But I do not meddle. I let them tell me what they need. If the leaves look plump, I leave them alone. If the soil is dry, I water. It is that simple.
Trust the process. Be patient. And remember: even experienced growers lose cuttings sometimes. It is not a failure. It is practice.





