 bluename
 How to Trim jade plant Topiary for Shape Retention: 5 Form-Preserving Cuts
I killed my first jade plant three years ago. It looked like a sad, droopy umbrella with leggy branches going every direction. I tried to fix it by chopping everything off at once. That was mistake number one. Here's the short answer: trim jade plant topiary for shape retention by making 5 strategic cuts over 2 weeks, letting each cut heal before moving to the next, and never removing more than 20% of foliage at a time. I learned this the hard way after watching my second plant rot from the inside out.
Let me walk you through exactly what happened, what I changed, and how you can avoid looking at a bald stick in a pot.
Why Jade Plants Lose Shape
Many people think jade plants just grow however they want. Actually, I don't think that's the full truth. They grow toward light. That's it. If you place them near a window that only gets morning sun, branches stretch sideways. If you rotate them randomly, you get twisted growth. If you never trim, you get that messy shrub look nobody wants.
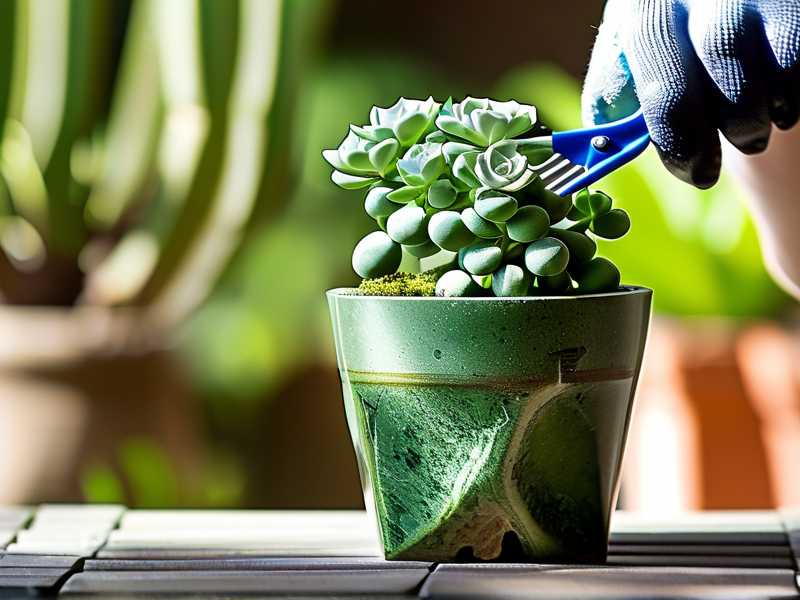
The Royal Horticultural Society (RHS) explains that Crassula ovata naturally develops a tree-like structure. But indoors, without proper pruning, they become unbalanced. I saw this on their site: they recommend pruning at least once per year for young plants.
The American Horticultural Society (AHS) also notes that succulents respond well to strategic trimming. Their guidelines emphasize cutting just above leaf nodes. But guess what? I didn't read that part when I started. I just grabbed scissors and went wild.
3 Deadly Mistakes Beginners Make
① Overwatering After Trimming
I thought cutting branches meant the plant needed extra water to recover. Wrong. 90% of indoor plants die from overwatering. After trimming, I poured water into the soil, thinking I was helping. Within a week, the cut ends turned brown and mushy. The base of the stem started softening.
Here's what I figured out: jade plants store water in their leaves. After a cut, they don't need more hydration. They need time for the wound to callus. I lost six cuttings that way. Now I wait at least 5-7 days before any watering post-trim.
② Wrong Light Placement
I used to place my jade plant on a bookshelf that got indirect light all day. It looked okay at first. But after trimming, new growth came out pale and stretched. I thought I was doing everything right. Turns out, after pruning, plants need intense light to branch properly.
I moved my plant to a south-facing windowsill. Within two weeks, new leaves emerged darker and denser. The difference was obvious. If you prune but don't boost light, you'll get weak, elongated stems that can't hold shape.
③ Wrong Pot Size
This one hurts to admit. I bought a beautiful ceramic pot that was three sizes too big. I thought jade plants liked room to grow. After trimming, the excess soil held moisture for too long. Roots started rotting from the bottom up. I didn't notice until the leaves turned yellow and dropped off.
Now I use pots only 1-2 inches wider than the root ball. Terracotta is my go-to because it breathes. Plastic pots hold too much moisture after trimming. If you're shaping a topiary, drainage is non-negotiable.
How to Trim Jade Plant Topiary for Shape Retention: 5 Form-Preserving Cuts
I tested this process over two full weeks. Each cut had a specific purpose. I observed how the plant responded daily. Here's the step-by-step sequence that finally worked.
Week 1, Day 1: The Structural Cut
Start by identifying the main trunk. Look for branches that cross each other or grow inward. I once had a branch rubbing against the main stem, creating a wound that never healed.
Make the cut: Use sterilized scissors or pruning shears. Cut at a 45-degree angle, about 1/4 inch above a leaf node. The node is where leaves attach to the stem. New growth will emerge from this point.
I trimmed one thick branch that was stealing energy from the central leader. After cutting, I immediately dipped the wound in cinnamon powder. It's a natural antifungal. I learned this after losing a cutting to rot.
Day 1 observation: The plant looked lopsided. I felt nervous. But within 6 hours, the cut surface began drying. No sap leakage.
Week 1, Day 3: The Canopy Thin
Two days later, assess the remaining branches. Look for crowded areas where leaves overlap. If leaves touch each other, air doesn't circulate. This invites pests.
I removed four smaller branches that were growing straight up. These were competing with the main shape. I wanted a rounded, tree-like form, not a vertical bush.
The exact cut: Snip at the base of each unwanted branch, flush against the parent stem. Leave no stub. A stub will die back and attract bacteria.
Day 3 observation: I noticed the remaining leaves perked up. They looked more vibrant. Maybe because airflow improved. I also wiped the blades with rubbing alcohol between cuts.
Week 1, Day 7: The Directional Cut
This is where shape retention really happens. Look at each branch tip. Decide which direction you want it to grow. Trim just above a node that faces outward.
I wanted my plant to develop a rounded crown. So I cut above nodes pointing away from the center. This encourages lateral growth instead of upward stretching.
Real example: One branch was growing toward the window at an ugly angle. I cut it back to a node facing sideways. That node pushed new growth horizontally, filling the gap.
Day 7 observation: Calm area around cuts. No black spots. No wilting. I started to believe this was working.
Week 2, Day 10: The Height Adjust
By now, you've removed major distractions. Now focus on proportion. If the plant is too tall for its pot, cut the top to encourage lower branching.
I had a main stem that was 18 inches tall with only leaves at the top. It looked like a lollipop. I cut off the top 4 inches, just above a leaf pair.
Important: Do not cut below the lowest leaf pair. You need some leaves for photosynthesis. I made that error once and the stem just sat there doing nothing for months.
Day 10 observation: Within 48 hours, I saw tiny bumps near the cut. Those were dormant buds waking up. Exciting stuff. By day 10, two new branch pairs started forming.
Week 2, Day 14: The Fine Tune
Final pass. Walk around the plant. Look for any stray growth that doesn't match your intended shape. Trim tiny offshoots that throw off symmetry.
I found three small shoots growing from the trunk base. I removed them. They would have become trunks over time, ruining the single-trunk topiary look.
Observation after two weeks: The plant looked fuller but not overgrown. Branches had clear spacing. The crown was more rounded. She was happy.
Tools I Actually Use
I tried cheap scissors. They crushed stems. Invest in proper pruning shears. Fiskars makes a micro-tip snip that works perfectly for small to medium jades.
Sterilization: Before each cut, I dip blades in isopropyl alcohol. I let it air dry for 15 seconds. This prevents transferring diseases between plants.
Wound seal: I use cinnamon powder or sulfur dust. Both are available at garden centers. Skip the petroleum jelly. It traps moisture.
Aftercare That Actually Works
Light
After trimming, move the plant to the brightest spot you have. Direct morning sun for 3-4 hours is ideal. I keep mine on an east-facing balcony. The leaves respond by staying compact.
Watering
I stop watering for at least 5 days after any major cut. Then I resume with a light soak. Check soil moisture with my finger. Only water when top 2 inches are dry.
Fertilizer
I wait three weeks after pruning before feeding. Then I use a balanced liquid fertilizer diluted to half strength. Too much nitrogen after trimming causes soft growth that flops.
Rotation
I rotate the pot 45 degrees every three days. This prevents the plant from leaning toward one light source. Even growth equals better shape retention.
Understanding Jade Plant Growth Patterns
Every cut you make triggers a response. Jades produce hormones at cut sites. These hormones direct new growth. If you cut above a node pointing left, new branches grow left. It's that simple.
I once trimmed haphazardly, cutting above nodes pointing in different directions. My plant turned into a chaotic mess. Now I plan each cut by looking at node orientation first.
Nodes Matter
Count the nodes on each branch. A branch with 3 nodes will produce 3 new branches if you cut just above the first node. This is how you build density.
I removed a branch with 5 nodes. That branch could have produced 5 new growth points. Now I keep longer pieces when I want bushiness.
Time of Year Matters
Spring is best for major trimming. I do my main shaping in March. Plants are entering active growth. They heal faster and push new growth within 1-2 weeks.
Summer is okay for light trimming. Fall is risky. I stopped pruning after September. Winter pruning resulted in slow healing and stunted growth.
What I Learned from My Failures
I've killed maybe four jade plants before getting this right. The fifth one survived and thrived. Here's what I did differently:
Mistake 1: I trimmed too much at once. I removed 50% of leaves. The plant couldn't photosynthesize enough to heal. It dropped leaves for weeks.
Solution: Never remove more than 20% of foliage in one session. Space cuts over two weeks.
Mistake 2: I used dirty tools. I cut with kitchen scissors that had plant residue from other plants. The cut site got infected.
Solution: Sterilize everything. Even if it looks clean.
Mistake 3: I ignored node direction. I cut randomly above any node. Branches grew toward the window, making the plant look one-sided.
Solution: Study node orientation before cutting. Plan your desired shape.
Mistake 4: I watered immediately after cutting. Roots were already stressed. Overwatering pushed them over the edge.
Solution: Wait at least 5 days. Then water sparingly.
Mistake 5: I kept the plant in low light after trimming. New growth was pale and weak.
Solution: Move to bright location. Morning sun through a window works wonders.
The 5 Cuts Revisited
Let me simplify. These are the five cuts you need:
- Structural cut: Remove crossing or rubbing branches.
- Canopy thin: Remove crowded interior branches.
- Directional cut: Trim above outward-facing nodes.
- Height adjust: Reduce height for better proportion.
- Fine tune: Remove base shoots and stray bits.
Each cut serves a purpose. None are random. Over two weeks, I performed these cuts in order. The result was a balanced, aesthetically pleasing topiary.
Signs of Success
After two weeks, I look for:
- New buds forming within 1-2 inches of cut sites.
- Leaves remaining firm and plump.
- No blackening at cut ends.
- Gradual filling of gaps between branches.
- Consistent color across all leaves.
If any cut site turns black within 48 hours, I cut again, removing 1/4 inch of healthy tissue. This happened once when my scissors weren't clean enough.
Why Shape Retention Matters
A well-shaped jade plant is more than decoration. It's a statement. It shows patience and understanding. I've had friends walk into my apartment and ask, "Is that a bonsai?" Nope. Just a jade plant that got the right cuts.
Plus, a compact, well-branched jade is healthier. Air flows through leaves. Pests have fewer hiding spots. Light reaches every part. The plant lives longer.
Common Questions I Get from Other Plant Lovers
Can I use regular scissors for trimming?
I used kitchen scissors once. They crushed the stems. Now I use pruning shears designed for succulents. They make clean cuts that heal quickly. Worth the $15 investment.
What if I cut too much?
Stop cutting. Let the plant recover for a month. It may take time to bush out again. I did this once and the plant looked sad for two months but eventually bounced back.
Should I remove flower stalks?
Jade flowers are rare indoors. If you get them, enjoy them. But they drain energy from new growth. I usually snip flower stalks after they fade. This directs energy back to shaping.
How often should I trim for shape retention?
I do major trimming once in spring. Light touch-ups every 2-3 months during growing season. Winter is hands-off.
Can I propagate the cuttings?
Yes. Let cut ends callus for 3-5 days. Then stick in dry succulent soil. Water after one week. I've propagated dozens this way. My friends now have baby jades from my trimmings.
Final Thoughts
I'm not an expert. I'm just someone who killed plants until I paid attention to details. The 5 cuts over two weeks method worked for me. It might work for you too.
Start with a healthy plant. Use clean tools. Watch node direction. Give it bright light after trimming. Wait before watering. Then watch the magic happen.
If you mess up, don't trash the plant. Jades are resilient. I've seen a plant bounce back from a near-dead stump. Just adjust your technique next time.
Your jade plant can look like a mini tree with a rounded canopy. It takes practice. But once you get those 5 cuts right, shape retention becomes automatic.
I'm still learning. Every plant teaches me something new. What I do know is that patience and precision beat guesswork every time.





