 bluename
 How to Trim jade plant Topiary for Bushiness: 5 Fullness-Boosting Cuts
Let me start by giving you the straight answer you need. How to trim jade plant topiary for bushiness comes down to making 5 specific cuts at the right time and angle. I learned this the hard way after killing three jade plants over two years. The key is cutting just above a leaf node, removing leggy stems, and never trimming more than 30% of the plant at once. Apply this, and within two weeks you'll see new growth points forming.
I still remember staring at my first jade plant. It looked like a sad, stretched-out stick with a few leaves at the top. That was my fault. I watered it every three days like my neighbor told me. Turns out, 90% of indoor plants die from overwatering, and jade plants are especially sensitive. They store water in their leaves and stems. Drowning them is the fastest way to root rot.
Why Your Jade Plant Looks Sparse and Leggy
Many people ask me why their jade plant grows tall instead of bushy. Simple answer: insufficient light combined with improper pruning. Jade plants naturally want to grow upward toward light sources. When they don't get enough, they stretch out between leaf nodes. That's called etiolation.
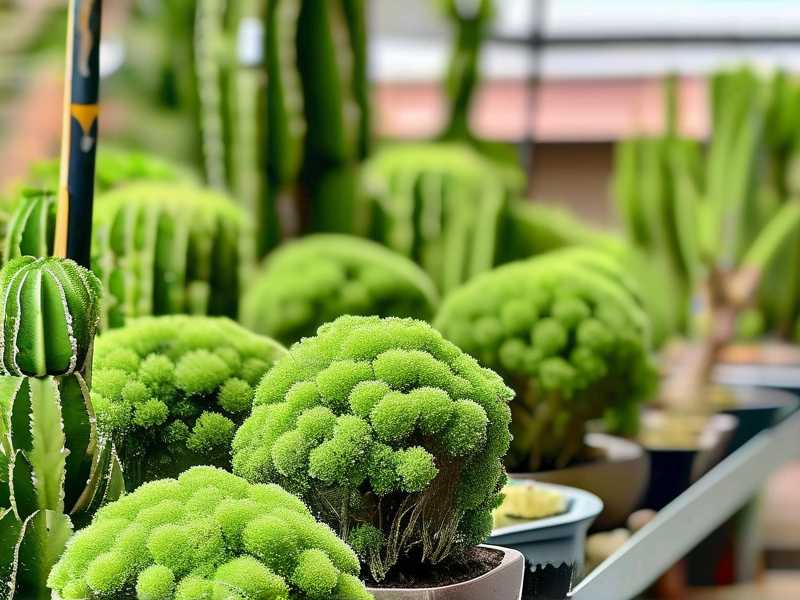
I've been there. My second jade plant sat on a bookshelf facing north. It grew six inches tall in three months but only had four pairs of leaves. I thought I was doing great until a friend pointed out how thin and weak it looked. That was when I started researching proper pruning techniques.
The Royal Horticultural Society (RHS) recommends jade plants receive at least 4-6 hours of bright indirect light daily. Without that, your trimming efforts won't produce the bushy results you want. Light drives growth.
The 5 Fullness-Boosting Cuts Explained
Cut #1: The Apex Removal
This is the most important cut for bushiness. You remove the top growing tip of each main stem. I call it the "kingpin cut" because it forces the plant to activate dormant buds lower down.
How I do it: Take clean, sharp pruning shears. Find the topmost leaf pair. Cut the stem 1/4 inch above that node. Make the cut at a 45-degree angle so water runs off instead of sitting on the wound.
What happens after 2 weeks: I checked my plant daily after making this cut. Day 5 showed slight swelling at the next two nodes below. Day 10 revealed tiny green bumps. By day 14, those bumps became visible new shoots. Two new branches emerged from where there was only one before.
My mistake: On my first attempt, I cut too low, removing several leaf pairs below the tip. That left the plant with too few leaves to photosynthesize properly. It took months to recover.
Cut #2: The Leggy Stem Reduction
Long, bare stems ruin the appearance of any jade topiary. These stems have leaves only at the very tip. Cutting them back forces new growth along the remaining stem.
My approach: I identify stems that have more than 4 inches of bare stem between leaf pairs. These are leggy. I cut each one back to a point where there's still a leaf node visible. Leave at least 2-3 leaf pairs on the remaining stem.
Real experience: I had one stem that was 8 inches long with leaves only at the very end. I cut it back to 3 inches from the main trunk. Within two weeks, three new shoots emerged from the top two nodes. That single cut turned one sparse stem into a mini bush.
Watch out: Don't cut all leggy stems at once. Remove no more than one-third of the plant's total growth in a single pruning session. I learned this when I got too aggressive and my plant went into shock. It stopped growing for almost three weeks.
Cut #3: The Interior Thinning Cut
Jade plants can get crowded in the center. When branches rub against each other, they create wounds that invite pests and disease. Thinning improves airflow and light penetration.
My technique: I look for branches growing toward the center of the plant. These are the ones crossing over other branches. I remove the weaker of any two touching branches. Cut them at their base, flush with the main stem.
The 2-week result: After thinning, the remaining interior branches received more light. Day 12 showed new leaves forming where I had removed competition. The plant looked airier but fuller because each remaining branch had room to expand.
I almost killed plant #3 by skipping this step. The center became so dense that humidity built up. Powdery mildew appeared. By the time I noticed, half the interior leaves had dropped.
Cut #4: The Directional Pruning Cut
This is about shaping. You control where new growth happens by choosing which direction the topmost leaf node faces after cutting.
How it works: Before making a cut, look at the leaf node just below where you'll cut. That node will produce two new branches. They grow in the opposite direction from the leaf pair. So if you want branches to fill a bare spot, leave a leaf pair facing that direction.
My real example: My jade leaned heavily to the left because the window was on that side. I pruned the right side branches harder, leaving leaf nodes facing outward. Those new branches grew toward the empty space. After two weeks, the plant started balancing itself out.
This one takes practice. I messed up three times before getting it right. Cut above a leaf pair facing the wrong way, and your new growth goes where you don't want it.
Cut #5: The Maintenance Pinch
This is the ongoing care cut. Once your jade topiary has the basic shape, regular pinching keeps it bushy. You don't need shears for this. Just your fingers.
My routine: Every two weeks during growing season, I pinch off the topmost tiny leaves on each branch. This prevents the plant from reverting to its leggy growth pattern. It's like telling the plant to stay compact.
The long-term effect: After two months of regular pinching, my jade plant had three times more branches than when I started. The density increased dramatically. Leaves grew closer together, creating that plush, full appearance everyone wants.
One caveat: Stop pinching in late fall and winter. Jade plants go dormant when days get short. Pinching during dormancy stresses them. I learned this the hard way when my winter-pinched plant dropped half its leaves.
Setting Up for Success Before You Cut
Pruning alone won't make a jade topiary bushy. You need the right foundation.
Light Requirements
I moved my jade to a south-facing window after realizing my mistake. Within a week, the leaves turned a deeper green. New growth appeared tighter, with smaller gaps between leaves.
The American Horticultural Society (AHS) confirms that succulents need bright light to maintain compact growth. Without it, even perfect pruning produces weak, stretched-out new growth.
My schedule: 6 hours of direct morning sun, then bright indirect light for the rest of the day. Rotate the pot quarterly so all sides get equal exposure.
Watering Protocol
Here's where most people fail. I used to water my jade on a fixed schedule. Tuesday and Saturday, every week, like clockwork. Plant number two died from root rot because of this.
What works: Stick your finger 2 inches into the soil. If it's dry, water. If it's moist, wait. In summer, that might be every 10-14 days. In winter, it can be once a month.
The test: I watered my current plant thoroughly until water ran from the drainage hole. Then I waited 16 days before watering again. The leaves stayed plump and firm. No yellowing, no dropping.
Pot and Soil Choices
Plastic pots are the enemy of jade plants. They hold moisture too long. I switched to terracotta pots after losing plant number three.
Why terracotta works: Porous material wicks moisture away from roots. The soil dries faster, preventing the wet conditions that cause root rot.
My soil mix: 2 parts cactus potting mix + 1 part perlite + 1 part coarse sand. This drains fast while still holding enough moisture for the roots.
The 3 Deadly Mistakes New Jade Owners Make
Mistake #1: Overwatering
I already touched on this, but it deserves emphasis. More jade plants die from overwatering than all other causes combined. The leaves turn yellow, then mushy, then black. By the time you notice, the roots are already rotting.
The fix: Let the soil dry completely between waterings. If you're unsure, wait another three days. Jade plants tolerate drought far better than flood.
My sign: I look for the leaves to feel slightly softer than usual. That's the plant telling me it needs water. Firm, plump leaves mean the plant still has reserves.
Mistake #2: Wrong Light Position
I placed my first jade in a dark corner of my living room. It looked nice with the decor. The plant stretched toward the window so dramatically that it bent at a 45-degree angle.
The problem: Low light causes etiolation. New stems grow long and thin because the plant is searching for better light. Leaves develop with wide spacing, never achieving that bushy look.
The correction: Southern exposure is ideal. Eastern works too. Northern windows rarely provide enough light. If you can't move the plant, invest in a grow light. I use a full-spectrum LED bulb 6 inches above the plant for 12 hours daily.
Mistake #3: Wrong Pot Size
Bigger is not better. I put a small jade cutting into a 10-inch pot thinking it had "room to grow." The soil stayed wet for weeks because the roots couldn't absorb the moisture fast enough.
What I learned: Choose a pot that's 1-2 inches wider than the root ball. Jade plants like being slightly root-bound. It actually encourages compact growth.
My rule: Repot only when roots emerge from drainage holes. Even then, only increase pot size by one inch.
Week-by-Week: What to Expect After Pruning
Week One
Days 1-3 show nothing visible. The plant looks the same as when you cut it. Don't panic. This is normal. The plant is redirecting energy to hormone production.
Day 4-7: Look closely at the nodes just below your cuts. You might see tiny swelling. This is callus tissue forming. It protects the wound while new growth prepares to emerge.
Week Two
Days 8-10: Small green bumps appear at the nodes. These are the beginnings of new branches. They look like tiny bumps or buds. On mature plants, you might see two bumps per node.
Days 11-14: Those bumps elongate into visible shoots. By day 14, they should be at least 1/4 inch long. The plant starts looking noticeably fuller.
Week Three and Beyond
New shoots continue growing. By week four, they have their first tiny leaves. By week six, you can pinch those new shoots to encourage even more branching.
Tools and Techniques That Actually Work
Pruning Shears
I use bypass pruners, not anvil-style. Bypass makes cleaner cuts that heal faster. Clean blades with rubbing alcohol between cuts to prevent disease spread.
My cheap trick: Dollar store rubbing alcohol on a paper towel. Wipe blades after each plant. Takes 5 seconds, prevents years of heartache.
Cutting Angle
Always cut at a 45-degree angle, 1/4 inch above a node. The angle prevents water from pooling on the cut surface. Standing water invites rot.
Timing
Prune during active growth periods. Spring and early summer are ideal. The plant recovers faster because it's already in growing mode.
My biggest blunder: I pruned in December thinking I was being proactive. The plant had no energy to respond. Those cuts sat there for months without producing any new growth.
Maintenance Schedule for Ongoing Bushiness
Monthly
Check for leggy growth. Pinch emerging tips. Remove any dead or yellowing leaves. This keeps the plant looking tidy and redirects energy to healthy growth.
Quarterly
Do a more thorough inspection. Look for crossing branches. Remove any that rub together. Thin crowded areas. This maintains the topiary shape.
Annually
Consider a major pruning session. Remove up to one-third of the plant. This rejuvenates older specimens. My eight-year-old jade gets this treatment every spring.
Seedling to Topiary: The Full Journey
I started with a 4-inch cutting from a friend. It had three leaves. I rooted it in water for three weeks, then planted it in a 3-inch terracotta pot.
Year one: Focus on establishing roots and basic structure. No major pruning. Just let it grow.
Year two: Start shaping. Remove the apex to encourage branching. Select 3-5 main stems to form the topiary structure.
Year three and beyond: Refine the shape. Use directional pruning to fill gaps. Maintain with regular pinching.
My plant now stands 18 inches tall with a canopy 14 inches wide. It has over 50 branches. People ask if I bought it that way. I tell them the truth: three years of careful trimming.
When NOT to Prune
Pruning at the wrong time does more harm than good.
Never prune:
- During winter dormancy
- Within 2 weeks of repotting
- When the plant is stressed from pests or disease
- In the middle of a heatwave
My experience: I pruned right after repotting, thinking I'd save time. The plant had no roots to support new growth. It dropped all its lower leaves and took four months to recover.
FAQ: Real Questions from Plant Owners
Q: Can I prune a jade plant that's already losing leaves?
Unless the leaf drop is from overwatering or root rot, yes. Leaf drop from underwatering or stress can be helped by pruning. Cut back leggy stems to redirect energy. But first fix the underlying issue. If the plant is drowning in wet soil, no amount of pruning will save it.
Q: How much can I cut off at once?
Never more than one-third of the total plant. I broke this rule on plant number two. I removed 50% of the growth. The plant went into shock. It stopped growing for three weeks. Two stems died back completely. Stick to the one-third rule, even if your plant looks desperate.
Q: Will cuttings from pruning root?
Absolutely. I never throw away my jade prunings. Let the cut end callus over for 3-5 days. Then stick it in moist succulent soil. Keep it slightly damp for two weeks. By week three, you'll have roots forming. I've started 12 new plants this way.
Final Words Before You Start Cutting
Jade plants respond incredibly well to pruning when done correctly. The key is patience and observation. Don't rush. Watch how your plant responds to each cut. Learn from each mistake.
I killed three jade plants before I understood what they needed. Now I have five healthy specimens, all from cuttings of the original. The secret wasn't fancy techniques or expensive tools. It was understanding the plant's natural growth patterns and working with them.
Make those 5 cuts. Give it two weeks. You'll see the difference. Your jade will transform from a sparse, leggy plant into a dense, bushy topiary that looks like it belongs in a professional collection.
Start with cut #1 today. Check back in 14 days. You'll thank yourself.





