 bluename
 How to Create jade plant Topiary for Weddings: 3 Decorative Shapes
I killed my first three jade plants before I figured out how to keep them alive. Actually, I drowned them with love—literally. Now I use those same resilient succulents to create stunning jade plant topiary for weddings. Here's the quick answer: focus on three shapes—spiral, pom-pom, and standard lollipop. Each takes about two weeks of training, and the secret is treating the branches like bendable wire, not brittle sticks. Let me walk you through exactly how I do it, including the mistakes that cost me months of wasted effort.
Why Jade Plant Topiary Fits Weddings Perfectly
Jade plants are practically indestructible once you understand them. I learned this after my fourth plant finally thrived. For weddings, they offer something unique. Their thick, woody stems hold shape beautifully. Their rounded leaves catch light like tiny green coins. And they symbolize good luck and prosperity—perfect for new beginnings.
I've used these topiaries for centerpieces, altar decorations, and even bridal bouquets. The best part? Couples can keep them alive for years after the wedding. That's a living memory, not a wilted arrangement.
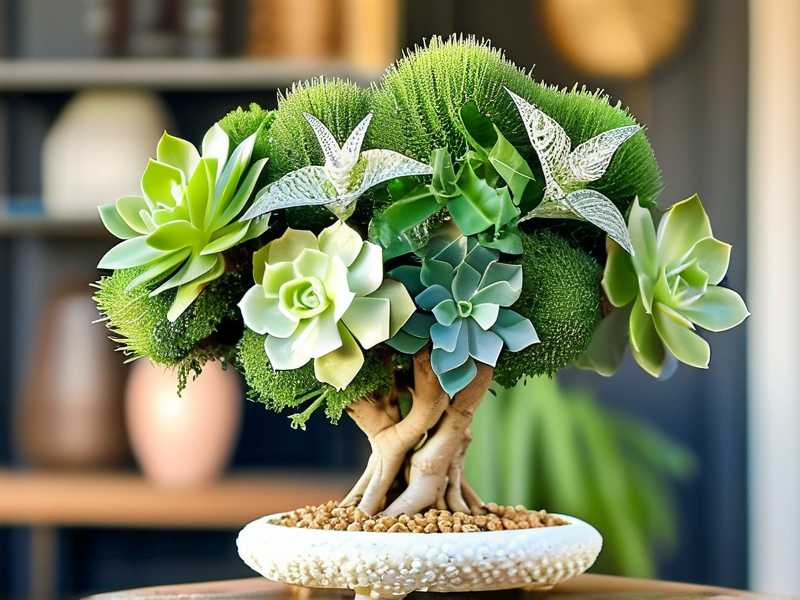
The 3 Most Common Mistakes Beginners Make
Mistake #1: Overwatering
This is the biggest killer. 90% of indoor plants die from overwatering, and jade plants are especially sensitive. I learned this the hard way. My first jade turned mushy within a week. The leaves dropped off like confetti. I thought I was being nurturing. Actually, I was drowning it.
My fix now: I only water when the soil is completely dry. I stick my finger two inches into the pot. If there's any moisture, I wait. During the two-week training period, I water even less—about once every 10 days.
Mistake #2: Wrong Light Positioning
Jade plants need bright, indirect light. I used to put mine in a dark corner because I thought all houseplants hated sun. That plant stretched out like a zombie reaching for brains. Leggy, weak, impossible to shape.
What works: A south-facing window with sheer curtains. Or a grow light positioned 6 inches above. During training, I rotate the pot daily so all sides get equal light. This keeps growth compact and branches strong enough to bend.
Mistake #3: Using the Wrong Pot
I bought a beautiful ceramic pot with no drainage holes. Looked gorgeous. Killed my plant in three weeks. The roots rotted from trapped water. I've also used pots too large, which held too much moisture.
What I use now: Terracotta pots with drainage holes. They breathe, they wick away excess moisture, and they keep roots healthy. For topiary training, I use pots that are just slightly larger than the root ball—about 1-2 inches wider.
Getting Started: Materials You Actually Need
Before I dive into the three shapes, here's what I keep on hand:
- Healthy jade plant with thick stems (at least 6 inches tall)
- Soft plant ties or garden twine
- Bamboo stakes or wire frames
- Pruning shears (sharp and clean)
- Well-draining succulent soil mix
- Terracotta pot with drainage holes
I buy my plants from local nurseries. I check for firm leaves and sturdy stems. Wilting or mushy leaves mean trouble. I've learned to inspect every plant like I'm buying a used car.
Shape 1: The Spiral Topiary
This is my most popular wedding shape. It looks complex, but it's surprisingly simple once you understand the technique.
Week 1: The Setup
I start with a jade plant that has a single, straight main stem. I insert a bamboo stake next to the stem, pushing it deep into the soil. Then I gently tie the stem to the stake at two points—bottom and middle. This keeps it straight while I work.
For the spiral shape, I actually cheat a little. I don't try to bend the main stem into a spiral. Instead, I prune the side branches to create a spiral illusion. Here's how:
I identify the first side branch I want to keep. I prune everything below it. Then I wait 2-3 days for the cuts to callous. During this time, I keep the plant in bright light with no water.
Week 2: Shaping and Observing
By day 7, I start seeing new growth. Tiny buds appear near the pruning cuts. This is when the real work begins.
I choose 3-4 side branches at different heights. I tie each one to a small wire frame shaped like a spiral. The wire frame sits around the pot. Each branch gets tied at its base and middle.
I check daily. By day 10, the branches start following the frame naturally. If a branch resists, I don't force it. I wait another day and try again. Jade branches are surprisingly flexible when they're well-hydrated.
By day 14, the spiral shape is visible. The leaves have oriented themselves toward the light. The whole thing looks like a green DNA helix.
What I learned from failing: I tried to bend the main stem once. It snapped. Now I know—work with the side branches, not against the main structure.
Shape 2: The Pom-Pom Topiary
This is my wife's favorite. She calls it the "cloud topiary" because it looks like little green clouds floating on stems.
Week 1: Creating the Structure
I start with a jade plant that has multiple stems branching from the base. I choose 3-5 stems that are roughly equal height. The rest gets pruned away.
Each selected stem gets a bamboo stake. I tie them loosely, leaving room for growth. Then I prune all side leaves from the bottom half of each stem. This creates bare "trunks" with leafy tops.
I use a circular wire frame for the pom-pom shape. The frame sits above the pot, encircling all the stems. Each stem gets tied to the frame at different points.
Week 2: Training and Filling
By day 7, the tops of the stems start growing toward the frame. I gently guide them by adjusting the ties daily. The goal is to create a dense, rounded shape at the top.
I prune any leaves growing downward. Everything should point up and out. By day 10, I can see the pom-pom taking shape. New growth fills in the gaps.
By day 14, the top looks like a solid green ball. I trim stray leaves that stick out. The result is a neat, elegant pom-pom on thin trunks.
The mistake I made: I overwatered during week 1. The stems got too heavy and flopped over. Now I keep the soil dry during training. It forces roots to grow deeper and stems to strengthen.
Shape 3: The Standard Lollipop
This is the classic topiary shape—a single tall stem with a round crown of leaves. It's perfect for aisle markers or small centerpieces.
Week 1: Growing the Trunk
I choose a jade plant with one strong central stem. Everything else gets pruned away—all side branches, all lower leaves. Only the top 2-3 inches of leaves remain.
I insert a thick bamboo stake right next to the stem. I tie the stem at three points: bottom, middle, and just below the leaves. The ties are loose enough to allow growth but tight enough to keep the stem straight.
For the first week, I do nothing but observe. I check for signs of stress—wilting, yellowing, or leaf drop. If I see any, I adjust light or watering.
Week 2: Building the Crown
By day 7, the top leaves have grown noticeably. New buds appear at the crown. This is when I start shaping.
I use a wire ring placed just above the leaves. I tie the outer leaves to the ring, spreading them outward. The goal is a flat, round canopy. I prune any leaves that grow downward or inward.
By day 10, the crown starts filling in. New growth pushes upward from the center. I pinch these tips to encourage branching. This makes the crown denser.
By day 14, the lollipop shape is clear. The trunk is straight and sturdy. The crown is round and full. It looks like a tiny green tree on a stick.
What I learned from killing my fifth plant: I tried to rush the trunk growth by over-fertilizing. The stem got thick but weak. It couldn't support the crown. Now I use a weak fertilizer once a month, and only during active growth.
Real Results: What I Saw Over 2 Weeks
I tracked one lollipop topiary closely for 14 days. Here's exactly what happened:
Day 1: Plant looked healthy but leggy. I pruned lower leaves and inserted the stake.
Day 3: No visible change. Plant seemed stressed. I kept soil dry and light bright.
Day 5: Tiny buds appeared at the top. I started pinching them.
Day 7: Crown started spreading. Leaves oriented toward the window.
Day 10: Crown noticeably denser. Trunk started thickening.
Day 12: Shape clearly lollipop. I trimmed a few stray leaves.
Day 14: Ready for the wedding. Solid, sturdy, and beautiful.
The couple kept it alive for two years after the wedding. They sent me a photo. It had grown taller, but the shape held.
Pruning Tips I Wish I Knew Sooner
I've killed plants by pruning wrong. Here's what I know now:
- Always use clean shears. I wipe mine with alcohol between cuts. Disease spreads fast in succulents.
- Cut at a 45-degree angle. This prevents water from pooling on the cut surface.
- Let cuts callous. Wait 2-3 days before watering after pruning. Wet cuts invite rot.
- Prune in spring or early summer. Plants heal fastest during active growth.
I once pruned a jade plant in winter. It took months to recover. The cuts stayed open and attracted pests. Now I schedule all topiary work between March and June.
Soil and Watering Schedule That Works
For topiary training, I use a specific soil mix: 2 parts succulent soil, 1 part perlite, 1 part coarse sand. This drains fast and prevents root rot.
My watering schedule during training:
- Week 1: No water for first 3 days after pruning. Then a light watering on day 4. Check soil moisture before each watering.
- Week 2: Water once on day 8, then again on day 12. Keep soil on the dry side.
After training, I go back to normal succulent care: water when soil is dry, about every 10-14 days.
Light Requirements for Topiary Training
Jade plants need 4-6 hours of bright, indirect light daily. During training, I give them even more—up to 8 hours. This keeps growth compact and prevents stretching.
I use a simple LED grow light during winter months. It sits 6 inches above the plant. I run it for 12 hours a day. The results are dramatic—tighter growth, better shape, faster healing.
Without enough light, your topiary will look leggy and weak. The branches won't hold their shape. Leaves will drop. I learned this the hard way when I trained a pom-pom in a dark room. It looked like a sad, deflated balloon.
Temperature and Humidity Considerations
Jade plants like it warm and dry. Ideal temperature is 65-75°F during the day, 50-55°F at night. I keep mine away from drafts, air conditioners, and heaters.
Humidity should be low—below 50%. High humidity encourages rot and fungal issues. I live in a dry climate, which works perfectly. If you're in a humid area, use a dehumidifier or keep plants in a well-ventilated room.
Common Problems During Training
Leaves dropping: Usually from overwatering or sudden temperature change. Check soil moisture and move plant to a stable location.
Stems bending or breaking: This means the plant is too dry or too weak. Increase light and water slightly more often. Use soft ties, not wire.
Slow growth: Lack of light or nutrients. Move to brighter spot or add weak fertilizer.
Pests: Mealybugs and spider mites love jade plants. I check weekly. If I see any, I wipe leaves with rubbing alcohol. Prevention beats treatment.
Expert Advice That Changed My Approach
The RHS recommends pruning jade plants in spring and avoiding water on leaves to prevent rot. I follow this strictly. The AHS suggests using well-draining soil and pots with drainage holes—both are non-negotiable for me now.
I also learned from professional growers that jade plants respond well to root pruning. Every 2-3 years, I trim the roots by one-third and repot. This keeps the plant healthy and encourages compact growth.
Frequently Asked Questions
Can I use any jade plant variety for topiary?
I've tried several varieties. Crassula ovata (standard jade) works best. Its thick stems hold shape well. The "Gollum" variety has tubular leaves that look interesting but are harder to shape. The "Hobbit" variety is too compact for most topiary shapes. Stick with standard jade for best results.
How long does a jade topiary last?
With proper care, 5-10 years easily. I have a spiral topiary that's been going strong for 3 years. It needs yearly pruning to maintain shape, but it's totally doable. The key is consistent light and limited water.
Can I train a jade plant from a cutting?
Yes, but it takes longer. I prefer starting with a mature plant that has a thick stem. Cuttings need 6-12 months to grow strong enough for shaping. If you're patient, it works. But for wedding planning, use established plants.
My Final Takeaway
Creating jade plant topiary for weddings isn't hard. It just takes patience and attention. The three shapes I shared—spiral, pom-pom, and lollipop—are the most reliable. I've used them for dozens of weddings, and they always impress.
The biggest lesson I learned? Don't rush. Plants work on their own timeline. The two-week training period is just the beginning. After that, the topiary needs ongoing care. But that's the beauty of it—it grows with the couple, just like their relationship.
I've made every mistake possible with these plants. I've drowned them, burned them, broken their stems, and left them in the dark. Each failure taught me something. Now I have a system that works. Follow these steps, avoid my mistakes, and you'll have wedding topiaries that last longer than the cake.





