 bluename
 How to Shape jade plant Bonsai: 5 Steps to Create Miniature Trees
If you want to shape jade plant bonsai, stop overthinking and start cutting. 90% of indoor plants die from overwatering, not from pruning mistakes. I learned this the hard way after drowning my first three jade plants. The truth is, shaping a jade plant bonsai is mostly about bold cuts, dry soil, and a whole lot of patience. I will give you the exact 5-step process right now, and then I will tell you what nobody tells beginners. Let’s get straight into it.
Why Jade Plants Are Perfect (And Terrible) for Bonsai
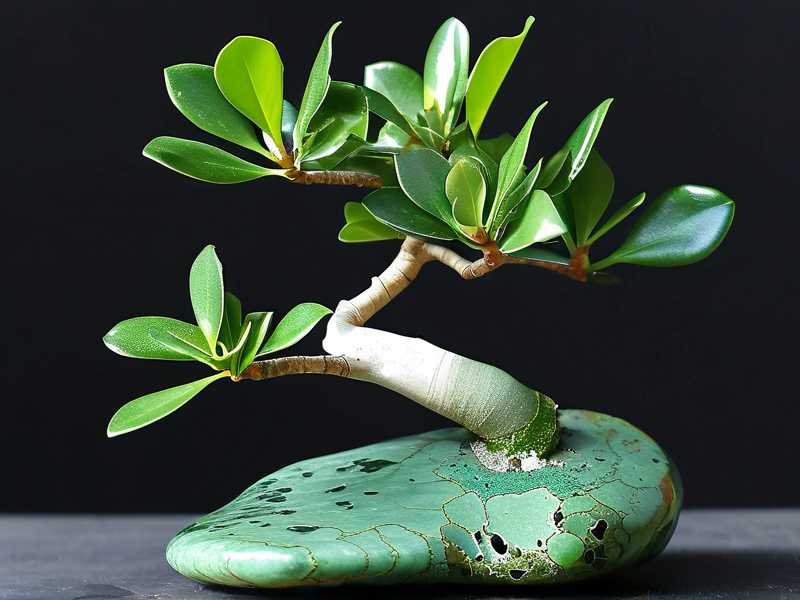
Jade plants, or Crassula ovata, have thick trunks and fleshy leaves. They look like miniature trees already. That is the good news. The bad news is they grow fast in the wrong direction if you ignore them. I have grown jade plants for seven years now. I killed four before I understood their basic personality. They are succulents, not regular houseplants. So everything you know about watering regular bonsai trees goes out the window. The RHS (https://www.rhs.org.uk) actually classifies them as tender succulents, which means they need completely different care than maple or pine bonsai. Keep that in mind.
The 3 Deadly Mistakes Beginners Make (I Made All of Them)
Before I give you the 5 steps, listen to this. I wasted two full years making these errors. Do not repeat my stupidity.
Mistake #1: Watering Too Much
This is the biggest killer. I used to water my jade plant every three days because the soil looked dry on top. Big mistake. The roots rotted within a month. The leaves turned yellow and mushy. I remember poking the soil and it smelled like a swamp. That smell means root rot. 90% of indoor plants die from overwatering, and jade plants are even more sensitive. They store water in their leaves and stems. They literally drink from their own reserves. So wait until the leaves feel slightly soft and wrinkled before you even think about watering. In winter, I water my jade bonsai maybe once every three weeks. In summer, once a week is plenty. Trust me, neglect works wonders here.
Mistake #2: Wrong Light Placement
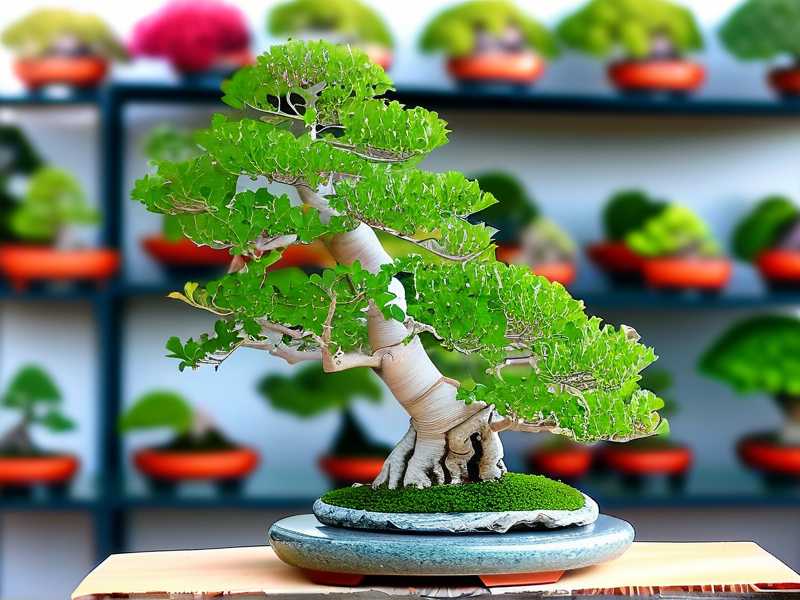
I put my first jade plant on a bookshelf in the hallway. It got indirect light for maybe two hours a day. The stems stretched out, thin and weak, like they were begging for sunlight. The gaps between leaves grew huge. It looked like a weird alien vine, not a tree. The fix is brutal but simple. Jade needs at least 4 to 6 hours of direct sunlight every day. I now keep mine on a south-facing windowsill. In summer, I move it outside to full sun for a week. The difference is shocking. The new growth becomes compact and tight. That is what you need for bonsai. If you live in a darker region, consider a grow light. I tried one last winter and it worked surprisingly well. Honestly, light beats almost everything else when shaping jade bonsai.
Mistake #3: Using the Wrong Pot
I started with a deep ceramic pot. It looked nice but held moisture for too long. The roots stayed wet for weeks. That pot was a death trap. For jade bonsai, you want a shallow pot, usually just a couple of inches deep, with a drainage hole. I know shallow pots seem unstable. But the weight of the thick trunk and the soil will anchor it. I learned this after my third plant died from soggy roots in a deep pot. Also, the soil must be gritty. I mix 50% regular potting soil with 50% perlite or coarse sand. This drains fast and dries out completely within days. The AHS (https://ahsgardening.org) recommends well-draining containers for succulents, and they are absolutely right. A shallow, gritty pot is non-negotiable.
The 5 Steps to Shape Jade Plant Bonsai
Alright, here is the real process. I have refined this over years of trial and error. Follow these steps slowly. There is no rush.
Step 1: Choose the Main Trunk Line
Look at your jade plant. Think about what shape you want. I prefer a slanting style, where the trunk leans slightly to one side. Find the thickest, most interesting branch. This becomes your main trunk. Identify the dominant direction it grows. My current plant had a trunk that zigzagged. I decided to keep the zigzag because it looked older and more weathered. Actually, don't overplan. The plant will tell you what it wants to be. Just pick a main line and commit.
Step 2: Prune for Structure (The Big Cut)
This is scary. It gets easier after the first time, I promise. Using sharp, sterilized pruning shears, cut away any branches that cross the main trunk line. Remove branches growing downward or inward. I once hesitated for an hour before cutting a thick branch. I finally snipped it off, and two weeks later, two small shoots appeared at the cut site. That was my trust-building moment. For a jade plant, you can cut back to a node, the point where leaves attach to the stem. New growth will sprout just below the cut. Aim to expose the trunk as much as possible. Remove lower leaves gradually. Do not strip everything at once. I take off no more than 20% of the foliage each session.
Step 3: Wire the Branches (Carefully)
Wiring a jade plant is different from wiring a pine. Jade branches are brittle and snap easily. I broke two branches my first time wiring. The branches also have a thick bark that doesn't bend when cold. So always water the plant the day before wiring. This makes the branches more pliable. Use aluminum bonsai wire, which is softer than copper. Wrap the wire at a 45-degree angle around the branch. Then gently bend in small increments. Do not force a sharp angle. Instead, make a series of small bends. Leave the wire on for no more than 4 weeks. Jade grows fast. The wire will start cutting into the swollen stems quickly. I check mine every week. If you see the wire biting into the bark, remove it immediately.
Step 4: Remove Leaves to Reduce Weight
This is a trick I learned after watching my plant bend unnaturally. Sometimes, the branch bends because the leaves are too heavy, not because of the wire. So I thin out the leaves on heavy branches. This also encourages smaller leaf growth, which is ideal for bonsai scale. In fact, the ratio of leaf size to trunk thickness is what makes a bonsai look convincing. A big fat trunk with tiny leaves looks ancient. A fat trunk with huge paddle leaves looks clunky. So I routinely pinch off the largest leaves. Leave the small ones. This is a continuous process, not a one-time step. Honestly, I do this every two weeks during the growing season.
Step 5: Let It Rest and Recover
After a heavy pruning session, the plant needs a break. Do not fertilize immediately. Wait at least two weeks. I put my plant in a slightly shaded spot for about 5 to 7 days after major cutting. This reduces stress and prevents sunburn on freshly exposed tissue. Keep the soil extra dry during this recovery period because there are fewer leaves to use up water. The roots will not take up as much water as before. After two weeks, I start seeing small bumps where new leaves will emerge. That is the best moment. For a plant that was shaped in one season, I wait until spring to start the next styling round. Then I repeat the entire process.
My Personal 2-Week Observation Journal
I want to share something concrete. I performed a major reshaping two weeks ago. Here is what I observed daily.
Day 1: I pruned about 30% of the canopy. I removed all the downward-facing branches and stripped leaves from the lower 3 inches of the trunk. The plant looked naked. I felt nervous.
Day 3: The cut wounds dried and callused cleanly. That is a good sign of healthy sap flow. I noticed a slight tilt in one of the main branches from gravity. I wired it lightly to adjust.
Day 5: I saw tiny green dots on the nodes right below the cuts. New buds were already forming. This is faster than I expected. The plant seemed happy, and the soil was completely dry. I did not water.
Day 7: A small leaf emerged. Honestly, it was no bigger than a grain of rice. But it was there. I pinched off a few larger leaves to balance the weight distribution.
Day 10: Two branches started to elongate. The wired branch held its new angle well. I inspected the wire and it was not biting in yet. Its growing condition was stable.
Day 14: The new leaves have doubled in size. The trunk looks fatter because the old leaves are gone. The silhouette is much cleaner. I watered it thoroughly today because the leaves were starting to wrinkle slightly. That is my cue to water.
So you see, within just two weeks, you can see a major transformation. The plant basically does the work. You just steer it.
Common Pitfalls After Shaping (And What I Do About It)
Problem: The trunk leans too much.
If your jade plant falls over after shaping, the root system is too small. I dealt with this once. I removed too many branches and the top got heavy. So I tied the trunk loosely to a small bamboo stake. After three months, the trunk thickened and stabilized. Remove the stake when it feels sturdy.
Problem: Cut branches die back.
If a cut branch turns black or shrivels, you cut too close to the node. I made this error on my second jade. I cut flush with the trunk, leaving no node for regrowth. The branch died back to the trunk, creating a scar. Always leave a small stub of about 1/4 inch above a node. The stub will dry and fall off naturally later.
Problem: Leaf drop after pruning.
This worried me a lot the first time. The plant dropped leaves near the bottom. However, I learned it is just a stress response. If the stem stays firm and green, all is well. Just reduce watering and wait. New leaves will return in a few weeks.
Expert Advice That Changed My Approach
I am not an expert, but I borrow wisdom from trusted sources. The Royal Horticultural Society (https://www.rhs.org.uk) suggests that succulents like jade prefer to be pot-bound. That means do not repot too often. I repot my jade bonsai every two to three years, only when roots emerge from the drainage hole. Consequently, a tight rootball keeps the plant compact, which is ideal for a miniature tree. Conversely, the American Horticultural Society (https://ahsgardening.org) emphasizes the importance of environmental adaptation. They recommend gradually acclimating a plant to new light conditions to prevent sunburn. I once moved my jade from indoors to full sun without hardening off. Within one day, the leaves turned reddish-brown. That was sunburn. Now I expose the plant to direct sun for one hour a day first, then increase slowly by 30 minutes daily.
Another habit I recommend is rotating the pot a quarter turn every week. I do this so all sides get equal light. That prevents a lopsided canopy. Moreover, I clean the leaves with a damp cloth every month. This removes dust so the plant can photosynthesize better. It sounds small, but I noticed thicker new growth after doing this.
Fertilizing After Shaping
You might be tempted to feed your plant to boost growth. May I suggest restraint? During the first month after pruning, I do not fertilize at all. The roots are stressed, and force-feeding leads to burnt roots. After about 4 weeks, I start with a balanced liquid fertilizer diluted to half strength. I use a 10-10-10 formula. I apply this only once a month during the growing season, roughly from April to September. In winter, I stop completely. This schedule yields compact, slow growth, which is what you want. Rapid growth from heavy fertilizing stretches the internode gaps. That ruins the bonsai look.
Light and Temperature Requirements
During the shaping process, light and temperature determine your success rate. I keep my jade bonsai at a temperature between 65°F and 75°F (18°C to 24°C). If it gets hotter, the plant goes semi-dormant. If it gets colder than 50°F (10°C), the leaves can drop. In winter, I move the pot near a cooler window but keep it away from frost. Frost will kill a jade plant overnight. I lost one plant to cold drafts when I left a window open during a winter storm. Just keep it above 50°F, and honestly, it will reward you.
My Final Thoughts on Shaping Jade Bonsai
Shaping a jade plant bonsai is not difficult, but it does require confidence with the pruning shears. I have killed several plants to learn this exact process. The key lesson most people miss is this: less water, more light. The AHS (https://ahsgardening.org) states that almost any plant will suffer more from excess moisture than from neglect. I couldn’t agree more. So go ahead and make the first cut. That branch you are staring at, it will grow back stronger. The space you clear will open up the trunk line. In two weeks, you will see fresh buds. In a year, you will have a miniature tree that looks decades old. Just remember, I have been where you are. I killed my share of jades. So be braver than I was. Cut, wire, and wait. It works.
Frequently Asked Questions
1. Can I shape a jade plant into a bonsai if it is already tall and leggy?
Absolutely. In fact, leggy growth is the best starting material. I got a leggy plant from a friend last year. The top was heavy and the trunk was bare. I cut the top off completely, leaving about 6 inches of trunk. New shoots emerged from the old leaf nodes within a month. Then I selected one strong shoot to be the new leader. Six months later, it looks like a proper tree. Do not fear the big chop. That is exactly what the plant needs to thicken the trunk. Note that the rosette should face the direction you want the new branch to grow. Make a notch above a node to encourage a new branch from that spot.
2. How long does it take to get a thick trunk?
It takes roughly three to five years to get a trunk that is one inch thick. I grew my largest plant from a cutting in 2019. The trunk is now about 1.5 inches thick at the base. However, you can speed it up by keeping the plant in a larger pot while it grows. Once the trunk reaches your desired thickness, repot into a shallow bonsai pot to restrict growth. Also, do not prune side branches too aggressively during the thickening phase. More leaves mean faster photosynthesis, which thickens the trunk. I let my plant grow wild for two years before I starting shaping it.
3. Is there a difference between a regular jade and a dwarf jade for bonsai?
Yes. Regular jade (Crassula ovata) grows bigger leaves, up to 2 inches long. Dwarf jade (Portulacaria afra) has much smaller leaves and is technically a different species. Portulacaria afra is more forgiving of rigorous training and wiring. I actually prefer Portulacaria afra for tiny bonsai. But for a beginner, regular jade is easier to obtain. Keep in mind that Portulacaria afra is also called a dwarf jade, but it grows faster and produces aerial roots. Both are excellent. Do not let a leaf size obsession stop you from starting. Start with whatever you have. Learn on it. You will get better with each repot.





