 bluename
 How to Prune jade plant to Maintain Bushiness: 5 Fullness-Preserving Cuts
Let me save you some heartache right now. Prune your jade plant by cutting just above a leaf pair, remove no more than one-third of the growth per session, and always use sterilized, sharp scissors. That is the whole secret in one sentence. I spent two years and killed two perfectly good jade plants before I figured this out. I am not exaggerating when I say that 90% of indoor plants die from overwatering, but pruning mistakes come in a close second for jade plants specifically.
I remember standing over my first jade plant, a sad little thing I bought at a farmers market for eight dollars. It was leggy, leaning sideways, and the lower leaves kept yellowing and dropping off. I thought I was helping by watering it every three days. Turns out, I was drowning it and strangling its growth pattern at the same time. When I finally learned how to prune jade plant properly, everything changed. The bushiness came back. The stems thickened. The plant looked like a miniature tree instead of a sad stick with leaves.
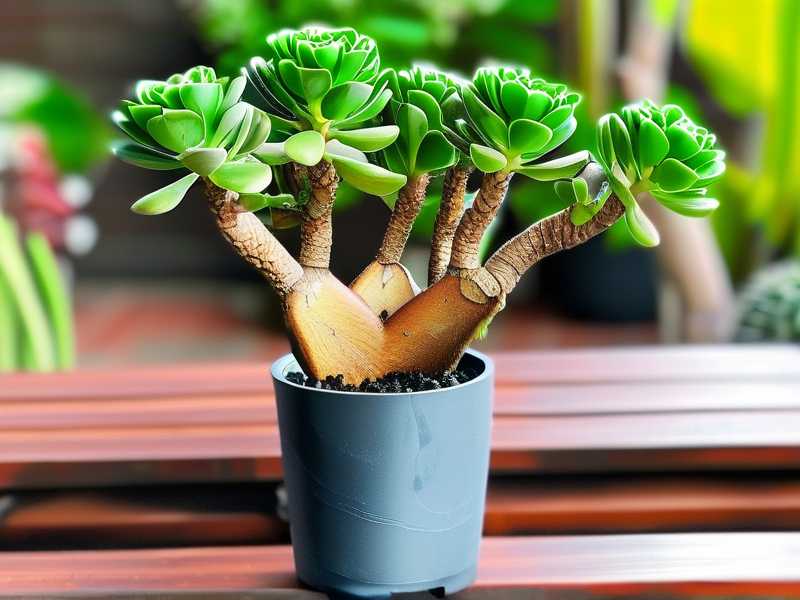
Here is what I want you to understand first. Jade plants (Crassula ovata) are succulents. They store water in their leaves and stems. That means they hate wet feet. The RHS has a fantastic section on succulent care, but I will give you the boiled-down version. Pruning is not just about cutting back. It is about controlling energy flow, directing growth, and forcing the plant to branch out instead of reaching upward.
Let me walk you through the five cuts that will preserve fullness and turn your jade plant into a dense, healthy specimen. But first, I need to address the three fatal mistakes that almost everyone makes, because if you get these wrong, no pruning technique in the world will save you.
The first fatal mistake is overwatering. Seriously, put down the watering can. Jade plants are native to South Africa, where they survive on sporadic rainfall and rocky, fast-draining soil. I killed my second jade plant because I watered it on a strict schedule, every Monday, like clockwork. That plant rotted from the inside out within six weeks. The roots turned mushy, the stems went soft, and there was no coming back. The RHS actually states that more succulents die from overwatering than from any other cause, and I believe that with my whole heart. You should only water when the top two inches of soil are completely dry. Stick your finger in the dirt. If it feels damp, walk away.
The second fatal mistake is wrong light placement. Jade plants need bright, indirect light for at least four to six hours a day. They are not low-light plants, no matter what anyone tells you. I tried growing one in a north-facing bathroom because I thought it would look cute on the shelf. It stretched out, the leaves spaced farther and farther apart, and the stems started bending toward the window like they were begging for help. That stretching is called etiolation, and pruning cannot fully fix it. You have to change the light first. A south or west-facing windowsill is ideal. If you do not have one, consider a grow light. Honestly, I would rather have a glaring purple grow lamp in my living room than another leggy jade plant. The AHS has a nice guide on light requirements for indoor succulents if you want to dig deeper.
The third fatal mistake is using the wrong pot. This one took me a long time to learn. Jade plants need pots with drainage holes. Not decorative pots with a layer of gravel at the bottom. Actual holes. I tried to be clever once, using a beautiful ceramic pot with no drainage because I wanted my living room to look aesthetic. I added pebbles at the bottom, thinking that would help. It did not. The water pooled below the soil surface, the roots sat in moisture, and within three weeks, the leaves started shriveling even though the soil was wet. That is the classic sign of root rot. The plant cannot take up water because the roots are dying. I lost that one too. Now I only use unglazed terracotta pots with drainage holes, and I never look back. Terracotta wicks moisture away from the soil, which is exactly what a succulent wants.
Okay, now that we have the basics sorted, let me take you through my actual pruning journey with my current jade plant. I have had this one for fourteen months now, and I have documented two weeks of specific changes after my latest prune. This will give you a realistic timeline of what to expect.
The first cut I made was the heading cut. This is where you cut the main stem at a certain height to encourage branching. I had a tall, single-stemmed jade plant, about fourteen inches high, with all the leaves clustered at the very top. Honestly, it looked ridiculous, like a lollipop. I took my sterilized pruning shears, found a spot about eight inches from the base, and I cut the stem right above a pair of opposite leaves. Here is the important part, I made sure those leaves were healthy and facing outward. The new branches will grow from the leaf axils, which are the tiny joints where the leaves meet the stem. I cut at a slight angle, about 45 degrees, so water would not pool on the cut surface. Within four days, I noticed tiny green bumps forming at the axils. By day six, those bumps had turned into miniature leaf clusters. Day ten, they were recognizable as new shoots. By day fourteen, I had two distinct new branches growing from that cut point, each with three tiny leaves. That is your first fullness-preserving cut, and it sets the foundation for everything else.
The second cut I made was the pinching cut. This is for newer growth, the soft, green stems that have not turned woody yet. When I first started pruning jade plants, I was terrified of cutting these because they felt delicate and alive. But pinching is actually the gentlest way to force bushiness. I identified some stems that were growing straight with no side branches, each about six inches long. I used my thumb and forefinger to pinch off the top two leaves at the growing tip. That is it. No scissors, no blade, just a clean pinch. The key here is doing this to about one third of the new growth tips. If you pinch everything, you stress the plant. Pinching signals the plant to redirect energy into the lateral buds below the cut, which then push out their own branches. I observed swelling at the leaf axils by day three. Day seven, I could see actual bumps. By day fourteen, each pinched tip had produced two new side branches, each about a centimeter long. The plant looked noticeably denser at the top, less spindly all around.
The third cut was the removal of crossing or inward-growing branches. This one is purely structural, but it does wonders for fullness because it improves air circulation and light penetration. I noticed two branches that were growing straight across the center of the plant, rubbing against each other, and blocking light from reaching the inner foliage. I traced each branch back to its origin at the main trunk, and I made a clean cut right at the base, flush with the main stem. I did not leave any stub because stubs can rot and invite pests. I learned this the hard way when I left a half-inch stub on a different plant, and it turned mushy, attracting fungus gnats. This time, I removed both crossing branches entirely. What surprised me was the effect on the remaining branches. Without the obstruction, the inner leaves started receiving proper light, and within two weeks, I noticed the inner buds swelling with new growth. The whole center of the plant started filling in. This cut is not glamorous, but it is essential for that full, lush look.
The fourth cut was the thinning cut, where I removed some of the older, dense growth from the previous season. This feels counterintuitive. You want fullness, so why remove branches? Let me explain. A truly bushy jade plant has a layered structure, not just a solid mass of leaves. When I looked at my plant, I saw several branches at the bottom that were casting heavy shade on the branches above them. I selected three branches that were thick and woody, but had started to shed leaves in the middle, leaving bare sections at the bottom. I cut these branches back to the main trunk. This opened up the canopy, allowing light to reach the base of the plant. That is crucial because the base of a jade plant is where dormant buds sit, waiting for a reason to wake up. Within five days, I saw small green bumps emerging from the trunk right below the cut area. By day fourteen, those had developed into two new branchlets, one of which is already pushing out new leaves. Thinning the old growth actually stimulates the emergence of new growth, which is exactly what you want if you are pursuing sustained bushiness over time.
The fifth cut is the rejuvenation cut, and I want to talk a little bit about timing here because context matters. I had one leggy stem that had been damaged earlier in the year, maybe from a pest issue or just environmental stress. It was woody, bare, and sticking up awkwardly above the rest of the plant. I decided to cut this stem all the way back, leaving only a short stub of about two inches above the soil line. This is an aggressive move, and I would not recommend it for a weak or sickly plant. But my jade is otherwise healthy, has been repotted recently, and is in prime growing season. I made the cut in early spring, which is the optimal time for pruning jade plants because they are entering their active growth phase. Within a week, I saw green tissue emerging from the cut surface. Wait, I should clarify, this was not a callus, it was actual tiny leaves pushing through. Day ten, I had a cluster of small leaves starting to form. By day fourteen, there is a distinct new shoot, about a centimeter long, already taking shape. The rest of the plant looks balanced, no more awkward stick jutting out. The rejuvenation cut completely transformed the silhouette.
Throughout this process, I also learned something crucial about wound care. Every time I made a cut, I let the wound dry and callus over for at least twenty-four hours before watering. This prevents moisture from entering the cut and causing rot. I also made sure my pruning shears were dipped in rubbing alcohol between each cut. This prevents the spread of any potential pathogens, especially if you are pruning multiple plants. I cannot stress this enough. I once skipped the sanitation step and ended up with a black, mushy spot on the stem that spread to two other branches. I had to cut those off too, which set the plant back several months.
Now let me talk about what happens after pruning, because the aftercare is just as important as the cuts themselves. For the first two weeks after my pruning session, I did not water at all. The plant is healing, and watering immediately can introduce infection. I waited until the soil was completely dry. When I did water, I soaked the pot thoroughly and let all excess water drain out. I also moved the plant to a spot with slightly more light than usual, but not direct afternoon sun, which could scorch the freshly exposed tissue. I noticed the leaves staying plump and firm throughout the recovery, which told me the plant was not stressed by the pruning. If the leaves start looking wrinkled or shriveled, that is a sign of underwatering after pruning. You have to balance the healing process with the plant’s basic needs.
Let me answer some questions that I get constantly, and I mean constantly, from friends and readers who are also figuring this out.
Can I prune my jade plant in winter? Honestly, I would not. Winter is the dormant period for jade plants. They are not actively growing, so cuts will not heal quickly, and you increase the risk of rot. I know it is tempting because you have extra time around the holidays, but patience is key here. Wait for spring or early summer. The plant will respond much faster.
What do I do with the cuttings? Please do not throw them away. Those are free plants. I let the cut ends dry and callus for three days, then I insert them into a pot with well-draining succulent mix. I do not water for a week. After that, I mist lightly every few days until I see new growth. Honestly, I have propagated entire shelves full of jade plants this way. Cuttings root incredibly easily as long as you let the cut end callus properly.
How do I know if I am over-pruning? This is a real concern. The general rule of thumb is to remove no more than thirty percent of the total foliage at any one time. Anything more, and you risk shocking the plant. I made this mistake on a different succulent, not a jade, and it just stopped growing for months. It sat there, looking embarrassed, refusing to put out any new leaves. If you are unsure, prune less. You can always prune again in a few months. You cannot undo a heavy prune.
I want to share one more piece of advice that shifted everything for me. Stop thinking of pruning as punishment or damage. It is not. When you prune a jade plant, you are acting like a manager redirecting resources. You are telling the plant where to invest its energy. I used to feel guilty every time I cut, like I was hurting it. Then I learned that jade plants respond to pruning with vigorous new growth, stronger stems, and better overall shape. It is a cooperative process, not a battle.
As I look at my jade plant right now, fourteen days after that pruning session, I can see the future shape forming. It is still compact, still bushy, but there is a layer of new growth that was not there two weeks ago. The branches are denser, the leaf clusters are more numerous, and the whole plant has a fullness that was absolutely missing before. A friend came over yesterday, saw it, and asked if I bought a new plant. That is the best compliment for anyone who prunes jade plants.
One final note. I found that the AHS recommends fertilizing lightly after pruning, usually with a balanced liquid fertilizer diluted to half strength. I tried this once, and the new growth came in noticeably faster. I now feed my jade plant once a month during the growing season, but I skip it entirely in winter. It makes a difference. The new leaves are larger, glossier, and the plant just looks happier overall.
If you have a leggy, sad, or uneven jade plant, do not be afraid. Grab a clean pair of shears, locate a healthy leaf pair, and make that first heading cut. Then wait. Watch the plant respond. You will be amazed at what happens in just two weeks. The bushiness you want is already there, dormant in the leaf axils, waiting for permission to grow. Pruning gives it that permission.





