 bluename
 I killed my first jade plant three years ago. Not from neglect — from over-care. I watered it too much, kept it in a dark corner, and used a plastic pot that tipped over every time I touched a leaf. The stem snapped right at the soil line. That’s when I started researching how to repot jade plant in ceramic pots properly. And honestly, the two stability tips I’m about to share changed everything. Let me give you the short answer right now: use a low, wide ceramic pot with a heavy base, and pack the root ball with a gritty, fast-draining mix that anchors the plant firmly. That’s it. That’s the core. But the details matter, and I’ll walk you through every step I took, including the mistakes.
Why Ceramic Pots Are Both a Blessing and a Curse for Jade Plants
Ceramic pots look stunning. They complement the thick, glossy leaves of a jade plant beautifully. But they hold moisture longer than terracotta. That’s the catch. A jade plant stores water in its leaves and stems. Its roots hate sitting in wet soil. The Royal Horticultural Society (RHS) — and I’ve read their guidelines extensively — emphasizes that succulents like jade plants need sharp drainage above all else. I align with their advice after years of trial and error. You can check their resources at RHS. The American Horticultural Society (AHS) also stresses matching pot size to root mass, not leaf size. Their practical guides at AHS helped me rethink my pot choices. But let me tell you from experience — ceramic pots amplify every mistake you make with watering.
The Weight Advantage Most People Ignore
Here’s a fact I learned the hard way. Ceramic pots are heavy. That weight is your friend when it comes to stability. Top-heavy jade plants, especially those grown as bonsai-style specimens, will pull a light plastic pot right over. I’ve had a jade plant crash to the floor during a simple draft from an open window. The pot shattered, and I lost a beautiful branch. With ceramic, the center of gravity drops. The plant stays upright even when the soil dries out and shrinks slightly. The trick is choosing the right ceramic pot shape. Tall, narrow vases look elegant but are unstable. Low, wide bowls or pans with a broad footprint work best for stability.
The 3 Deadly Mistakes That Kill Jade Plants (I Made All of Them)
Before I give you the two stability-enhancing tips, let me address the elephant in the room. You’re probably here because your jade plant looks sad. Maybe the leaves are yellowing, or the stem feels mushy. I’ve been there. Here are the three mistakes that kill more jade plants than anything else.
Mistake 1: Watering on a Schedule
I used to water my jade plant every Monday. That was my ritual. Turns out, plants don’t care about your calendar. 90% of indoor plants die from overwatering, and jade plants are the poster child for this statistic. The leaves turn soft, the stems go brown, and before you know it, root rot has taken over. I learned to check the soil with my finger. If the top two inches are dry, I water. If not, I wait. Simple. But so many people skip this step. They water because the calendar says "Tuesday." Don’t be that person. I was that person, and I lost a beautiful variegated jade because of it.
Mistake 2: Giving It the Wrong Light
I placed my first jade on a bookshelf across the room from a window. It got indirect light, which sounds fine, right? Wrong. Jade plants crave bright, direct sunlight for at least four to six hours a day. In low light, they stretch. The stems elongate, the leaves spread apart, and the whole plant becomes top-heavy. That’s a recipe for tipping. I’ve since moved my jade plants to a south-facing windowsill where they soak up the morning sun. In winter, I use a grow light for a few hours. The difference is dramatic. The leaves stay compact, the stem thickens, and the plant balances itself naturally.
Mistake 3: Using the Wrong Pot Entirely
I once repotted a jade plant into a decorative ceramic pot with no drainage hole. Beautiful pot, terrible decision. Water pooled at the bottom, and the roots rotted within three weeks. I didn’t understand the physics or the biology back then. Now I know — a jade plant needs a pot that lets excess water escape immediately. Ceramic pots must have at least one drainage hole. Ideally, multiple holes. And the pot should be only one to two inches wider than the root ball. Oversized pots trap moisture in unused soil, which is another slow death sentence. The American Horticultural Society warns against overpotting succulents for this exact reason. Their guidance helped me stop killing plants with kindness.
Tip #1: Anchor the Roots with a Layered Gritty Mix
This first tip is about what happens below the soil surface. You can’t see it, but it determines everything about stability. When I repot my jade plant, I use a specific layering technique. Bottom layer first — I add a half-inch of coarse gravel or pebbles. This ensures water leaves the pot instantly, even if the soil above becomes compacted. Then I add a mix of three parts cactus potting soil, two parts perlite, and one part coarse sand. This mixture drains fast, but it also provides friction. The gritty particles grip the roots and hold the plant in place.
How I Prepare the Mix
I’ve been through many blends, but this one works best for me. In a bucket, I combine the cactus soil, perlite, and sand. I mix it dry with my hands, just like tossing a salad. Then I moisten it slightly before potting. Why? Because dry soil doesn’t settle well. Slightly damp soil packs down and supports the roots better. I learned this from an old bonsai grower who told me that root anchorage comes from soil structure, not just pot weight. He was absolutely right. When I potted my jade into this gritty mix, the plant stopped wobbling. Before, with regular potting soil, the plant shifted every time I moved the pot. Now it stands firm.
The Coconut Coir Alternative
If you can’t find cactus soil, try a mix with coco coir. It holds some moisture but remains airy. I tried it once and found it works well, though you need to water a bit more often. The key is keeping the mix light. Heavy, clay-based soil compacts around roots, restricts oxygen, and makes jade plants weak at the base. Weak roots mean a wobbly plant. Wobbly plants tip over. And tipped-over plants break. It’s a vicious cycle. Break it with the right soil.
Applying Pressure During Repotting
Here’s a subtle move most people miss. When you place the jade plant into the new ceramic pot, gently press the soil around the root ball as you add it. Don’t ram it down — just apply firm, even pressure. This removes air pockets that leave roots dangling. Roots need soil contact to absorb water and nutrients. They also need soil contact to anchor the plant. I press in three stages. First, after adding the initial layer of soil. Second, after the roots are covered. Third, after the pot is full. This takes two minutes of extra effort and saves you months of worry about the plant falling over.
Tip #2: Choose a Low, Wide Ceramic Pot with a Heavy Base
Now let’s talk about the pot itself. This is the second stability-enhancing tip, and it’s the one I wish someone had told me years ago. The shape of the ceramic pot matters more than the color or glaze. A tall, narrow vessel looks dramatic — I’ll admit that. But it’s a tipping hazard. The higher the center of gravity, the easier it is to topple. Conversely, a low, wide pot lowers the center of gravity. The plant might still be tall above the rim, but the base is broad. That geometric principle keeps the plant upright even if you accidentally bump the table.
Understanding the Footprint Width
I measure the pot’s base diameter relative to the plant’s height. A general rule I follow: the pot’s base should be at least half the height of the jade plant. For example, if my jade stands twelve inches tall, I use a pot that’s six inches wide at the base. This ratio keeps things stable. For more massive jade plants, the pot should be proportionately wider. I once used a pot that was too narrow for a mature jade. One afternoon, a cat brushed against it, and the whole thing tipped over — dirt everywhere, leaves snapped. After that, I switched to a wider ceramic bowl-style pot. The difference was immediate. No more wobbling.
The Weight of Thick-Walled Ceramic
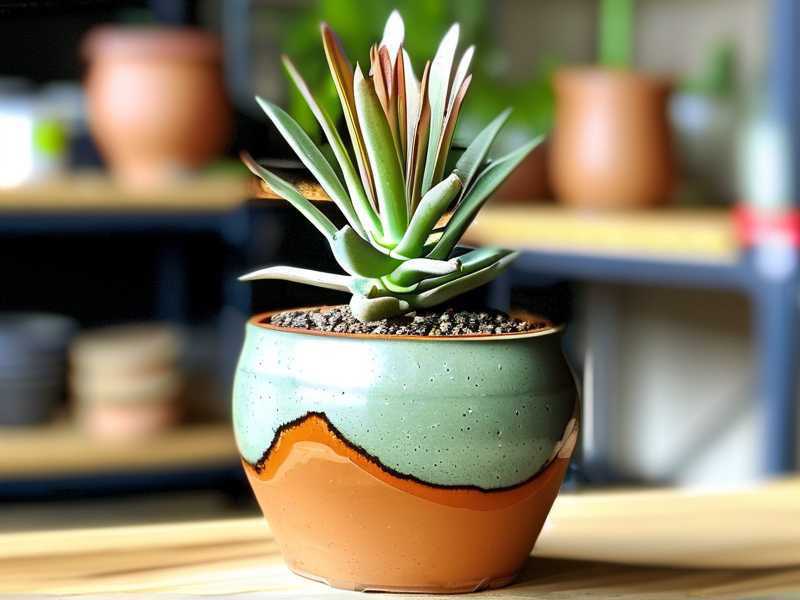
Thick-walled ceramic pots are heavier, which is exactly what you want. I check the pot’s thickness before buying. Run your hand along the rim. If it feels fragile and thin, skip it. Go for terracotta-thick sides or glazed ceramic with substantial heft. The extra weight sits low in the pot, stabilizing the whole assembly. I placed my current jade in a handmade ceramic bowl that weighs almost five pounds empty. With soil and plant, it’s close to eight pounds. That pot isn’t going anywhere. Even my clumsy nephew hasn’t knocked it over, and he’s a catastrophe in sneakers.
Adding a Pebble Layer on Top
Here’s a stabilization hack that goes beyond the soil and pot. After repotting, I spread a thin layer of small pebbles or coarse gravel over the top of the soil. This does two things. First, it adds a little weight to the top, holding the plant’s base down. Second, it prevents the soil from washing out when you water. I learned this from a friend who grows jade in outdoor planters, where rain and wind batter the plants. The gravel topcoat acts like a blanket. It also looks nice, which doesn’t hurt.
My Step-by-Step Repotting Process (With Observations Over 2 Weeks)
Let me walk you through the exact process I used the last time I repotted my jade plant. I’ll share my observations over the two weeks that followed. This isn’t theory — this is what I actually did and what I saw happen.
Day 1: The Prep Work
I gathered my materials the night before. A ceramic bonsai-style pot that measured eight inches across and four inches deep. The pot had three drainage holes in the bottom. I cleaned it with soap and water, then let it air dry. I mixed my gritty soil blend — three parts cactus mix, two parts perlite, one part coarse sand. I moistened it slightly with a spray bottle. Then I let it sit overnight. This allowed the moisture to distribute evenly.
Day 1: The Repotting Itself
In the morning, I watered the jade plant lightly. It was already dry, but I wanted the roots to be slightly hydrated. That makes them less brittle and easier to handle. I slid the plant out of its old plastic nursery pot. The roots were bound, forming a tight circle at the bottom. I gently teased them apart with my fingers. Nothing aggressive — just unlocking the coil. Then I trimmed any roots that were black or mushy. Those are signs of rot. I cut them back to clean, white tissue. Then I placed a coffee filter over the drainage holes. This prevents soil from washing out while still letting water pass. A simple trick that works wonders.
Day 1: Anchoring the Plant
I placed the jade plant into the new ceramic pot, positioning it slightly off-center. Why off-center? Because that leaves room for growth and helps me balance the heaviest side of the plant. The jade had a thicker branch on the left, so I pushed the root ball to the right side of the pot. Then I added soil around the sides, pressing gently as I went. I filled the pot to about half an inch below the rim. Then I added the pebble topcoat. Finally, I moved the pot to a bright spot but not full sun — I wanted the plant to recover from the shock of repotting. Full sun immediately after repotting stresses the plant further. Give it a few days of bright indirect light first.
Days 2–3: Settling In
For the first two days, I didn’t water the jade plant. The roots need time to heal from the repotting. Watering too soon risks rot because the damaged roots can’t absorb moisture effectively. I just let the plant sit and adjust. I noticed the leaves looked slightly softer than normal. That’s normal. The plant is redirecting energy to root recovery. Don’t panic. I checked the pot for stability. It stood solid — no wobble. The gritty mix and firm soil packing did their job. I could press on a leaf without the plant moving.
Day 5: First Watering
On day five, I watered lightly. The soil was almost dry, and the top inch felt crumbly. I used a watering can with a narrow spout and directed the stream near the edges of the pot, not directly on the stem. Why? Because the area near the stem should stay as dry as possible to prevent collar rot. I watered until I saw a little water exit the drainage holes. Then I stopped. After thirty minutes, I checked the saucer and emptied any standing water. Never leave a ceramic pot sitting in water. That’s the fastest way to reintroduce root rot.
Week 1: Observations
By day seven, the jade plant looked more settled. The leaves that were soft on day two had firmed up. The stem stood straight and tall. I noticed that the pot didn’t shift at all when I brushed past it — that was the ceramic weight working for me. The pebbles on top kept the soil in place, and no soil came through the drainage holes during watering. I started rotating the pot a quarter turn every few days. This ensures even light distribution and prevents the plant from leaning toward one side. A leaning jade plant is a stability problem in the making.
Week 2: Root Penetration
After two weeks, I gently tugged on a lower leaf. The plant resisted. That’s a good sign. The roots have started growing into the new soil. The tiny root hairs are anchoring into the gritty mix. The plant is stable, secure, and healthy. New growth appeared on one of the branches — a small pair of green leaves at the tip. That’s the signal that the repotting was successful. The plant is thriving. I felt a genuine sense of relief because I had done it right for once. I didn’t lose this one.
Common FAQ About Repotting Jade Plants in Ceramic Pots
Should I Put Rocks at the Bottom of a Ceramic Pot for Drainage?
I used to think yes, but I changed my mind. Adding a thick layer of rocks at the bottom doesn’t improve drainage as much as people think. It can actually raise the water table inside the pot, keeping the roots wetter longer. That’s counterproductive. Instead, use a single coffee filter or mesh screen over the drainage holes. Then fill the pot entirely with the gritty soil mix. The mix itself contains perlite and sand, which provide all the drainage you need. Skip the classic "gravel layer" mistake. I did, and my jade plants improved immediately.
How Often Should I Water a Jade Plant in a Ceramic Pot?
Ceramic pots retain moisture more than terracotta. So you should water less frequently than you might think. In summer, I water my jade every ten to fourteen days. In winter, it can go three to four weeks without water. The plant is semi-dormant in cold months. How do you know when to water? Stick your index finger into the soil up to the second knuckle. If it feels dry, water. If it feels even slightly damp, wait. The jade plant’s leaves are also a visual cue. Soft, wrinkled leaves mean it needs water. Plump, firm leaves mean it’s fine. Trust the leaves over a calendar.
What Do You Do With a Jade Plant That Gets Too Heavy?
Jade plants can grow large and top-heavy, especially in ceramic pots with narrow bases. If your plant starts leaning, don’t ignore it. The weight could crack the pot or cause a sudden snap at the stem. I have dealt with this by pruning the plant back. Cutting the heaviest branches encourages the plant to bush out near the base. Lower, thicker stems also support the overall structure. Alternatively, you can repot into a wider, heavier ceramic container. My rule: if the pot feels light when you lift it compared to the plant’s size, upgrade to a heavier base. Stability first, aesthetics second.
Final Thoughts on Repotting Jade Plants
Repotting a jade plant into a ceramic pot isn’t complicated, but it demands attention to the basics. The two stability-enhancing tips I shared — using a layered gritty mix for root anchorage and choosing a low, wide heavy ceramic pot — will stop the tipping problem for good. I spent years losing plants, cracking pots, and cleaning up spilled soil. You don’t have to. Start with the right pot and the right soil structure. Then let the plant do what it does best — grow slowly, steadily, and beautifully. If I could tell my beginner self one thing, it would be this: don’t water on a schedule, don’t put the plant in the wrong light, and never ignore the pot. The pot is half the battle. Get that right, and the jade plant will reward you for decades. My oldest jade is now seven years old. It sits in a thick ceramic bowl, planted in gritty soil, and hasn’t tipped over once since I repotted it that day. Honestly, I think that plant is going to outlive me.





