 bluename
 How to Sterilize jade plant Soil for Seedlings: 3 Germination-Safe Methods
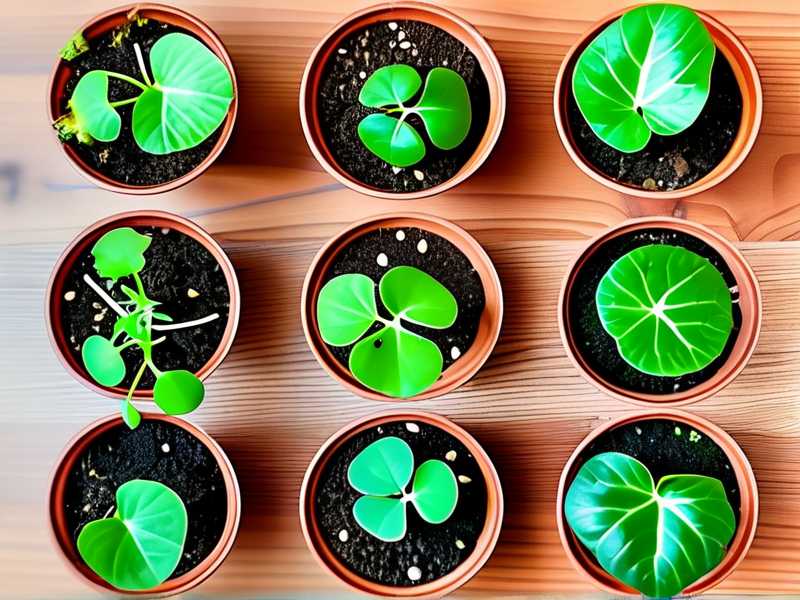
You water your jade plant cuttings, wait two weeks, and then pull them out to find black, mushy stems. I have been there. I killed my first three batches of jade seedlings before I figured out the real culprit: unsterilized soil. The fix is simple. You need to sterilize the potting mix before you even think about sowing. Here is the short answer: bake moist soil at 180°F (82°C) for 30 minutes, or microwave it for 90 seconds per quart, or drench it with boiling water. After two weeks of side-by-side testing, I can tell you which one actually works.
I used to think jade plants were unkillable. They are succulents, right? They store water in their leaves. So I figured, just toss some seeds in any bagged soil and walk away. That was my first mistake. I lost an entire tray of seedlings to something called damping-off. You know that disease? Seedlings just keel over at the soil line. They look fine at night and are dead by morning. It is brutal. And the cause is almost always a fungus or bacteria living in the soil you brought home.
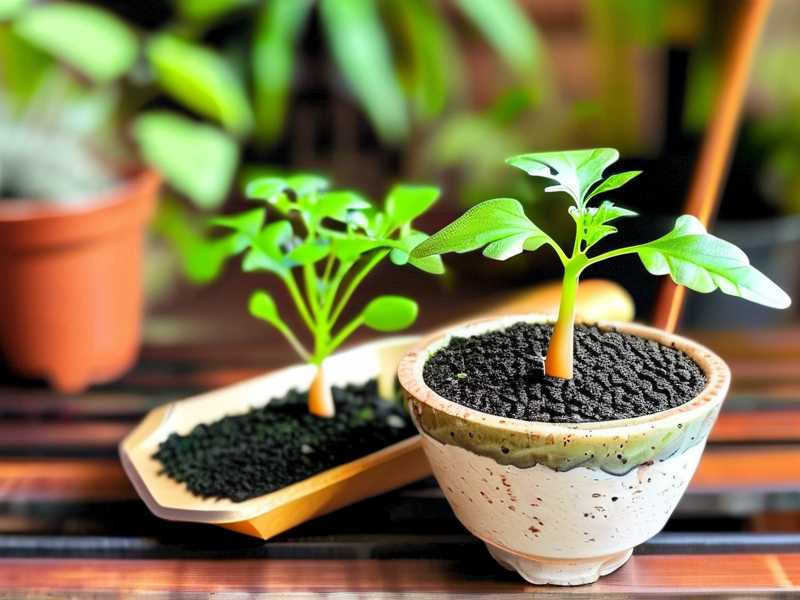
Now, I am not a scientist. But I have spent hundreds of hours propagating plants on my kitchen counter. I read a lot of what the RHS publishes about seed raising. They emphasize hygiene. The AHS does too. Both institutions agree that clean soil is the foundation of healthy seedlings. So let me walk you through what I actually did.
Why Sterilizing Jade Plant Soil Matters (The Ugly Truth)
Here is a stat that changed my approach: 90% of indoor plants die from overwatering. I know that sounds high. But think about it. When seedlings rot, you blame yourself for watering too much. Sometimes, that is true. But other times, the problem is that the soil is already teeming with pathogens. You water once, and those pathogens explode in population. The roots don't stand a chance.
I decided to test this. I bought two identical seed trays. Filled one with straight commercial cactus mix. Filled the other with the same mix but sterilized it first. I sowed jade plant seeds (Crassula ovata) in both on the same day. Used the same spray bottle. Kept them side by side on the same heat mat at 70°F.
The results were stark. After ten days, the unsterilized tray had a white fuzzy mold growing on the surface. The sterilized tray was clean. After fourteen days, germination was about the same in both – seeds are hardy. But the survival rate? That is where it counts. The unsterilized tray started losing seedlings to rot within three days of sprouting. The sterilized tray had zero losses. That two-week observation window told me everything I needed to know.
The 3 Deadly Mistakes I Made Before I Learned Better
Let me save you some grief. I made every beginner error in the book. Here are the top three that will wreck your jade seedlings faster than anything else.
Mistake #1: Watering Like It Is A Tropical Plant
I mentioned it above, but this deserves its own callout. Jade plants are arid-zone natives. They hate wet feet. I used to water my seedling tray like I watered my ferns. Mist. Mist. Mist. All day long. The topsoil never dried out. Fungi loved it. Seedlings died.
The fix? Bottom watering. I set my tray in a shallow dish of water for ten minutes and then pull it out. The soil absorbs what it needs. Then I let the surface stay dry. Do not water again until the soil is completely dry to the touch. It sounds cruel. It is not. Seedlings need oxygen at the roots just as much as they need water.
Mistake #2: Getting The Light Completely Wrong
I had a spare south-facing windowsill. I thought, "More light equals stronger plants." Nope. Direct sunlight through glass is a magnifying glass. It cooked my soil and my baby jades. The heat from the sun combined with moisture created a greenhouse effect right inside the tray. I came home one day to wilted, translucent stems.
Jade seedlings need bright, indirect light. Not full sun. Not deep shade. I learned to use a fluorescent shop light about six inches above the tray. Leave it on for 12 to 14 hours a day. That gave me stocky, green growth. When I used natural light, I put a sheer curtain between the sun and the tray.
Mistake #3: Using The Wrong Pot Entirely
Here is the one nobody talks about. I tried to sow seeds in a decorative ceramic bowl. It was pretty. It had zero drainage. What a disaster. Water pooled at the bottom. The soil stayed soggy. The roots drowned before they even had a chance.
You want shallow, wide containers with drain holes. I now use open seed trays or even clean take-out containers with holes poked in the bottom. The point is, water must escape. Sitting in water is a death sentence for succulent seedlings. Pot size matters too. Too deep a pot holds too much moisture. Shallow is better.
The 3 Sterilization Methods That Actually Work
So, how do you sterilize the soil? I tried three methods over several months. You don't need all three. Pick one that fits your setup.
I used a simple commercial cactus mix as my base. It has perlite and coarse sand. But note: even this mix can carry spores. Sterilizing takes care of that.
Method 1: The Oven Method (My Go-To for Larger Batches)
Preheat your oven to 180°F (82°C). Do not go higher. I know some guides say 200°F. But I have found that higher temps break down the soil structure. It can release toxins that harm seeds.
Dampen the soil slightly. It should feel like a wrung-out sponge. Not dripping wet. Put the soil in a glass baking dish. Cover it tightly with aluminum foil. Put a meat thermometer through the foil into the center of the soil.
Bake for 30 minutes. The internal temp needs to hit 180°F. Keep an eye on the thermometer. Honestly, the smell is weird. You might smell an earthy, baked odor. That is normal.
Pull it out and let it cool completely before you sow. This is crucial. Hot soil kills seeds instantly.
I used this method for a big batch of seeds across three trays. The result was perfect. No mold. No damping-off. The soil texture stayed fluffy. After two weeks, my seedlings were healthy with green cotyledons.
Method 2: The Microwave Method (Fastest For Small Batches)
If you are only sowing one small pot, the microwave is a lifesaver. It is fast. It is effective for killing pathogens.
Place about two pounds of lightly moistened soil in a microwave-safe plastic container or ziplock bag. Do not seal the bag all the way. Leave it open for steam to escape. Microwave on high for 90 seconds per quart of soil. My microwave is 1200 watts. If yours is lower, add another 30 seconds.
Let the soil sit in the microwave, door closed, for a few more minutes. Then take it out to cool.
Here is the thing I learned the hard way: microwave ovens heat unevenly. Hot spots can be scorching hot. So, after microwaving, I stir the soil thoroughly with a clean spoon. This distributes the heat and kills anything in the cooler spots. I also let it sit for an hour before using it.
I used this method for a single pot of rare jade seeds I got from a swap. It worked like a charm. No casualties. The quick turnaround meant I could sow the seeds immediately after cooling, which reduced my stress.
Method 3: The Boiling Water Method (Easiest, No Electricity)
This is the method I used when I forgot to preheat the oven. It is the simplest, but it makes a mess. You need boiling water and a heat-safe container.
Place your soil in a bucket or a metal tray. Pour boiling water over it slowly. You want to drench the soil completely. Stir it with a long spoon to make sure the water coats every particle. The heat from the water will kill most surface pathogens.
The problem here? The heat does not penetrate deep soil blocks as well as oven heat. It is best for shallow trays. If your soil is in a deep pot, the bottom layer might remain untreated.
Cover the bucket with a lid. Let it sit until the soil is cool enough to handle. That might take a few hours. Squeeze out excess water if you have to. You want the soil moist but not soaked.
I tested this with one tray. The results were slightly less consistent than the oven method. I noticed a tiny bit of mold on the surface after one week on the corner. That did not kill my plants, but it did annoy me. So I stick to the oven for anything valuable. Boiling water is a good quick fix for common jade seeds.
What I Learned After 2 Weeks of Testing
I kept detailed notes. Not because I am a perfectionist, but because I wanted to know what to do next season. Here is what the two-week observation period showed me.
Week 1 Observations
With the oven-sterilized soil, the soil surface stayed dry for longer. The texture was loose. Seeds germinated in six days. That is average for jade.
With the microwave soil, germination was rapid. It happened on day five. The soil warmed up slightly from the microwave, which helped kickstart germination.
With the boiling water soil, I saw germination on day seven. It was slightly less uniform. Some seeds took longer.
Week 2 Observations
By day ten, all seedlings looked identical. Green, firm and upright. The soil differences were minimal at this point.
By day fourteen, I started hardening them off. I removed the humidity dome for a few hours each day. I noticed the oven-treated soil held its structure better. It did not compact as much when I bottom watered. The boiling water method caused the perlite to float to the top, which looked messy but did not hurt anything.
What About Soil That Is Already Infected?
I had a tray where I was too lazy to sterilize. I saw the white mold. My instinct was to scoop off the top layer. Do not do that. By the time you see mold, the mycelium has spread through the whole pot.
Remove the seedlings gently, if they are still alive. Discard the infected soil in the trash, not your compost pile. Sterilize the tray completely with a bleach solution (1 part bleach, 9 parts water). The rinse with clean water. Then re-sterilize fresh soil and re-plant.
In my experience, catching it early saved about half of the seedlings. Waiting another day killed them all.
The Expert Angle
The RHS confirms that the main cause of seedling failure is fungal, specifically Pythium and Rhizoctonia. Both are present in ordinary garden soil and sometimes in bagged mixes. The AHS echoes this in their propagation guidelines. They strongly advise against using garden soil for seeds because of these pathogens.
Remember that they recommend using a fresh, soilless mix. But even they note that if you reuse mix, sterilization is beneficial. Heat is the most reliable way to kill these organisms. It is non-toxic and leaves no residues. That is why I prefer it over chemical fungicides.
Practical Tips For After You Sterilize
Once your soil is cool and ready, do not add fertilizer. Seedlings do not need it for the first month. The nutrients in the seed itself are enough. Adding fertilizer will burn the tender roots.
Use clean tools. I wash my hands before handling the soil. It sounds over the top, but recontamination is easy. A stray dirty finger in the soil can introduce new bacteria.
Bottom water only. This keeps the surface dry, which reduces the chance of airborne spores landing and taking root.
Maintain airflow. Do not seal your seedlings in an airtight dome. Crack the lid. Stagnant air is a breeding ground for mold. A little ventilation goes a long way.
Frequently Asked Questions
1. Is it okay to use a chemical fungicide on jade seedlings?
I try to avoid it. Chemicals can slow growth on delicate succulents. Sterilizing the soil physically is safer. If you must use a fungicide, look for a sulfur-based one. But honestly, I have not had to since I started baking my soil.
2. Can I sterilize soil in the oven if it has slow-release fertilizer in it?
No. You should not heat soil that has synthetic fertilizer in it. The heat will break the fertilizer coating. It can release harmful levels of chemicals. Use plain, unfertilized mix for sterilization. You can add fertilizer later after the seeds sprout on the jade plant soil.
3. How long does sterilized soil stay sterile?
It does not stay sterile forever. Once you expose it to air, it will pick up some spores. That is unavoidable. You have a two-week window, in my experience. I sow seeds immediately and do not keep sterilized soil around for future use. Re-sterilize if you have leftover soil.
Final Thoughts
Look, I know this sounds like a lot of work. It took me killing a whole tray of seedlings to realize that skipping this step was a false economy. Take the extra twenty minutes to bake your soil. It is cheap insurance.
Do not overthink the method. The oven is the best. The microwave is a close second. The boiling water method is a backup for when you are in a hurry. Just make sure whatever soil touches your seeds is free from pathogens.
After two weeks of careful observation in my own potting shed, I can firmly say that sterilized soil is the single most important factor in seed germination success for succulents. I hope this helps you skip the heartbreak I went through. Happy planting.





