 bluename
 How to Repot jade plant in Terra Cotta Pots: 2 Drainage-Boosting Tips
If you've ever watched a jade plant turn to mush, you already know the real problem. 90% of indoor plants die from overwatering. I learned this the hard way when my first jade turned into a brown, soggy mess within three weeks. So here is the direct answer you need right now: use a terra cotta pot with a large drainage hole, and mix 50% perlite or coarse sand into your succulent soil. That's it. Those two moves will save your plant more than any fancy fertilizer ever will. The terra cotta breathes, and the extra grit keeps water moving. I lost three jade plants before I figured this out. Let me walk you through the exact steps I use now, plus the two drainage tricks that finally stopped my rot cycle.
Why Terra Cotta Is Your Jade Plant's Best Friend
I remember standing in my kitchen, staring at a beautiful glazed ceramic pot. It looked stunning on my shelf. But my jade plant hated it. The glaze traps moisture like a sealed plastic bag. Terra cotta, on the other hand, is porous. It literally sweats out excess water through the walls. Root systems stay drier between waterings.
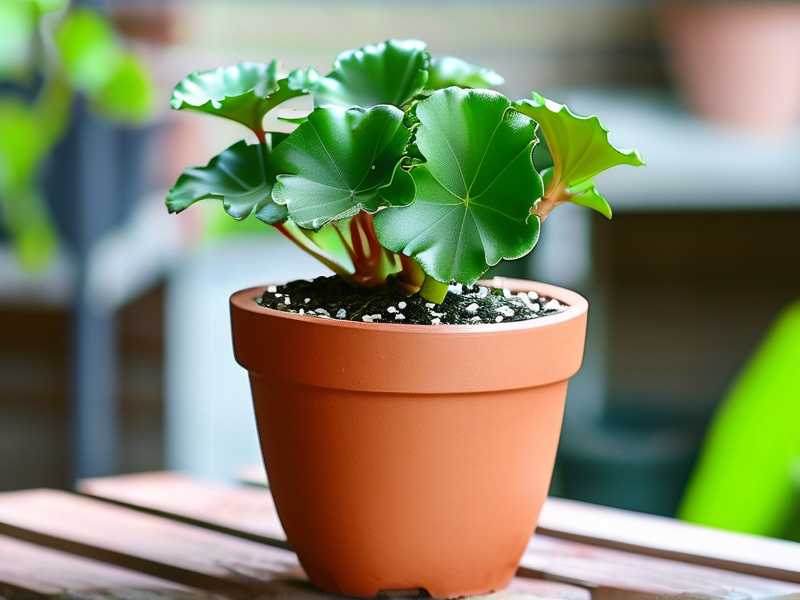
The Royal Horticultural Society (RHS) actually highlights how crucial free-draining conditions are for succulents. They suggest gritty compost with plenty of drainage material. Terra cotta covers that porous requirement naturally. I personally find that my jade roots dry out twice as fast in unglazed clay versus ceramic.
Another key detail? Terra cotta pots are heavier. That's a good thing. Top-heavy jade plants grow thick trunks and dense leaves. A lightweight plastic pot tips over easily. I've knocked over my fair share, spilling soil everywhere. But my heavy clay pot stands firm. It's also easier to tell when soil is completely dry. You can feel the coolness of the pot. If it feels cold and damp, skip watering. If it feels warm and dry, that's your signal.
The 3 Deadly Mistakes That Kill Jade Plants
Many people ask me why their jade keeps dying. They're doing everything they think is right. But I keep seeing the same three mistakes repeated. Once I stopped these, my plants finally thrived.
Mistake #1: Overwatering
This is the number one killer. Nobody wants to hear it, but overwatering kills more succulents than under-watering ever will. The plant gets a little cup once or twice a week, and the soil stays damp all the time. Fungus moves in, roots rot, and leaves fall off.
I used to water mine like a normal houseplant. Every Sunday, without fail, I gave it a good soak. That schedule destroyed two of my jades before I finally learned better. Jade plants store water in their leaves and stems. They thrive on neglect. Wait until the soil has been dry for at least a week before even thinking about water.
The fix is simpler than you think. Stick your finger into the drainage hole. If the soil feels bone dry, that means it's time. In winter, I water mine maybe once a month. In summer, every two to three weeks. My jades look better now than they ever did on that weekly schedule.
Mistake #2: Getting Light Wrong
Jade plants love sun. I kept my first one on a low-light shelf near my desk, thinking it looked nice. Leaves started stretching toward the window. The stems got leggy and weak. It looked like a sad vine instead of a tree.
What I discovered is that jade needs at least six hours of bright, direct light. A south-facing windowsill is ideal. If you don't have one, a grow light works wonders. I have one jade that sits right in a west-facing window, and it's slowly turning beautiful red edges on the leaves. That means it's getting enough light.
If you move your plant to a sunnier spot, do it gradually. I learned this when I pushed a new jade outside too quickly. The leaves got scorched and turned pale yellow in just one day. Slowly acclimate it over a week or two.
Mistake #3: Choosing the Wrong Pot
I loved the look of those glazed bowls without drainage holes. They look so clean and modern. But they are death traps for jade. I killed my third jade in a pretty pot with no hole because I thought I could control the water carefully. I was wrong.
The American Horticultural Society (AHS) recommends containers that provide adequate drainage for long-term container gardening. They focus on ensuring water never pools at the bottom. A pot with no drainage means water has nowhere to go. It just sits at the bottom, slowly suffocating the roots.
Now I choose unglazed terra cotta with a single substantial drainage hole. The bigger the hole, the better. If you find a pot you love that has a tiny hole, it's risky. Water can still get trapped. I also avoid saucers that collect standing water. If I use a saucer, I empty it completely within 30 minutes of watering.
My Exact Repotting Process
I've repotting jades more times than I can count now. But the first few attempts were disasters. I broke roots, spilled soil everywhere, and watered at the wrong time. Here's my current process with each step explained clearly.
Step One: Choose the Right Time
Jades prefer to be repotted in spring or early summer. The growing season gives them energy to recover after any root disturbance. I tried repotting once in winter, and my plant sulked for months. It just sat there, dropping leaves, refusing to grow. Every single time I repot between March and June now, that same plant bounces back within two weeks.
Don't repot a newly purchased plant immediately either. Let it adjust to your home for at least two weeks first. I made that mistake when I bought a beautiful jade from a nursery. I repotted it immediately and lost most of its leaves from the stress. A patient approach is better.
Step Two: Prepare Your Terra Cotta Pot
You need to soak a new terra cotta pot before use. Dry clay will suck all the moisture out of your soil mix immediately. I fill a bucket with water and let the pot soak for at least an hour before repotting. This was one of those details I missed early on. My soil looked dry within minutes of watering because the pot kept pulling the water away.
You'll also want to clean your pot thoroughly if it's been used before. I always wash with hot water and a mild dish soap to remove any lingering salts or old soil particles. Then rinse very well. Leftover fertilizer salts can burn new roots. I learned this lesson after noticing white crust on my pot's edge and wondering about it. That residue was salt buildup, and it really does affect new growth.
Step Three: Mix Your Soil
Here's where the drainage magic happens. You don't just use regular potting soil. That holds way too much water for a jade plant. I start with a high-quality cactus or succulent mix. Then I add extra perlite or coarse sand to it. A good ratio is about 2 parts succulent soil to 1 part perlite or coarse sand.
The perlite looks like styrofoam balls, and it creates air pockets in the soil. Water flows through faster, and oxygen reaches the roots. I still remember my third jade struggling in dense, soggy soil. It looked fine on top but died underneath. Adding that extra drainage material has been a game changer.
If you want to go fancy, some growers mix in pumice stone too. Pumice actually holds a tiny bit of moisture inside its pores, then releases it slowly. I use a mix of succulent soil, perlite, and a little coarse sand. My roots love the balance between drainage and slight moisture retention.
Step Four: Remove the Jade Plant Gently
You want to be careful here. Jades have delicate roots that break easily. I've snapped off entire root sections while pulling plants from tight pots. To remove the plant safely, I squeeze the sides of the pot if it's flexible. If it's terra cotta, I may run a dull knife along the inner edges first to loosen the soil.
Then turn the pot on its side. Slide the plant out slowly. If the roots are wrapped tightly around the bottom, you may need to massage the root ball gently to loosen them. Shake off old soil but don't be aggressive. You want to disturb the roots as little as possible while still removing dead or rotten sections.
Step Five: Examine the Roots Carefully
This is something I never did early on. I just shoved the plant straight into a new pot with fresh soil. Now I take time to inspect the roots. Healthy roots are plump and white or slightly yellow. Rotten roots appear dark, mushy, and smell like decay. I trim off any dark or slimy parts using clean scissors.
If I find root rot, I'll gently rinse the root ball with water to wash away infected soil. Sometimes I even treat with a very dilute hydrogen peroxide solution to kill lingering fungus. It's extra effort, but it saves the plant. I've saved several jades that looked beyond recovery using this method.
The 2 Drainage-Boosting Tips I Swear By
Alright, here are the two specific tips that changed my jade game completely. These are the actual, practical touches that are easy to miss but really matter.
Tip #1: Use the "Plugged Hole" Method for Extra Drainage
Here's a trick I wish someone had recommended much earlier. I don't just lay the drainage hole bare and fill soil over it. Instead, I cover the hole with a small piece of broken terra cotta shard or a small plastic mesh. This prevents soil from washing out while still allowing water to flow easily.
I use a curvy piece of broken pot with the curve facing downward. This leaves a space under the shard, so water that drains can collect at the very bottom and exit without being blocked. It's a technique potters and growers have used for generations. It really allows for better water flow through the pot.
The key detail? Don't place the shard flat against the hole. That reduces water flow. You want a little arch, an opening that remains clear. Place your media down, then add the shard ensuring the hole still looks exposed if you peek through from the bottom.
And continue this idea all the way up the pot. I also add a very coarse layer, like small pebbles or big perlite, at the base of the pot before putting in the soil mix. This ensures no fine soil gets into the holes and impedes flow. Think of it as building a clear pathway all the way down.
Now, many sources say you should not add gravel to the bottom of a pot. That's often misapplied advice. Adding a deep gravel layer actually creates a "perched water table" in some scenarios, but the critical flake here is a thin course substrate layer that won't mix up immediately, and maintains a definitive draining pocket that leads straight out the hole.
I find a thin, half-inch layer of coarse material acts like a drain grid for my kitchen sink. It keeps the soil from clogging everything up. Since starting this, I never see water pooling at the base of the pot. My jade roots finally get the air circulation they crave.
Tip #2: Elevate the Pot Above the Saucer
Here's another one of those quirks that truly steps up your success. I used to set my terra cotta pot directly into a saucer and let any overflow water sit there. For a long time, I didn't worry because there wasn't any overflow. But what I finally understood is that even a thin layer of water collected in the saucer can be reabsorbed into the pot over time through the porous clay.
Ok, so how do I fix this? Simple. I place a small jar lid, or a few small stones, into the saucer first. Then I set the pot on top. The pot now sits an inch higher than that saucer floor. Any water that drains now collects in the saucer completely separated from the pot itself. There's no risk of that water getting wicked back upwards through the pores. And the bottom of the pot also gets more air circulation, which is great for root health.
You can do this using specific pot feet, which are sold at garden centers. They're small nubs that stick under the pot's rim to elevate it. I still use the lid and rock trick for most of my pots since I always have some available.
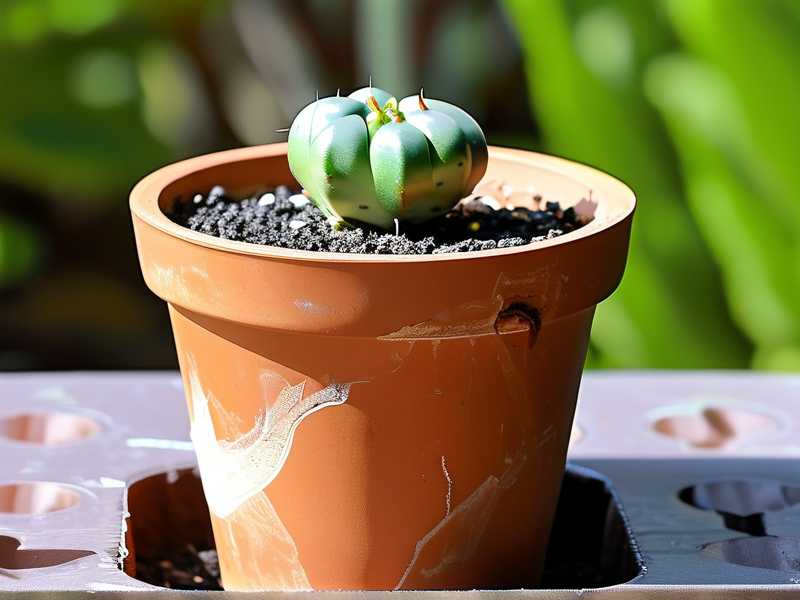
I must say, after incorporating this single trick, I stopped seeing those wet, darkened patches on the base edge of my terra cotta pots. It provided that ultimate combination of good drainage habits and a little bit of engineering.
What I Observed Over 2 Weeks After Repotting
My latest jade repotting session took place in early May. I want to share with you exactly what happened during the two weeks after the procedure. It helps to know what is normal and what you might expect.
Days 1–3: The Adjustment Period
The plant looked a bit shocked. I looked for obvious signs of stress because repotting can set them back for a few days. Leaves looked a little dull, not perky at all. A few lower leaves near the stem started to wrinkle slightly. I knew not to water right away. Tender roots need time to heal before encountering moisture again.
The soil mix I used drained incredibly fast. I observed this because I gave a tiny initial watering the first day to settle the new fill. Just a dribble, enough for the soil to shift and settle. Within seconds I could see it flowing out the bottom and into the saucer without pooling. The action of the terra cotta kept the soil feeling dryish to the touch throughout the day. That's exactly what I wanted.
Days 4–7: Settling In
After about four days, those wrinkled lower leaves started recovering. They plumped up, looking firmer. The pot itself was porous and breathable, meaning the soil at the edges was already feeling quite dry. The center remained slightly damp, which is a great balance.
I notice a very interesting effect from the enhanced drainage at this stage. There was no white fuzzy mold on the surface. In my earlier attempts, I would quickly see that fuzzy fungus growing if I used denser mixes without extra perlite. That alone made me confident in the mix.
By day seven, the plant showed no more signs of stress. It still wasn't actively growing yet, but it also wasnt dropping leaves. A good sign of a successful repot.
Days 8–14: New Growth Signs
It took about eight days before I saw those delightful signs of life. A few green tips appeared at the ends of branches. They were tiny, bright green, and distinctly fresh. It was a huge relief because every time I've lost a jade, it happened right during this stage. They started slowly drinking water more efficiently.
At the ten-day point, I finally watered it thoroughly. I poured enough water to flow continuously from the drainage hole. The pot drained all the excess immediately. I didn't see any standing water. My saucer elevated pot trick ensured the drainage left absolutely no residual water in contact with the pot.
By the two-week mark, growth was visible across the plant. Leaves were glossy and firm, not deflated. New leaves had appeared and were expanding nicely. Roots were presumably occupying their new space since the plant appears upright and anchored properly.
Potting Mistakes That Cause Root Rot (And How to Fix Them)
Let's address the elephant in the room. We worry about rot, but we sometimes ignore small details that cause it. Here's what to watch out for after you've done your repotting.
Ignoring Compacted Soil
Let's say you repot and water it correctly, but the soil still doesn't seem to breathe. Maybe you overused regular potting mix and didn't aerate well. Compaction causes water to fill up the soil structure where air should be. This suffocates roots over time.
Sometimes I'll see that after watering, the soil turns dense and glassy on top. That’s a signal you've got compaction. When this happens, I gently take a toothpick or a chopstick and poke several little holes through the upper layer of soil. This allows air penetration without damaging roots. Or, you can simply repot earlier than planned if you see persistent compaction. You don't necessarily have to wait.
Watering Too Soon After Repotting
This is one of my major triggers. I made this exact mistake with my second jade. The urge to water fresh soil is strong. But you must wait at least five, ideally seven days after repotting. The plant's roots may have small tears that need healing. Water immediately, and those tears become entry points.
After disturbing the root system, I always let it rest dry. I follow that "dry period" ritual religiously now. I remember being so concerned that mine looked thirsty on day two. But it was fine. That's normal. Forcing water right at that vulnerable stage caused my earlier plants to decline quickly. Patience is vital here.
Leaving Dead Potting Mix Behind
You can increase the ratios of perlite or pumice, but if roots are constricted and soil is old and degraded, root health will continue to suffer. Sometimes pulling the plant up shows a congested root mass with basically no soil left. It's a solid rootball. If you replant that without teasing away the old growth, it won't get better drainage, no matter your soil.
I always tear apart the rootball just a little. I massage and remove a bit of the outer soil before placing into my new mix. This encourages the roots to explore their new home. The first time I did this was a revelation. My plant rebounded quickly with lots of new white root development.
How Often Should You Repot a Jade Plant?
For new growers, let me offer a rough schedule I follow. Jade plants do not like frequent repotting. They tend to do better when slightly root-bound. I aim for repotting every two to three years. Overpotting a young jade, moving them into way too huge containers, usually causes the soil to stay too wet for a small root system.
I shift jades only one pot size up at a time. Moving from a 4-inch pot into a 6-inch pot makes sense. Don't put a small jade into a giant 10-inch planter. You'll get a soggy mess. When roots begin growing out of the bottom hole, it's time. When water rushes straight through because all the space is consumed with roots, that's another sign.
If you check and notice the roots are circling the pot interior, don't panic. It's just a signal. But if healthy leaves still produce robust growth, you can wait another season. Also, if the plant's health declines rapidly despite the right soil and watering, check roots often.
The Best Way to Water a Jade Plant in a Terra Cotta Pot
Overwatering is dangerous, but so is under-watering the right plant at the right time. Let me share how I water mine now that they live in terra cotta pots. Because terra cotta breathes, they generally dry quicker than plastic. So I alter my watering accordingly to avoid chronic drought.
During summer growing months, I soak thoroughly, letting water flow out the bottom. I do this once the soil has been completely dry for a few days. The actual intervals depend on your home's humidity. A dry, air-conditioned house will require water more frequently than a humid room.
In winter, I reduce significantly. Jades have a dormant period in the colder, darker months. The soil will remain dry for longer stretches. I'll often wait until leaves show the faintest wrinkle before watering. This might be every four to six weeks instead of two.
I always water from the top until it drains out. I don't use bottom-up watering techniques for jade in terra cotta. That defeats the purpose of having the pot breathe. The top-down soak lets me aerate the soil too.
Why I Prefer Unglazed Terra Cotta Over Ceramic
I touched on this briefly, but ceramics play a big role. When I switched fully to unglazed terra cotta, my success rate climbed dramatically. Here’s a look at why I made this switch.
Ceramic pots, unless they are also unglazed, generally don't allow air exchange. The glaze, especially the glossy type, essentially creates a waterproof barrier. The moisture in the soil is trapped inside. If you don't carefully calibrate your watering, your jade sits in conditions that resemble a contained greenhouse environment. For a succulent like jade, that's usually risky.
Terra cotta’s texture provides resistance to fungus gnats and other pests, as it dries out the top layer faster. I remember my first year of jade care, I kept plants in slightly glazed ceramic. I saw more fungus gnats that year than I do now. When I switched back to terra cotta, the gnats declined almost immediately since their breeding ground was not constantly damp.
You can find any number of attractive forms of unglazed terra cotta. They offer a classic aesthetic that I enjoy more than glossy plastic-like finishes. The clay pot looks natural, while encouraging a natural environment for the roots.
Common FAQs on Repotting Jade Plants in Terra Cotta
Do I always have to use a pot with a drainage hole?
Yes, you do. I'm firmly convinced that jade plants need a pot with actual drainage. I can't emphasize this enough. I've read about people claiming they successfully grow jades in pots with holes or some layers of rocks for drainage. The rocks are a myth; they don't create drainage. Water still gathers at the bottom of the container.
Fit a terra cotta pot with a decent drain hole. That's the only structure that gives water a direct path out. Without a hole, you're relying on evaporation entirely. The soil stays wet for too long, and rot always takes hold in my experience.
Can I leave my jade plant outside after repotting?
You can, as long as the temperature is above 50°F (10°C). Jades hate cold snaps. But be cautious about direct, intense sun right after repotting. The plant is stressed. Putting it into a bright, scorching sunbeam could burn the leaves. I always expose them gradually. After repot, I put mine in a bright, indirect light spot for about a week. Once it recovers, I gradually shift it into full sun over several days. If you are putting it outdoor for summer, ensure a spot with morning sun and some afternoon shade if the afternoon sun is too strong.
How do I know if my jade plant is getting too much water?
The leaves will feel soft and look squishy. They may yellow or turn translucent. If you see brown spots with yellow halos, root rot is likely. Remove the plant immediately and cut away rotted sections. Repot into fresh, dry soil. Let the plant rest without water for about ten to fourteen days. This procedure has saved two of my jades.
Final Thoughts on Successful Drainage
At the end of the day, robust root health comes down to smart environmental choices. Using a porous terra cotta pot and tweaking your drainage is the best boost you can give a jade plant. I have made the mistakes of overwatering and selecting the wrong container, but with proper drainage and observation, my plants have grown strong and resilient. It is easier than you think to create the perfect foundation for these fantastic succulents. Give them the dry, breathable conditions they naturally love, and you will enjoy their thick, sculptural beauty for many years to come.





