 bluename
 How to Propagate jade plant in Water Jars: 3 Clear-View Hacks
If you have ever stared at a leggy jade plant and wondered how to turn those drooping branches into new plants, you likely found conflicting advice everywhere. Let me cut to the chase. The answer to how to propagate jade plant in water jars is yes, it works, but only if you ignore 90 percent of the common wisdom you read online. I have done this dozens of times over the past few years. I have also killed more cuttings than I care to admit before I figured out the real tricks.
Most guides will tell you to use soil for succulents, period. I say you can absolutely root jade in water. You just need a clear jar, the right cutting, and a whole lot of patience. I have watched roots sprout in about two weeks when I followed my own steps. I have also watched cuttings rot in three days when I got cocky and skipped the basics.
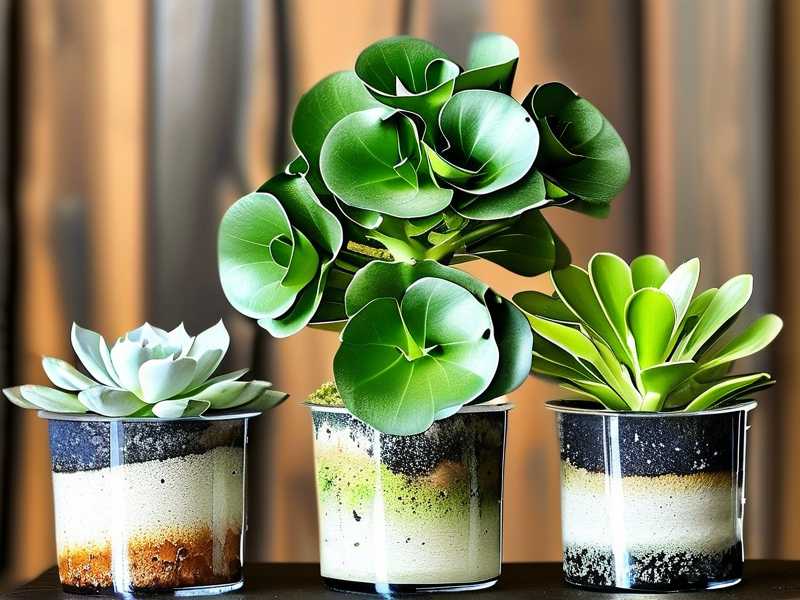
Let me walk you through the exact method I use now. I will also tell you where I messed up so you do not repeat my misery.
The 3 Biggest Mistakes That Kill Jade Cuttings Before They Root
Before we get into the pretty jar photos, let me save you from heartbreak. I learned these lessons the hard way. I probably killed eight or nine cuttings before I finally paid attention to what was actually happening inside those jars.
Mistake 1: Overwatering the Parent Plant Before You Even Cut
Here is the kicker. The health of your cutting starts days before you ever take scissors to the stem. I used to water my jade plant on a strict weekly schedule because that is what I read somewhere. Turns out, that was basically drowning it.
I remember my first real attempt. I watered my jade on a Monday, cut a stem on Wednesday, and popped it into a glass of water. Within four days, the bottom of the cutting turned into a brown, mushy mess. The whole thing smelled like rotting salad. I did not understand why.
The truth is, a fully hydrated jade stem is full of water. When you place that into another water source, the cells just burst. They cannot handle the double dose. The Royal Horticultural Society (RHS) has noted that succulents store water in their leaves and stems, making them highly sensitive to excess moisture. That is an understatement.
So what is the fix? Stop watering the parent plant for at least five to seven days before you plan to take cuttings. Let the soil go bone dry. Let the leaves look slightly less plump. A thirsty jade cutting actually roots faster because it is searching for moisture. I know it sounds backwards but it works. Simple as that.
Mistake 2: Putting the Cutting in Bright Direct Sunlight
Another classic failure. Most of us assume plants want maximum light. I made this error with my second batch of cuttings. I placed the glass jar right on my sunniest windowsill, thinking the more light, the better.
That jar turned into a miniature greenhouse. The water warmed up, algae started growing within a week, and the cutting just sat there, sulking. The leaves turned a weird yellow-green and the stem softened. Nothing rooted. I wasted an entire month on that one.
What I learned is that indirect light is your best friend here. The goal is to get roots to grow, not to encourage leaf production. Leaves need light, roots need darkness and stability. But wait, I said clear jars, right? That is the hack. You want a clear jar so you can watch the roots develop, but you should place that jar in a spot with bright, filtered light, not direct sun.
Think of it this way. You are a plant person, you know your kitchen counter or a north-facing shelf is perfect. Direct sun will cook the water and stress the cutting. I currently keep my rooting jade jars on a shelf about three feet away from a west window. They get ambient light but never a direct beam. That is the sweet spot.
Mistake 3: Using the Wrong Kind of Container
Honestly, I thought any glass jar would work. I grabbed an old pickle jar once, washed it out, and went to town. The opening was too narrow, the glass was tinted, and I could not see anything inside. Also, the cutting kept slipping down and the leaves were sitting in the water, which is a death sentence.
After my jade cuttings kept rotting, the American Horticultural Society (AHS) published a great tip about using transparent vessels for moisture management. The visual clues tell you everything. You need to see if the water is getting cloudy or if roots are actually appearing. A colored glass or a narrow-necked bottle hides all the problems until it is too late.
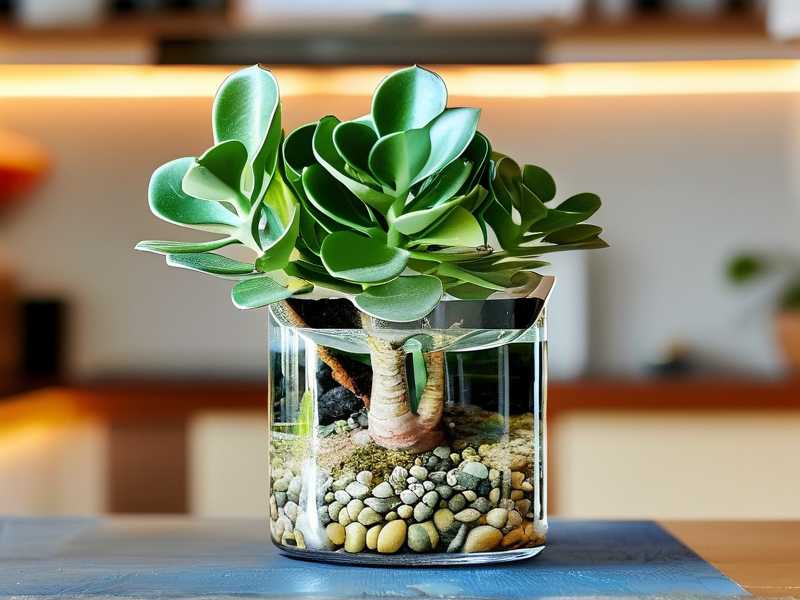
My rule is simple. Wide mouth, clear glass, no tinting, no narrow necks. I now use old salsa jars with the labels soaked off, or small mason jars. You want the cutting to sit upright but not be jammed in. You also want enough room to pull the cutting out gently to change the water when needed.
How to Propagate Jade Plant in Water Jars: My Exact 2-Week Process
Alright, now that we cleared up the fatal errors, here is my current workflow. I have done this maybe fifteen times now, and I have a near 100 percent success rate when I follow these steps to the letter.
Step 1: Choose the Right Cutting and Prep It Like a Pro
I cannot stress this enough. Fat, healthy stems work best. Look for a stem that is at least four to five inches long. It should be green, firm, and show no signs of shriveling or browning. Avoid woody, gray stems that look like tree bark. They take forever to root.
I use a clean pair of pruners or even a sharp kitchen knife. Sterilize the blade with rubbing alcohol first. That simple step prevents introducing bacteria into the fresh wound.
Here is the part that most people rush. After you cut the stem, remove all the leaves from the bottom two inches of the cutting. This is critical. Any leaf that sits below the waterline will rot and turn the water foul. I usually leave two to three sets of leaves at the top of the cutting, but the lower half is bare stem only.
Then, and this is my key secret, let the cutting dry out for a full 24 to 48 hours before you put it in water. I know, it looks sad and wilted sitting on the counter. But this allows the cut end to callus over. That callus forms a barrier that prevents rot once it hits the water. I realize I am repeating myself, but honestly, so many people skip this exact step and then wonder why the stem dissolves.
I once skipped the drying period because I was in a hurry. I placed the cutting directly into a jar of water right after snipping it. The next morning, the entire cut end had turned translucent. By day three, it was mush. I lost a perfectly good cutting because I wanted instant gratification. Learn from my laziness.
Step 2: Set Up the Jar and Water Temperature
Fill your chosen clear jar with room temperature filtered water. Avoid straight tap water if you can, there is often too much chlorine and additives. I just use the water from my fridge filter. If you only have tap water, leave it out on the counter for a day so the chlorine evaporates.
You only need about two to three inches of water depth. The idea is that the callused end of the stem touches the water, but ideally, the node where you removed the leaves should be the part submerged. That is where the roots will emerge.
Place the cutting gently into the jar. The bare stem should sit upright in the water, and the leaves should be completely above the waterline. If a leaf is touching the water, push the cutting up or remove that lower leaf. A single leaf touching the water can begin to rot and contaminate the whole jar.
The water depth matters more than you think. I used to fill up the jar halfway, thinking more water was better. That just drowned the stem and slowed oxygen exchange. Roots need oxygen, even when they are in water. If you submerge the whole stem, you effectively suffocate it. I keep the level low so only the bottom inch of stem is submerged. That seems to stimulate root growth along the entire submerged section.
Step 3: The Waiting Game and Daily Observation
Now, this requires patience. I place the jar on my shelf with indirect light, somewhere I will see it daily. Why clear jar again? Because I need to monitor it without disturbing the cutting.
For the first three days, expect almost nothing. The cutting is adjusting. Do not poke it or lift it out to check. Just look through the glass.
Around day four, sometimes day five, I notice a tiny bump forming on the callused stem. It looks like a small white dot at first. This is the beginning of a root. It always feels magical to me, even though I have seen it many times.
By day seven, those bumps elongate into thin white tendrils. If the water stays clear, I just leave it alone. If the water turns cloudy or there is a filmy residue on the top, I change the water immediately. I usually replace the water every four to five days to be safe. I also gently rinse the bottom of the stem under running room-temperature water when I do this. The new roots are delicate, so I use the gentlest stream possible.
During the second week, the roots grow larger and branch out a little. The root length by day ten to fourteen is generally between one and two inches. I have seen faster growth in summer and slower growth in winter. I tried this in January once, and it took almost a month to get the same root development that happened in two weeks during June. Temperature matters, warmth speeds things up.
I should also mention that 90% of indoor plants die from overwatering, but in this case, the water itself is the medium. The secret is keeping it clean and watching the cutting struggle is not a sign to intervene. Let the plant do its thing. I have learned to trust the process.
Step 4: Transplanting to Soil Without Killing It
You would think the hard part is over once roots appear. But the transition from water to soil is the most dangerous moment. I have killed many jade cuttings at this exact point because I got overconfident.
Here is the thing about water roots, they are structurally different from soil roots. They are thinner and more fragile. If you just stick the cutting into a standard pot of dry soil mix, the roots will often break off, or worse, they get damaged and rot in the soggy soil.
A friend of mine, who is a horticulturist, gave me what I think is the best advice on this. Plant the rooted cutting into a very gritty, well-draining mix. You want a cactus and succulent blend that is mixed with perlite, roughly fifty-fifty. Then, and this is huge, do not water it for at least a week after you pot it.
I know it hurts your heart. You take this adorable cutting with roots that grew in water, and then you deny it water. Why? Because the soil should be slightly moist, not wet. The fine water roots need time to adjust to finding moisture in soil particles. Watering immediately will cause those fine roots to rot.
When I transferred my first successful rooted cutting, I watered it right away, thinking I was helping it settle in. It was a disaster. The leaves turned yellow and the plant toppled over with root rot within a week. I had to start all over. The next time, I potted the cutting into dry mix and just left it alone for five days. After that, I slowly began watering every two weeks or so, letting the soil dry out completely between waterings.
Once the cutting has been in soil for about a month and shows new leaf growth, you can treat it just like a normal adult jade plant. Congrats, you made it.
Why Clear Jars Are the Actual Game Changer
You might ask why I emphasize clear containers so heavily. When I first started propagating, I used all sorts of opaque mugs and ceramic pots. It felt more aesthetic. But honestly, it was a gamble.
Clear glass lets you see the signs of trouble early on. You can easily detect:
- Root development
- Growth of algae
- Water evaporation levels
- Deterioration of the stem
Without this visibility, you are basically playing a guessing game. You might think the cutting is doing fine and wait for roots to appear in soil, not realizing that the water has become a bacteria soup that is slowly killing it.
I watch for two specific warning signs through the glass. If the water becomes brownish or slightly milky, that means bacteria. Change the water and rinse the stem. If the stem below the callus starts turning dark or mushy, you have rot. Trim the mushy part off with sterile scissors, let it callus over again for a day, and try once more. Sometimes it is still salvageable.
Another visual trick I learned is to check the leaf color. If the leaves start turning yellow and falling off, the light is too intense, or the stem is drowning. Move the jar to a dimmer spot. If the leaves become wrinkled and the plant looks shriveled, that means the cutting is not taking up water. Often that happens if the stem is not actually submerged properly. Look at the glass, check if the waterline dropped below the node. Top up the water.
Lighting, Temperature, and Water Quality Details That Matter
Let me drill down on the technical aspects. The RHS emphasizes providing the right light balance for succulent propagation. They suggest hearty light but avoiding the scorching midday sun honestly, that aligns with my experience.
The ideal temperature for rooting jade in water is between 65°F and 75°F (18°C to 24°C). I have a corner in my kitchen that holds around 70°F, and that is where my jars live. If your house is cooler, consider placing the jar on a heat mat. I used a cheap seedling mat under my jar last winter, and it cut the rooting time in half.
Water quality, do not sleep on this. Hard water with high mineral content can deposit white scale on the stem and roots. This can obstruct the rooting process. I switched to distilled water after noticing a whitish film on my glass jars. After that, rooting seemed to speed up. If distilled water feels too fussy, try rain water or aquarium water if you have it. Just avoid water that has been softened with salt softeners, that sodium is bad for plants.
Combining Water Propagation with Other Methods
Some of you might have heard about a soil method or a perlite method. I tried those as well. But here is what I think. Water propagation is the most useful for beginners because you can watch the progress. It is a learning tool.
The AHS points out that observing root growth can help novices understand the life cycle of plants. I agree. Once you actually witness roots sprouting and elongating in a jar, you gain confidence and understand what healthy root development looks like. It makes you a better gardener for everything else you grow.
I also use a hybrid method now for larger batches. I start the stem in water for two weeks until roots emerge, then I transfer it to a clear plastic cup full of perlite and a tiny bit of water at the bottom. This is called the semi-water method. It encourages the roots to become more robust before hitting gritty soil. But for a first answer, the simple water jar method works just fine.
Common Questions I Get About Jade Water Propagation
I hear a lot of the same concerns from people who message me on Instagram. Let me address them directly.
Is it better to root jade plants in water or soil?
People always ask me this. Honestly, soil rooting is the traditional way. It produces a stronger root system from the start. But water rooting has its perks. It offers a higher visual satisfaction and a lower chance of forgetting about the cutting and letting it dry out completely, assuming you keep an eye on the water level.
In my experience, soil propagation is easier for me to forget and neglect. Water needs more attention but gives more feedback. Roots in water also tend to grow slower once transferred because they do not have that same initial adaptation stress, but they do fine if you handle the transition correctly. Pick whichever method fits your attention span. I like water because the jars look cool in my kitchen.
How long does jade plant take to root in water?
Based on my logs, expect visible roots in about 10 to 14 days. The first white nubs might appear at day five, but they only become substantial enough for transplanting near the two-week mark. During winter, double that time. Do not rush it. A small root that is half an inch long is too small, wait until it is at least two inches long before you move it.
The AHS actually has some literature about the structural development of roots in water versus soil. They note that water roots have less branching structure, but they have a higher number of lateral root hairs, which will dry out quickly if exposed. So if your roots look thin and silky, that is normal. Like I said, move them to soil before they get too long and tangled.
Why is my jade cutting not growing roots after 3 weeks?
This is the most heartbreaking scenario. A cutting just sitting there in the jar, looking healthy but showing zero root growth. I have dealt with this multiple times. Here are the reasons I have found.
One, your cutting might be too old or too woody. A piece of stem that is older and has gray bark has entered dormancy and may never root. Take a cutting from the green, active part of the plant.
Two, the cutting was taken from a plant that was recently purchased and had been treated with growth retardants. Those chemicals can suppress root development for months. Your local nursery jade might not root quickly until it grows an inch of new growth.
Three, you have the cutting upside down. I am only half joking. I did this once with a cutting that I accidentally placed with the former top node in the water. No roots ever formed. Look at your cutting and make sure that the top leaves are pointing up and that the stem end that was once connected to the mother plant is the one submerged in the water.
Four, the water is simply too cold. Check that your room is warm. Cold water slows down enzyme activity in plants dramatically. I had a cutting in a drafty hallway that did nothing for a full month. Once I moved it to the warm kitchen shelf, roots appeared in a week.
Final Thoughts on Propagating Jade in Water Jars
Growing jade from a single cutting in a water jar is a satisfying little project. It connects you to the plant cycle in a way that buying a full plant never does. I have given away dozens of rooted jade babies to friends, and all of them were started in a basic clear jar on my kitchen shelf.
I still use the same salsa jar trick, honestly. There is no need for fancy propagation tubes or specialized terracotta gadgets. Just a clear glass, some clean water, and a healthy cutting that has been allowed to callus. That is the entire secret to learning how to propagate jade plant in water jars successfully.
The main hurdles have nothing to do with complicated chemistry and everything to do with patience and observation. Watch the jar, read the leaves, change the water routinely, and resist the urge to water the young jade plant too much once you move it to soil.
Just remember what I said: 90% of indoor plants die from overwatering. Jade plants are succulents, they like it dry. Even in water propagation, the danger is not too little water, but too much moisture and the excess that brings rot.
So go grab that glass, let the stem dry out for a couple days, and give it a try. You might end up with a tiny jade forest like I did, sprouting all over your windowsill, all thanks to a few glass jars and careful vigilance. Good luck.





