 bluename
 How to Save Your jade plant from Overfertilization: 4 Burn-Rescue Steps
I’ve been there. You look at your beloved jade plant, wanting nothing more than to see it thrive, so you give it a little extra “food.” A bit more fertilizer, you think, will make it grow faster, look lusher. But then, the leaves start to look off. They might develop crispy brown tips, yellow patches, or even start dropping unexpectedly. That sinking feeling hits you—you’ve overfertilized it. If you’re staring at a jade plant showing signs of fertilizer burn right now, don’t panic. I’ve successfully navigated this exact crisis, and over the next two weeks, I’ll guide you through the precise, step-by-step rescue process that brought my plant back from the brink.
Understanding the “Burn” First, let’s understand what we’re dealing with. Fertilizer burn on jade plants isn’t a disease; it’s a physiological injury. According to the Royal Horticultural Society (RHS), excess soluble salts from fertilizer accumulate in the soil, creating a high-concentration environment that actually draws water out of the plant’s roots through osmosis, leading to dehydration and tissue damage. The American Horticultural Society (AHS) notes that succulents like jade plants are particularly sensitive due to their slow growth and low nutrient requirements. The symptoms you see—those brown, scorched leaf edges and tips—are the visual evidence of this internal stress. Recognizing this is the first step in effective plant first aid.
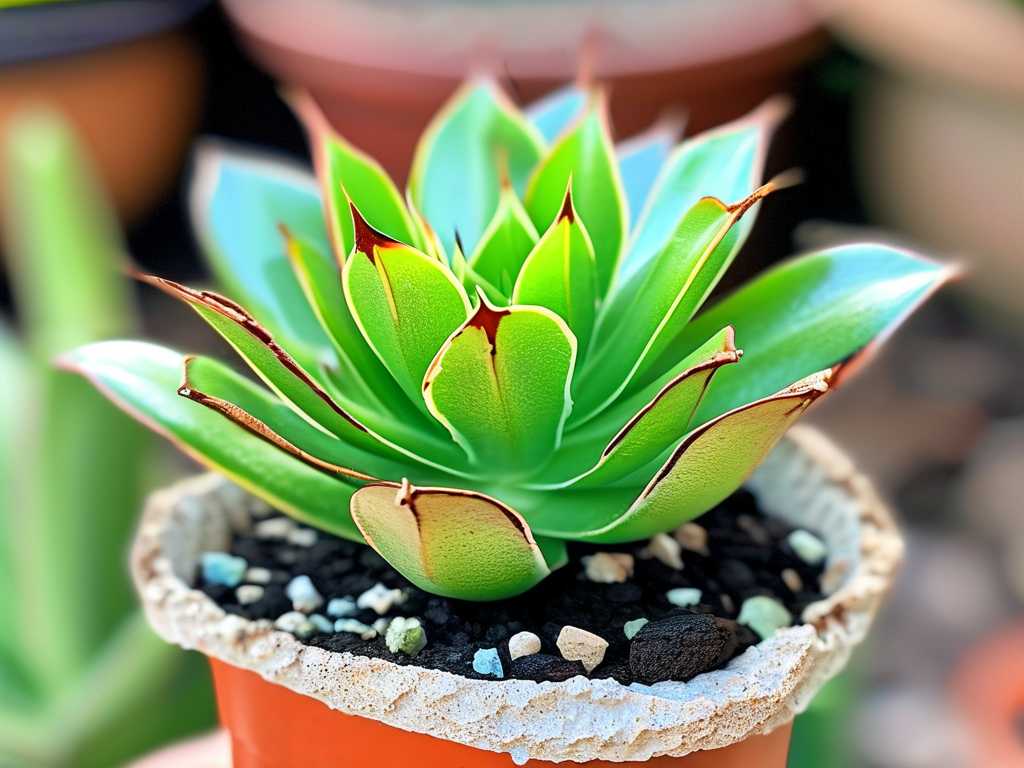
My Rescue Mission: A Two-Week Recovery Journal Here is the exact four-step protocol I followed, complete with my real-time observations, mistakes, and adjustments.
Step 1: The Immediate Flush – Removing the Toxins The moment I confirmed how to save an overfertilized jade plant, action was critical. The goal is to dilute and flush out the excess salts from the soil.
- My Action: I took my potted jade to the sink or bathtub. Using lukewarm water (cold can shock the roots), I slowly poured a large volume of water through the soil, allowing it to drain freely from the bottom. I repeated this process 3-4 times, ensuring the water ran clear. This wasn’t a gentle watering; this was a deliberate leaching process.
- The Mistake I Made: In my haste, I used a pot without excellent drainage for the first flush. The water pooled at the bottom, risking root rot on top of the burn. I immediately switched to performing the flush with the plant in a pot with ample drainage holes.
- Pro Tip: If your plant is severely burned, consider gently removing it from its pot after flushing to rinse the root ball directly before repotting in fresh mix.
Step 2: The Surgical Trim – Assessing and Removing Damage After the flush, I assessed the physical damage. Not all affected leaves need to go, but severe cases can drain the plant’s energy.
- My Action: With clean, sharp scissors, I trimmed off only the most severely damaged leaves—those that were more than 50% brown or mushy. For leaves with just crispy tips, I sometimes trimmed just the brown edge, following the leaf’s natural shape. I avoided removing all damaged foliage at once to prevent further shock.
- My Observation (Day 3): The plant looked a bit bare and sad after trimming, but I could already see it wasn’t losing more leaves rapidly. The remaining green tissue looked firm, a good early sign.
Step 3: The Fresh Start – Repotting for Recovery This step is non-negotiable for severe burns. Lingering salts in the old soil will continue to cause harm.
- My Action: I prepared a new, well-draining succulent and cactus mix. I gently removed my jade from its old pot, carefully shaking away as much of the old, contaminated soil as possible from the roots. I inspected the roots, trimming any that were black or slimy (a sign of rot). Then, I repotted it into the fresh, dry mix.
- The Mix I Used: I combined a commercial cactus mix with extra perlite (about a 2:1 ratio) for ultimate drainage. The AHS emphasizes the importance of porous soil for succulent health, especially during recovery.
- Crucial Note: I did NOT water the plant immediately after repotting. I allowed it and any disturbed roots to rest in the dry medium for about 5-7 days to heal and prevent rot.
Step 4: The Recovery Zone – Optimizing the Environment Now, the plant needs a perfect, low-stress environment to focus its energy on healing.
- My Action:
- Light: I placed it in a spot with bright, INDIRECT light. I avoided direct, hot sun which would increase water demand and stress on the compromised root system.
- Water: I resumed watering only after a week post-repotting, and then only when the soil was completely dry an inch down. I adopted a “less is more” approach.
- Fertilizer: This is key—I implemented a complete fertilizer burn treatment for succulents by imposing a strict fertilizer hiatus for at least 3-4 months. The plant had more than enough nutrients stored in its leaves and from the fresh soil.
- My Observation (Week 1): The plant seemed stable. No new damage appeared. The soil dried out appropriately, confirming the roots were functioning.
The Two-Week Turnaround: What to Expect Patience is your most important tool. Here’s how my plant progressed:
- Days 5-7: The most critical period. I watched for any further leaf drop or spreading discoloration. Stability here meant the flush and repot were successful.
- End of Week 1: I noticed the very first sign of hope: the very tips of some stems looked plump and firm, not desiccated.
- Days 8-14: Absolute stillness, then growth. By the middle of the second week, the plant was clearly not declining. By day 14, I spotted tiny, bright green nubs emerging from a few stem nodes—new growth! This was the definitive signal that the rescue had worked and the plant was redirecting energy to recovery.
Preventing Future Overfertilization: Lessons Learned This experience taught me more about jade plant care mistakes than any book. My fertilizing routine is now foolproof:
- Dilute, Dilute, Dilute: I always use a balanced, water-soluble fertilizer diluted to half or even quarter strength of the label recommendation.
- Frequency is Everything: I now fertilize only during the active growing season (spring and summer) and no more than once a month. I skip it entirely in fall and winter.
- Water First: Always water the plant thoroughly with plain water before applying any fertilizer solution to moisten the roots and prevent direct salt burn.
- Listen to the Plant: Lush, steady growth means you’re on track. If growth is slow, lack of fertilizer is rarely the issue for jades—check light and watering first.
Common Questions from Fellow Plant Lovers
Can a jade plant recover from fertilizer burn? Absolutely, yes. Jade plants are remarkably resilient. With prompt action to remove the excess salts (flushing/repotting) and a period of careful, stress-free care, they will often bounce back. The key is to act quickly at the first signs of burn.
How long does it take for a plant to recover from overfertilizing? You should see the deterioration stop within the first week if treatment is correct. Visible signs of active recovery, like new growth, can take 2 to 6 weeks to appear. Full recovery to its former lushness may take several months. Patience is not just a virtue; it’s a requirement.
What does an overfertilized jade plant look like? The signs are distinct: brown, crispy, “scorched” tips and edges on the leaves, often accompanied by yellowing. Leaves may drop, and a white crust of salt buildup might be visible on the soil surface or the pot’s rim. The plant may also appear wilted despite moist soil, as the roots are unable to take up water effectively.
Watching my jade plant push out those first new leaves after two weeks was incredibly rewarding. It reinforced that sometimes, the best care involves knowing when to step back and intervene less. Overfertilization is a common misstep born of good intentions, but it doesn’t have to be a death sentence. By following these burn-rescue steps—flush, trim, repot, and optimize—you give your plant the clean slate and supportive environment it needs to heal itself. Remember, with jade plants, less is almost always more. Your quiet, observant care after a mistake is what truly brings it back to health.





