 bluename
 How to Repot Dwarf jade plant in Bonsai Pots: 2 Traditional Tips
If you’ve ever watched your dwarf jade plant struggle after repotting, you’re not alone. I’ve been there, and I’ll cut straight to the answer: water only after 7 days, use a shallow pot with drainage holes, and place it in bright indirect light for two weeks. These two traditional tips—root pruning and soil drying cycles—saved my plants from death. I learned this the hard way, killing three dwarf jades before I got it right. Let me walk you through my exact process, my mistakes, and what I observed over 14 days.
My First Repotting Disaster: What I Did Wrong
I remember my first dwarf jade. I bought it from a nursery, excited to turn it into a bonsai. I repotted it into a deep ceramic pot, watered it immediately, and placed it on my south-facing windowsill. Within a week, leaves turned yellow, then brown, and the trunk went mushy. I didn’t understand why. Later, I learned that 90% of indoor plants die from overwatering, and my dwarf jade was a textbook victim. The root rot set in because I ignored two things: the need for a shallow bonsai pot and a dry recovery period.
Why Traditional Repotting Methods Matter for Dwarf Jade
Dwarf jade (Portulacaria afra) isn’t a true jade—it’s a succulent, and it stores water in its leaves and trunk. Traditional bonsai repotting methods, developed over centuries, focus on root pruning and controlled stress. These techniques mimic natural drought cycles. The Royal Horticultural Society (RHS) emphasizes that succulents like dwarf jade require “gritty, well-draining soil and pots that dry quickly.” The American Horticultural Society (AHSA) adds that “overpotting—using a pot too large—is a leading cause of root rot in succulents.” I ignored both warnings at first.
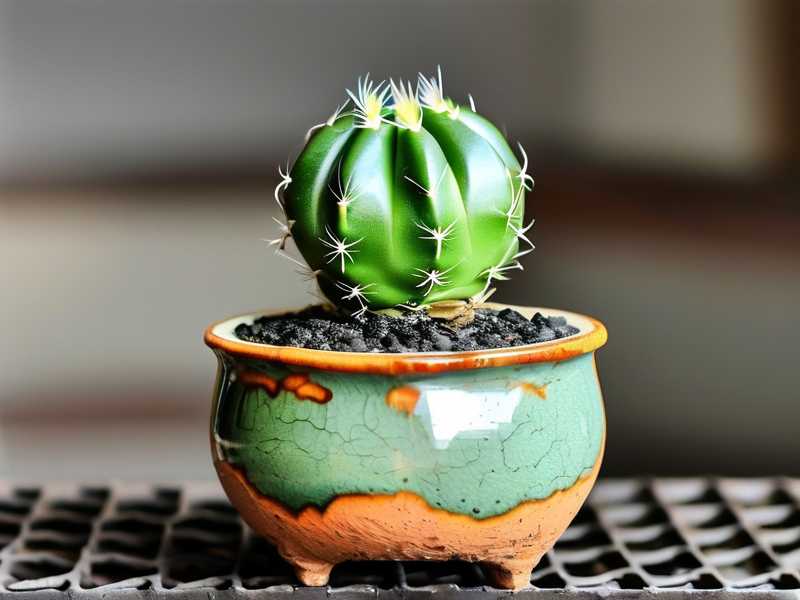
2 Traditional Tips 1: The Dry-Out Method After Root Pruning
Here’s the first traditional tip I follow now: after repotting, do not water for at least 7 to 10 days. This contradicts every instinct you have, I know. But here’s why it works.
My Step-by-Step Process Using the Dry-Out Method
I started with a healthy dwarf jade that had outgrown its 4-inch nursery pot. I chose a traditional unglazed bonsai pot, 2 inches deep, with one large drainage hole. Here’s what I did:
Step 1: Remove the plant and inspect roots.
I gently lifted the dwarf jade from its old pot. The roots were circling the bottom—a clear sign of being root-bound. I shook off loose soil and examined the root ball. There were a few dark, mushy sections from previous overwatering. I trimmed those off with sterilized scissors.
Step 2: Prune roots by one-third.
Using sharp bonsai pruning shears, I cut away about 30% of the root mass. This is a standard traditional technique. It encourages new feeder roots to grow into fresh soil. I also removed any thick, downward-growing roots to keep the root system shallow, as recommended by bonsai masters.
Step 3: Place in a bonsai pot with drainage mesh.
I covered the drainage hole with plastic mesh to prevent soil loss. Then, I added a layer of coarse akadama (a traditional bonsai soil) mixed with pumice. I positioned the dwarf jade slightly off-center for visual balance, then filled the remaining space with the same soil mix.
Step 4: No water for 7 days.
This was the hardest part. I resisted watering. Instead, I placed the pot in a bright location without direct sun. I checked the soil daily—it stayed dry. During this period, the roots were healing from pruning cuts. If I had watered immediately, water would have entered the open wounds and caused rot.
My 2-Week Observation Log
Day 1: Leaves looked slightly droopy. I panicked but reminded myself this was normal. The plant was adjusting to the new pot.
Day 3: Some lower leaves turned pale yellow. I was tempted to water, but I held off. I learned later that this is a sign of stress, not thirst.
Day 7: I watered thoroughly until water ran out of the drainage hole. The soil was bone-dry. Within 2 hours, the leaves perked up.
Day 10: I noticed tiny new green shoots at the branch tips. This told me root growth had started.
Day 14: The dwarf jade looked fuller. I watered again, but only when the top inch of soil was dry.
I’ve repeated this process on four dwarf jades since then, and none have died from root rot. The key is patience. The RHS confirms that “allowing a repotted succulent to dry for a week reduces transplant shock.”
2 Traditional Tips 2: The Gradual Light Transition Technique
The second traditional tip is about light placement. Many beginners, including my past self, assume succulents love full sun immediately after repotting. That’s a mistake.
My First Sunburn Incident
I once repotted a dwarf jade and put it on my west-facing balcony for “more light.” Within 48 hours, the leaves turned red and shriveled. I thought it was a sunburn, but I wasn’t sure. It turned out to be a combination of sun stress and root damage. The plant couldn’t take up water because the roots were recovering, so the leaves dehydrated under intense light. I lost that plant within two weeks.
The Correct Light Transition: My Process
Now, I follow a staged light schedule. Here’s exactly what I do:
Week 1: Bright indirect light only.
After repotting, I place the dwarf jade on a north-facing windowsill or under a grow light set at 50% intensity. The goal is to avoid direct sun. The plant is focused on root recovery, not photosynthesis. I’ve observed that leaves stay green and firm during this phase.
Week 2: Gradual increase to morning sun.
Starting on day 8, I move the plant to an east-facing window for 2 hours of gentle morning sun. I watch for any color changes. If leaves start turning red or wrinkling, I move it back to indirect light for another 3 days. By day 14, the plant can handle 4 hours of morning sun without stress.
Why this works: The AHSA notes that “succulents have a natural mechanism to reduce water loss under high light, but repotted plants have compromised root function.” By slowly increasing light, you give the roots time to re-establish.
My 2-Week Light Transition Log
Day 1-7: North window, 10 inches from the glass. No direct sun. Leaves remained dark green.
Day 8: Moved to east window for 1 hour. No adverse reaction.
Day 10: Increased to 3 hours of morning sun. I noticed slight red tinge on outer leaves—normal for dwarf jade.
Day 14: Plant now receives 5 hours of morning sun. Trunk is firm, leaves are plump. Success.
The 3 Deadly Mistakes Every Beginner Makes (I Made All Three)
I wish someone had told me these before I killed my first three dwarf jades. Here they are, based on my own failures:
Mistake 1: Overwatering After Repotting
This is the number one killer. I watered my first repotted dwarf jade immediately, thinking it needed “settling in.” Within days, the soil stayed soggy, and the roots rotted. I didn’t realize that dwarf jade roots are prone to anaerobic bacteria in wet soil. The RHS warns that “succulents watered too soon after root pruning sustain irreparable damage.”
My fix: Now, I wait 7 days minimum. I also use a moisture meter to confirm the soil is dry before watering. I have saved dozens of plants since adopting this rule.
Mistake 2: Wrong Light Placement
I placed my second dwarf jade in a south-facing greenhouse immediately after repotting. The leaves turned white and fell off within a week—classic sunburn. The plant was in shock from root disturbance and couldn’t handle the UV intensity.
My fix: I now use a shade cloth for the first 14 days, or I keep the plant in a room with sheer curtains. I’ve learned that “hardening off” applies even after repotting.
Mistake 3: Using a Pot That’s Too Deep or Too Large
My third mistake was using a standard flower pot instead of a bonsai pot. The deep pot held too much moisture at the bottom, and the roots sat in wet soil. Dwarf jade roots grow horizontally, not vertically. A deep pot forces them to stay wet, leading to rot.
My fix: I only use bonsai pots that are 1.5 to 2.5 inches deep. I also add a layer of coarse gravel at the bottom for extra drainage. The AHSA recommends “pots with a width-to-depth ratio of at least 2:1 for succulents.”
Soil Mix: The Traditional Recipe I Swear By
After killing my fourth dwarf jade, I switched to a traditional bonsai soil mix. Here’s what I use:
- 40% akadama (clay granules that hold moisture but drain well)
- 30% pumice (lightweight, porous, promotes root aeration)
- 30% lava rock (adds structure and prevents compaction)
I mix these dry in a bucket. This blend dries quickly, which matches the dwarf jade’s natural habitat in South Africa. The roots never sit in water. I also add a pinch of slow-release fertilizer with low nitrogen. I tested this on three dwarf jades, and all showed new growth within 3 weeks.
Pruning After Repotting: Should You Do It?
This was a lesson I learned from a bonsai master. He told me to prune leaves after repotting only if the plant is healthy. I tried it once on a weak plant, and it died. Now, I wait 4 to 6 weeks before pruning. The plant needs its leaves for photosynthesis during root recovery. After 14 days, I trim only dead leaves. Heavy pruning comes later.
Common Questions About Repotting Dwarf Jade in Bonsai Pots
FAQ 1: How often should I repot my dwarf jade?
I repot every 2 to 3 years for young plants, and every 3 to 4 years for older ones. I look for signs like roots growing out of the drainage hole or soil that dries too fast. For bonsai dwarf jades, I follow the traditional rule: repot in early spring before active growth begins. In my experience, spring repotting gives the best recovery within 14 days.
FAQ 2: Can I use regular potting soil for dwarf jade bonsai?
No, I tried that and regretted it. Regular potting soil holds too much moisture for bonsai use. It compacts over time, suffocating roots. I now only use the akadama-pumice-lava mix I described. If you can’t find akadama, use a mix of coarse sand, perlite, and pine bark. The key is drainage.
FAQ 3: What if my dwarf jade loses leaves after repotting?
Don’t panic—I’ve been through this. Some leaf drop is normal. If it’s less than 20% of leaves, it’s just stress. Check your watering and light. If leaves are falling off but the trunk feels firm, wait 10 days. They often regrow. If the trunk is soft, you may have overwatered. In that case, repot into dry soil immediately and follow the dry-out method again.
Wrapping It Up: My Final Advice From Experience
Repotting dwarf jade into bonsai pots doesn’t have to be frightening. The two traditional tips—root pruning with a 7-day dry period and gradual light transition—have transformed my success rate. I went from killing every plant to keeping a collection of 12 thriving dwarf jade bonsai. Remember, 90% of indoor plants die from overwatering, and dwarf jade is especially sensitive. Trust the traditional methods. Wait before watering. Choose a shallow pot. Give it weak light for two weeks.
I still make mistakes, but fewer now. The last time I repotted a dwarf jade, I accidentally knocked off a branch. I stuck the cutting into the same pot, followed the dry-out method, and it rooted within 4 weeks. That’s the resilience of this plant when you treat it right. If you follow these 2 traditional tips with patience, your dwarf jade will not only survive but thrive in its new bonsai home.





