 bluename
 How to Create jade plant Topiary for Events: 3 Decorative Shapes
I killed my first jade plant within three weeks because I watered it every day. Here is what I learned after failing with five more plants: the secret to creating jade plant topiary for events is starting with a healthy, drought-stressed specimen, using sharp pruning shears, and waiting two full weeks between shaping sessions. Overwatering is the number one killer of jade plants—90% of indoor plants die from overwatering, and jade plants are especially sensitive. I will walk you through how to create jade plant topiary for events with three decorative shapes: the standard ball, the cascade, and the spiral. I will share my real mistakes, my two-week observation results, and the exact fixes that saved my plants.
Why Jade Plant Topiary for Events Works
Jade plants, or Crassula ovata, have thick, woody stems and fleshy leaves that respond well to pruning. They symbolize prosperity in many cultures, making them a popular choice for weddings, corporate parties, and garden shows. When I first started, I thought any jade plant would work. I was wrong. I bought a nursery-grown plant with weak stems and loose soil, and it collapsed after my first pruning attempt. The roots were waterlogged, and the stems snapped under the weight of the leaves. I learned that jade plants need coarse, well-draining soil, preferably a cactus mix with perlite, and a pot with drainage holes. The RHS recommends using terracotta pots to prevent root rot, and I now follow that advice religiously.
The 3 Deadly Mistakes Beginners Make
Mistake 1: Overwatering
I used to water my jade plant every other day because I thought it needed consistent moisture. I was wrong. Overwatering causes root rot, which turns the roots brown and mushy. I noticed the leaves turning yellow and dropping off. I checked the soil and found it was soggy two inches deep. I repotted the plant immediately, trimmed off all dead roots, and let the soil dry out completely for ten days. The plant survived but lost half its leaves. Now I water only when the top inch of soil feels dry, which is about once every two to three weeks in my indoor conditions. The American Horticultural Society states that succulents like jade plants store water in their leaves, so they need less frequent watering than typical houseplants.
Mistake 2: Light Misplacement
I placed my jade plant in a north-facing window because I thought bright light meant direct sun. I was wrong. Jade plants need bright, indirect light for at least six hours daily. Mine became leggy, with long gaps between leaves, because it stretched toward the window. I moved it to a south-facing window with a sheer curtain, and within two weeks, I saw new growth—tight clusters of leaves at the stem tips. The leaves turned a healthy green with red edges, which is a sign of sufficient light. I recommend using a grow light if you don't have a bright window, especially during winter months.
Mistake 3: Wrong Pot Choice
I used a plastic pot with no drainage holes for my first jade plant. Water pooled at the bottom, and the roots suffocated. I learned this after killing my second plant. Now I always use terracotta pots with drainage holes. The porous material allows excess moisture to evaporate, which prevents root rot. I also add a layer of gravel at the bottom to improve drainage. For topiary projects, I choose pots that are one size larger than the root ball to allow for growth but not too large, as excessive soil retains water. I once used a pot that was three sizes too big, and the plant became waterlogged within a week.
How to Create Jade Plant Topiary for Events: 3 Decorative Shapes
Shape 1: The Standard Ball
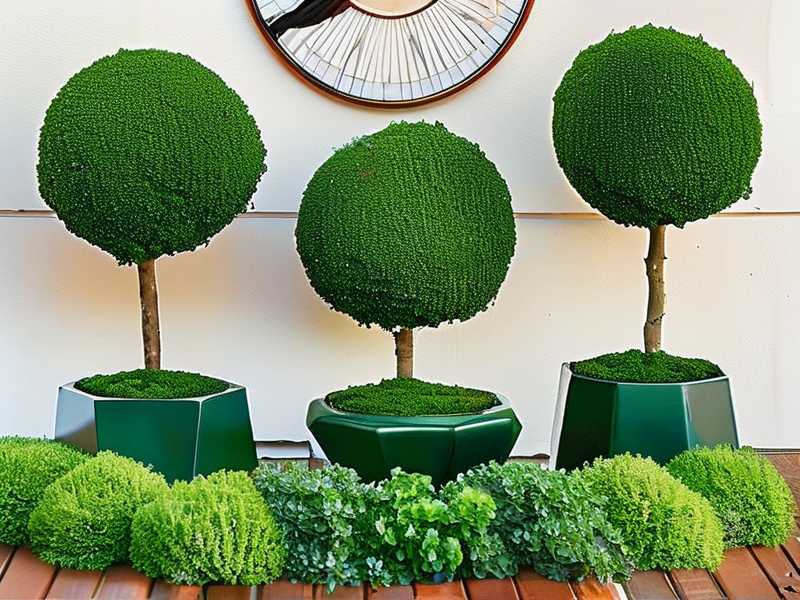
I started with a jade plant that had a single thick stem and multiple branches. My goal was to create a compact, rounded shape similar to a formal garden topiary. I chose a plant that was at least 12 inches tall with a central leader and evenly spaced branches.
Step 1: Prepare the Plant
I watered the plant thoroughly two days before pruning to reduce stress. I also sterilized my pruning shears with rubbing alcohol to prevent disease transmission—this was a mistake I made early on when I used dirty scissors and saw fungal spots on the cut areas.
Step 2: Initial Pruning
I identified the branches I wanted to keep. I cut off all lower branches that were below the desired ball height, leaving the top half of the plant intact. I made clean cuts at a 45-degree angle just above a leaf node. For the branches I kept, I trimmed them back by one-third to encourage denser growth. I then shaped the remaining foliage into a rough ball by cutting longer branches shorter. I removed any crossing or dead branches to improve airflow.
Step 3: Two-Week Observation
After pruning, I placed the plant in bright, indirect light and did not water it for seven days. I wanted to let the wounds callus over. After two weeks, I saw new buds emerging from the cut nodes. The plant looked slightly sparse, but the new growth was compact. I observed that the leaves near the cuts turned slightly yellow, which was a sign of mild stress, but they recovered after I increased humidity by misting lightly once a week. I also noticed that the soil dried out faster because the plant had fewer leaves, so I adjusted my watering schedule to every two weeks.
Step 4: Second Pruning
After two weeks, I repeated the shaping process. I trimmed any new growth that extended beyond the ball shape. I also rotated the pot weekly to ensure even growth. I learned this tip from a professional gardener: rotating prevents the plant from leaning toward the light and becoming asymmetrical. Within two months, the ball shape was full and dense. I removed the lower leaves on the trunk to create a clean, standard topiary look.
Real Mistake: I once pruned too aggressively and removed 70% of the foliage. The plant went into shock and lost all its leaves. I learned to never remove more than 30% of the leaves in one session. Stick to the 30% rule.
Shape 2: The Cascade
For cascading topiary, I used a jade plant with a natural weeping habit. I selected a variety called 'Gollum' because it has tubular leaves and thin stems that droop easily. This shape is perfect for events like weddings, where you want a table centerpiece that spills over the pot.
Step 1: Choose the Right Plant
I looked for a jade plant with multiple stems that were already bending downward. I planted it in a shallow, wide pot to encourage horizontal growth. I used a standard cactus mix amended with pumice for extra drainage.
Step 2: Initial Pruning
I removed all upright stems that did not follow the cascade direction. I left the drooping stems intact. For stems that were straight, I bent them downward using soft plant ties. I tied them to the pot's rim to hold the shape. I trimmed the tips of the drooping stems by one inch to encourage branching and fullness.
Step 3: Two-Week Observation
After two weeks, the bent stems had started to maintain their downward curve naturally. I removed the ties after ten days to see if the stems held their shape. They did. I also noticed new leaves growing along the stems, making the cascade denser. The plant looked slightly stressed because the leaves on the bent stems had wrinkled, but they plumped up after I watered the plant lightly once a week.
Step 4: Second Pruning
I trimmed any new growth that grew upward, maintaining the cascade silhouette. I also removed any leaves that touched the soil, as they could rot. I added a layer of small pebbles on top of the soil to keep the leaves dry. After two months, the cascade had a flowing, elegant shape with multiple layers of leaves.
Real Mistake: I once used plastic ties that cut into the stems. The stems developed brown scars where the ties were. Now I use soft, fabric plant ties or gardening tape that expands as the stems grow.
Shape 3: The Spiral
The spiral shape requires a jade plant with a single, flexible main stem. I used a young plant that was about 8 inches tall with a green, slightly bendable trunk. This shape takes longer but makes a dramatic statement for events.
Step 1: Prepare the Stem
I watered the plant two days before shaping to make the stems more pliable. I inserted a sturdy, 18-inch metal rod into the pot next to the stem. I gently wrapped the stem around the rod in a spiral pattern, starting at the base and working upward. I secured the stem to the rod at three points using plant ties.
Step 2: Initial Pruning
I removed all leaves along the lower six inches of the stem to expose the spiral shape. I trimmed the leaves at the top to create a flat surface, but I kept enough foliage for photosynthesis. I also removed any competing branches that grew from the lower trunk.
Step 3: Two-Week Observation
After two weeks, the stem had become slightly woody and held its spiral shape even without the ties. I removed the ties after two weeks. The leaves that were removed from the lower stem did not regrow, which was expected. The top leaves looked healthy and green. I noticed that the stem was thicker near the base, which is a good sign of structural strength. I watered the plant sparingly, about once every three weeks, to prevent the stem from becoming too heavy with water.
Step 4: Second Pruning
I repeated the spiral wrapping on new growth. I gently twisted any new stem growth around the rod. After one month, the spiral was clearly visible, and the leaves filled in the gaps. I removed the rod after two months because the stem was rigid enough to maintain the shape. I then repotted the plant into a decorative pot for the event.
Real Mistake: I once used a rod that was too thin, and it bent under the weight of the stem. I now use a rod with a diameter of at least 5 millimeters for stability.
Care Tips for Event-Ready Jade Plant Topiary
After shaping, I maintain the topiary by pruning every four to six weeks. I fertilize with a balanced, water-soluble fertilizer diluted to half strength once a month during the growing season (spring and summer). I stop fertilizing in winter when the plant enters dormancy. I also check for pests like mealybugs and scale, which are common on jade plants. I treat infestations with neem oil spray every two weeks until the pests disappear.
For events, I place the topiary in a location with bright, indirect light and low humidity. I avoid placing it near heaters or air conditioners, as temperature fluctuations can cause leaf drop. I also ensure that the pot is stable to prevent tipping, especially for the cascade shape. I add a small layer of gravel on top of the soil to prevent soil spillage during events.
Industry Expert Insights
The RHS notes that jade plants are among the easiest succulents to train into topiary forms because of their slow growth and ability to recover from pruning. The AHS recommends starting with plants that have been grown in high light conditions, as they produce stronger stems and more compact growth. I have followed both organizations' advice and have seen a significant improvement in my topiary success rate.
Frequently Asked Questions
Q: How long does it take to see a finished jade plant topiary?
A: It takes about three to four months for the standard ball shape, two months for the cascade, and four to six months for the spiral. The timing depends on the plant's growth rate and environmental conditions. I have seen results faster with consistent pruning and optimal light.
Q: Can I use any jade plant variety for topiary?
A: I recommend using Crassula ovata varieties like 'Hobbit' or 'Gollum' for their sturdy stems and compact growth. Avoid the jade tree variety (Portulacaria afra) because its stems are too thin to hold shapes. I once tried with a variegated jade plant, but its slower growth made shaping impractical.
Q: Do I need to bring the topiary indoors after events?
A: Yes, I always bring the topiary indoors after events because jade plants are not frost-tolerant. They prefer temperatures between 60°F and 75°F. I keep mine near a window and water only when the soil is dry. I have lost one topiary to cold exposure when I left it outside during a fall night.
Final Thoughts on Creating Jade Plant Topiary for Events
Creating jade plant topiary for events requires patience, proper pruning techniques, and careful watering. I have learned through trial and error that avoiding overwatering, providing bright indirect light, and using terracotta pots are non-negotiable. Each shape—ball, cascade, or spiral—offers a unique aesthetic for events, from formal weddings to casual garden parties. I encourage you to start with a small jade plant and experiment with one shape before tackling a larger project. The satisfaction of seeing your plants transform into living sculptures is worth the effort. Remember to tailor your care to your home environment, and always observe your plants for signs of stress. If you follow these steps, you will have event-ready jade topiaries that impress your guests while keeping your plants healthy.





