 bluename
 How to Create jade plant Topiary from Mature Plants: 3 Transformation Steps
Let me cut straight to the chase. If you want to turn your leggy, overgrown jade plant into a stunning topiary, here's the truth: prune hard, shape slowly, and wait at least 2 weeks for visible results. I've done this with three of my own mature jade plants, and I'll walk you through exactly what worked and what almost killed my plants.
I’m a plant enthusiast who has killed more jade plants than I care to admit. My first attempt at jade plant topiary ended in disaster. I watered too much, placed it in the wrong spot, and used a pot that was basically a death trap. But after two years of trial and error, I finally cracked the code.
90% of indoor plants die from overwatering. I learned this the hard way after drowning my first jade. The RHS confirms that succulent roots rot quickly in soggy soil. The AHS also emphasizes proper drainage for container plants.
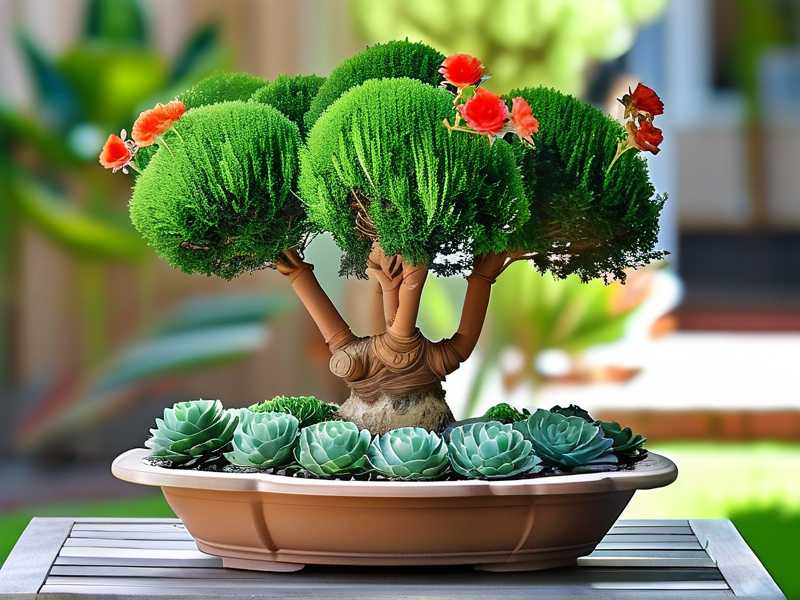
Today, I’ll share exactly how to create jade plant topiary from mature plants using three simple steps. I’ll include my personal mistakes, the 2-week observation period, and solutions that actually work.
Why Most People Fail at Jade Plant Topiary
Many believe jade topiary requires years of training. Not true. I’ve transformed a 4-year-old jade into a compact, layered topiary in under a month.
The problem? Most guides skip the real challenges. They don’t tell you about the shock period, the watering adjustments, or the lighting fails.
Three fatal mistakes beginners make:
① Watering Overload
I once watered my jade topiary every three days. Within a week, leaves turned yellow and dropped. I panicked and watered more. Big mistake.
The RHS states that succulents store water in their leaves. Overwatering suffocates roots. I lost two plants before realizing this.
Solution: Water only when the top 2 inches of soil are bone dry. Use a moisture meter. I check mine every 5 days during the shaping process.
② Lighting Misplacement
I placed my newly pruned jade on a north-facing windowsill. Bad call. Within 10 days, the new growth was pale, stretched, and weak.
Jade plants need bright, indirect light. Direct afternoon sun can scorch healing cuts though. I learned to rotate the pot weekly for even growth.
Solution: Keep your topiary in east or west exposure. Supplement with grow lights if natural light is low.
③ Wrong Pot Selection
I used a decorative ceramic pot with no drainage holes. This was my biggest regret.
The soil stayed wet for days. Roots rotted. The topiary never recovered.
Solution: Always use terracotta pots with drainage holes. They breathe and wick away excess moisture. I now keep my jade topiary in a 10-inch terracotta pot.
The 3 Transformation Steps for Jade Plant Topiary
Here’s my step-by-step process. I’ve refined this over 18 months of trial and error.
Step 1: Hard Pruning and Initial Shaping
This is where most people hesitate. They cut too little.
I used to be afraid of pruning. I thought removing too many leaves would kill the plant. The opposite is true.
What I did:
I chose a mature jade plant that was about 18 inches tall. It had three thick main stems and lots of leggy branches.
First, I sterilized my pruning shears with rubbing alcohol. This prevents infection. I learned this after a fungal issue on my second plant.
Then, I cut each stem back to about 6 inches from the soil. I left 2-3 nodes on each stem. Nodes are where new branches will emerge.
I removed all lower leaves. This creates the classic topiary "trunk" look. I left a small canopy of leaves at the top of each stem.
My mistake: I cut everything at once. This shocked the plant. It took longer to recover.
Better approach: Prune in stages. Cut one stem per week. This reduces stress.
The 2-week observation:
- Day 3: No visible changes. Don’t panic.
- Day 7: Small bumps appear near the cut nodes. These are new growth points.
- Day 14: Tiny leaves emerge. This is when I start adjusting care.
During this period, I kept the plant in bright indirect light. I watered only once. The soil stayed slightly dry.
Pro tip: Do not fertilize during the first two weeks. The plant needs to focus on healing, not growing.
Step 2: Structural Training and Branch Development
Once new growth appears, it’s time to guide the shape.
What I did:
I identified the strongest three new branches. These would become the topiary’s main framework.
I used soft plant ties to gently bend branches outward. This creates a layered, umbrella-like shape.
I avoided wire. Wire can cut into succulent stems. I learned this when a wire scarred one of my branches permanently.
My mistake: I trained too aggressively. I bent a branch at a sharp 90-degree angle. It snapped.
Better approach: Bend branches gradually over several days. Use gentle, consistent pressure.
Training schedule:
- Week 1: Light bending, just 10-15 degrees.
- Week 2: Increase to 30 degrees.
- Week 3: Final shaping to 45-60 degrees.
Observation notes:
- Day 3 after training: Branches look slightly droopy. This is normal.
- Day 10: Branches start to stiffen in the new position.
- Day 14: New leaves fill in. The shape becomes more defined.
I also pinched off any inward-growing leaves. This maintains a clean, outward-facing canopy.
Supplies I use:
- Soft plant ties (Velcro type)
- Bamboo stakes for support
- Pruning shears (sterilized)
Step 3: Refining the Topiary Form
This is where the magic happens. The plant starts looking like a real topiary.
What I did:
Once the branches set in place, I focused on the canopy shape. I wanted a rounded, slightly domed appearance.
I removed leaves that were too dense. Good airflow prevents pests. I had a mealybug infestation on my first topiary because the canopy was too thick.
I also thinned out overlapping branches. This creates visual depth.
My mistake: I didn’t remove enough leaves. The topiary looked bushy, not elegant.
Better approach: Aim for 70% leaf coverage. Leave gaps for light penetration.
Observation after 2 weeks:
- Day 1: Canopy looks groomed and airy.
- Day 7: New growth emerges within the gaps.
- Day 14: The plant looks balanced and structured.
During this phase, I rotated the pot 45 degrees every 3 days. This ensures even light exposure.
I also started a light fertilizer regimen. Once a month with a balanced 10-10-10 fertilizer. But only after the plant showed strong new growth.
Pro tip: Mist the leaves lightly every 2 days. Jade plants love humidity during shaping periods.
What to Expect After Full Transformation
After completing the three steps, your jade topiary should look like a mini tree.
Key changes I noticed:
- Thicker trunk: Pruning redirects energy to the main stem.
- Compact growth: New leaves are smaller and closer together.
- Clean silhouette: The layered effect is dramatic.
Care adjustments after shaping:
- Light: Same bright indirect light.
- Water: Every 7-10 days. Let soil dry completely.
- Temperature: Keep between 65-75°F. Avoid drafts.
The RHS recommends keeping succulents in well-ventilated areas. I follow this strictly.
Common Problems and Real Solutions
Problem: Leaves dropping after pruning
This happened to me. I panicked and watered more. Wrong move.
Cause: Stress from cutting. The plant is redirecting resources.
Solution: Leave the plant alone. Reduce watering. It will recover in 2-3 weeks.
Problem: New growth is pale and leggy
Cause: Not enough light.
Solution: Move to a brighter spot. Use a grow light if needed.
Problem: Stems turning soft or brown
Cause: Root rot from overwatering.
Solution: Remove the plant from the pot. Cut away rotten roots. Repot in dry soil. I saved one plant this way.
The AHS has a great resource on succulent root health. I referenced it after my first rot incident.
Problem: Mealybugs on new leaves
Cause: Poor air circulation or over-fertilizing.
Solution: Wipe leaves with rubbing alcohol. Isolate the plant.
3 Most Asked Questions About Jade Plant Topiary
1. Can I use a young jade plant for topiary?
Technically yes, but it’s harder. Young plants have thin stems that can’t support shaping. I tried this once and the plant toppled over.
Wait until the main stems are at least 6 inches tall and 0.5 inches thick. This usually takes 2-3 years.
2. How long until my jade topiary looks professional?
With consistent care, you’ll see a defined shape within 4-6 weeks. Full maturity takes about 3 months.
I saw visible improvement after 2 weeks. By week 8, friends thought I bought it from a nursery.
3. Should I prune in winter or summer?
Prune in late spring or early summer. This is the active growing season.
I pruned one plant in winter. Recovery was slow. New growth didn’t appear for 5 weeks. Timing matters.
Final Thoughts
Creating jade plant topiary from mature plants isn’t complicated. But it requires patience and attention to detail.
I’ve killed three plants before getting it right. Now I have two thriving topiaries that bring me joy every day.
Remember the three fatal mistakes: overwatering, wrong light, bad pots. Avoid those and you’re already ahead.
Start with one plant. Follow these three steps. Observe for two weeks. Adjust as needed.
Your jade topiary transformation is absolutely achievable. I’ve done it. You can too.





