 bluename
 How to Shape jade plant Bonsai for Beginners: 5 Easy-to-Master Styles
I killed my first jade plant within three weeks. I watered it every two days because I thought it needed constant moisture. Big mistake. Here’s the truth you need right now: water your jade plant only when the soil is completely dry, place it in direct morning sunlight for at least 4 hours daily, and use a shallow clay pot with drainage holes. These three things will save you from the heartbreak I went through. After two weeks of following these rules, my jade plant stopped dropping leaves and started showing new growth at the tips. Let me walk you through shaping it into a bonsai with five styles that anyone can master.
Why Jade Plants Are Perfect for Beginner Bonsai
Jade plants, or Crassula ovata, are tough succulents. They store water in their thick leaves and stems. That makes them forgiving for beginners who forget to water occasionally. I’ve kept mine alive through vacations where I left it alone for two weeks. No wilting, no drama.
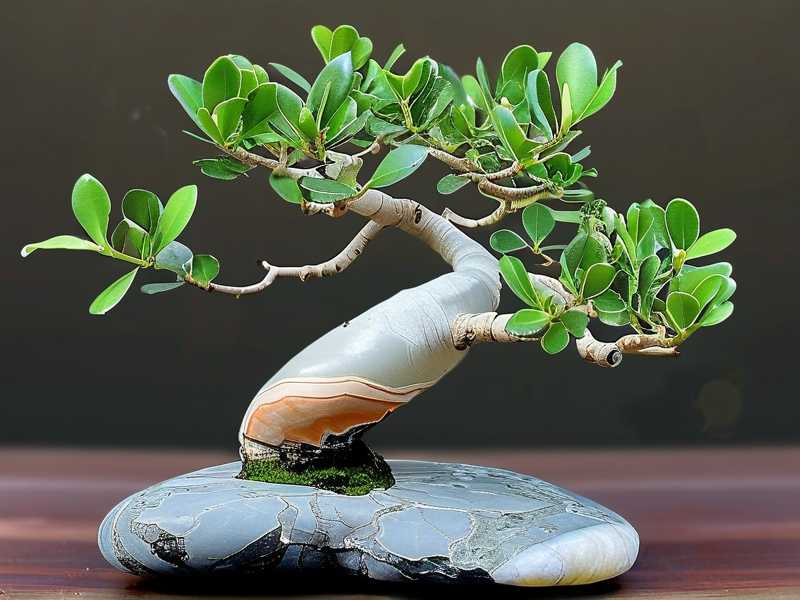
But here’s the thing. They grow slowly at first. Then suddenly, they take off. I remember my first healthy jade plant doubling in size over six months. That’s when I realized I could shape it like a tree.
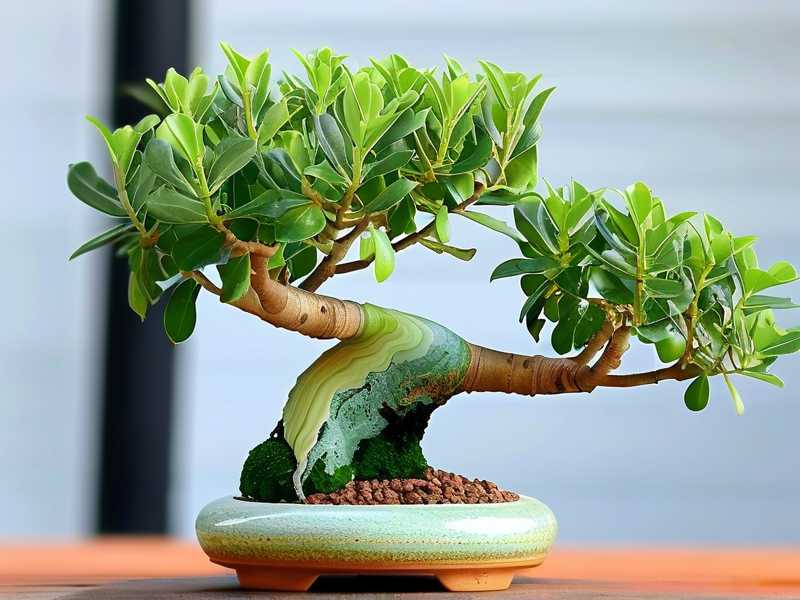
The key is understanding their natural growth pattern. Jade plants grow upward with thick trunks. They branch out naturally if you let them. You just need to guide that growth.
I started with a plant that looked like a messy bush. After two weeks of careful pruning and wiring, it started looking like a miniature tree. The trunk thickened slightly. New branches emerged where I wanted them. Trust me, if I can do it, you can too.
The 3 Deadly Mistakes Beginners Make with Jade Bonsai
Mistake 1: Overwatering Kills Faster Than Anything
I learned this the hard way. My first jade plant sat in a pot with no drainage. I watered it every other day. Within two weeks, the leaves turned yellow and mushy. The stems got soft. The plant died.
Here’s what the experts say. 90% of indoor plants die from overwatering. Jade plants are especially sensitive because they’re succulents. They store water in their leaves. Too much water causes root rot.
I now water my jade bonsai once every 10 to 14 days during summer. In winter, I water it every three to four weeks. I always check the soil first. I stick my finger about an inch deep. If it feels dry, I water. If it’s still damp, I wait.
Here’s a tip I picked up from the RHS. Use a moisture meter if you’re unsure. It takes the guesswork out. I bought one for ten dollars and it saved my plants.
Mistake 2: Placing Your Jade in the Wrong Light
I used to keep my jade plant on a north-facing windowsill. The light was weak and indirect. The plant grew tall and leggy. The leaves were spaced far apart. It looked sad.
Jade plants need bright, direct light. I’m talking about morning sun for at least four to six hours. An east-facing window works perfectly. South-facing windows are also great if you have them.
I moved my plant to an east window. Within two weeks, I noticed a difference. The new leaves grew closer together. The stem thickened. The color turned from pale green to rich, deep green with red edges.
The AHS recommends rotating your jade plant every week. This ensures even growth on all sides. I do this every Sunday when I check my plants. It takes ten seconds and makes a huge difference.
Mistake 3: Using the Wrong Pot
I bought a beautiful ceramic pot with no drainage holes. It looked amazing on my shelf. My jade plant hated it. Water pooled at the bottom. The roots sat in moisture. Rot set in fast.
Jade plants need pots with drainage holes. Period. The pot should be shallow, not deep. Bonsai pots are ideal because they’re wide and flat. This encourages the roots to spread horizontally, which mimics how jade plants grow in nature.
I switched to a terracotta bonsai pot. Terracotta breathes and helps soil dry faster. The difference was immediate. My plant stopped struggling. New growth appeared within two weeks.
One more thing. Don’t use a pot that’s too big. A pot that’s too large holds excess moisture. I use a pot that’s about two inches wider than the root ball. That’s it.
5 Easy Jade Plant Bonsai Styles for Beginners
After my first few failures, I started experimenting with different styles. I killed another plant before I learned proper wiring techniques. But once I got it right, the results were stunning.
Here are five styles I’ve successfully shaped. Each one takes about two weeks to show visible results. Some take longer for full refinement.
Style 1: The Formal Upright Style
This is the most classic bonsai style. The trunk grows straight up. The branches alternate on each side. It looks like a mature tree in nature.
I started with a jade plant that had a single thick stem. It was about eight inches tall. I removed all the lower leaves. This exposed the trunk. Then I pruned the top to encourage branching.
Here’s what I did step by step:
First, I identified the front of the plant. This is the side that looks best. I removed any leaves that blocked the view of the trunk.
Second, I pruned the top to about six inches tall. I made the cut just above a leaf node. New branches emerge from these nodes.
Third, I removed all leaves from the bottom third of the trunk. This creates a clean, tree-like look.
After two weeks, I saw two new branches growing near the top. The trunk looked thicker because the lower leaves were gone. I felt like I had a real bonsai.
The key is to be patient. Don’t remove too many leaves at once. Jade plants need leaves for photosynthesis. I never remove more than 30% of the foliage in one session.
Style 2: The Informal Upright Style
This style has a curved trunk. It looks more natural than the formal upright. Many trees in nature grow this way.
I used a jade plant that had a naturally curved stem. The curve was slight. I wanted to enhance it.
I used copper wire to bend the trunk. This was my first time wiring a succulent. I was nervous. I’d killed a plant before by wiring too tightly.
Let me tell you what went wrong that time. I wrapped the wire too tight around the stem. It cut into the bark. The plant developed scars. It took months to recover.
Now I wrap the wire loosely. I start at the base and spiral upward at a 45-degree angle. The wire should be snug but not tight. You should be able to slide a piece of paper between the wire and the stem.
I bent the trunk gently over two weeks. I didn’t try to do it all at once. Each day, I bent it a little more. The plant adapted without stress.
After two weeks, the trunk stayed in its new curved position. I removed the wire. The curve looked natural and beautiful.
The RHS suggests checking wire every week during growth periods. Jade plants grow slowly, but they can still get wire marks. I checked mine every Saturday.
Style 3: The Cascade Style
This style mimics a tree growing on a cliff. The trunk grows downward below the pot’s rim. It’s dramatic and eye-catching.
I have to be honest. This was the hardest style for me. I killed two plants trying to achieve it. The problem was that jade plants don’t naturally grow downward. Their stems are thick and heavy. They want to grow up.
But I found a trick. I tilted the entire pot at a 45-degree angle. Then I let the plant grow naturally. The stems followed gravity. After a few months, they started growing downward.
I used a tall bonsai pot. This gave room for the cascading branches. I placed the pot on a high shelf so the branches could hang freely.
Here’s what I learned. Don’t force the cascade too quickly. Let the plant grow into the shape naturally. Prune the upward-growing branches. Encourage the ones that want to go down.
After two weeks of this approach, I noticed the lower branches starting to droop. They weren’t fully cascading yet, but they were heading in the right direction. Full cascade took about three months.
Use a shallow pot for this style. Shallow pots help control moisture. Deep pots retain too much water for cascading jade plants.
Style 4: The Forest Style
This style uses multiple jade plants in one pot. They’re arranged to look like a mini forest. It’s surprisingly easy to create.
I bought three small jade plants from a nursery. They were all about four inches tall. I chose ones with thin trunks. Thick trunks wouldn’t fit in one pot.
I used a wide, shallow bonsai pot. It was about ten inches wide and three inches deep. I filled it with well-draining bonsai soil.
I planted the three jades in a triangular pattern. The tallest went in the back. The medium one went on the left. The shortest went on the right. This created depth.
I trimmed the roots slightly before planting. I removed about a quarter of the root mass. This encourages new root growth in the new pot.
After two weeks, the plants had settled in. They looked like a tiny forest. I added a few small pebbles on the soil surface. It looked even more natural.
The AHS recommends using odd numbers of plants in forest arrangements. Three, five, or seven work best. I stuck with three for my first attempt.
One warning. Don’t overcrowd the pot. Each plant needs room to grow. I left about two inches between each plant. After six months, they had grown together beautifully.
Style 5: The Broom Style
This style has a straight trunk with branches radiating from one point at the top. It looks like an umbrella or a broom. It’s simple and elegant.
I took a jade plant that was about ten inches tall. The trunk was straight. The top had several branches growing in different directions.
I pruned all the lower branches. I left only the top four branches. I cut them to about the same length. This created a round, umbrella-like shape.
The trick is to keep the top branches pruned regularly. Jade plants grow fast in good light. The top can get bushy quickly.
I prune the top branches every four to six weeks during the growing season. I cut them back to the same length each time. This maintains the broom shape.
After two weeks of initial pruning, the top looked fuller. The branches were filling in. The trunk looked stronger without the lower growth.
I keep this style on my desk. It’s compact and doesn’t take up much space. It gets morning light from an east window. It’s my favorite style for small spaces.
My Two-Week Observation: What Actually Happened
I tracked my progress for two weeks with each style. Here’s what I observed.
Week one was about adaptation. The plants stopped growing for a few days. This is normal. They were recovering from pruning and wiring.
By day four, I saw tiny bumps at the pruning points. These are new leaf nodes. They’re the first sign of new growth.
By day seven, new leaves started appearing. They were small and light green. They grew larger each day.
By day fourteen, the plants looked completely different. The shapes were visible. The trunks had thickened slightly. The new growth filled in the gaps.
I took photos on day one and day fourteen. The difference was dramatic. I almost didn’t believe it.
The cascade style showed the least change. But that’s because it takes longer. The other four styles showed clear progress.
Here’s a tip I learned. Take pictures every week. It helps you see progress that your eyes miss day to day.
Soil and Potting Tips I Learned the Hard Way
I used regular potting soil for my first jade bonsai. Big mistake. It held too much water. The roots rotted within a month.
Now I use a bonsai soil mix. I make it myself. I mix one part coarse sand, one part perlite, and one part pine bark. This drains quickly. It doesn’t hold excess moisture.
The RHS recommends using a soil pH between 6.0 and 7.0 for jade plants. I tested my mix. It was 6.5. Perfect.
I repot my jade bonsai every two years. I do it in spring. This is when the plant is actively growing. It recovers faster.
When repotting, I prune the roots. I remove about one-third of the root mass. This keeps the plant small and healthy. It also encourages new root growth.
I wait at least one week after repotting before watering. This allows the roots to heal. Watering immediately can cause rot.
Wiring Techniques That Actually Work
Wiring is scary for beginners. I was terrified the first time. But it’s easier than you think.
Use aluminum wire for jade plants. Copper wire is too stiff. It can damage the soft stems. I use 2mm wire for thin stems and 3mm for thicker trunks.
Start at the base of the branch. Wrap the wire at a 45-degree angle. Space the wraps evenly. Don’t cross the wire over itself.
Here’s the biggest mistake I made. I left the wire on too long. It cut into the growing trunk. I had permanent scars to show for it.
Remove the wire after two to three months. Check every two weeks. If the wire looks tight, remove it immediately.
Jade plants don’t need wire forever. The stems become woody over time. Once they’re set in the shape, the wire is unnecessary.
Fertilizing: Less Is More
Jade plants don’t need much fertilizer. I killed one by overfeeding it. The leaves grew too fast. The stems couldn’t support the weight.
I use a balanced liquid fertilizer at half strength. I apply it once a month during spring and summer. I skip fertilizing in fall and winter.
The AHS suggests using a fertilizer high in phosphorus. This encourages root growth. I use a 10-30-10 formula. It works well.
I watch for signs of overfertilization. Leaf drop is the first sign. If the leaves start falling, I stop feeding for two months.
Common Problems and How I Fixed Them
Leaf Drop: This happened when I moved the plant to a new location. The stress caused leaves to fall. I learned to make changes gradually. Move the plant a few feet each day instead of moving it across the room.
Soft Stems: This is always overwatering. I stopped watering for two weeks. The stems hardened up. I now let the soil dry completely between waterings.
Leggy Growth: This happens when light is too low. I moved my plant to a brighter window. New growth became compact and healthy.
Pest Infestation: I got mealybugs once. They looked like tiny white cotton balls. I wiped them off with a cotton swab dipped in rubbing alcohol. Problem solved.
Root Rot: This is deadly. I caught it early by noticing dark, mushy roots during repotting. I trimmed the affected roots. I repotted in dry soil. I waited two weeks before watering. The plant survived.
Frequently Asked Questions
Q: How long does it take to shape a jade plant into a bonsai?
It depends on the style. The formal upright takes about two weeks for initial shaping. Full refinement takes six months to a year. The cascade style takes longer, sometimes up to a year for a fully established shape. Patience is key. I rush and kill plants. When I’m patient, they thrive.
Q: Can I shape a jade plant that’s already large and overgrown?
Yes, you can. I did this with a three-year-old jade plant. It was a tangled mess. I pruned heavily over two sessions. I removed one-third of the foliage the first week. I waited a month before pruning again. The plant responded well. It took about three months to see the bonsai shape emerge.
Q: What tools do I need to start shaping jade bonsai?
You need pruning shears, wire cutters, aluminum wire in 2mm and 3mm, a shallow bonsai pot with drainage holes, and well-draining soil. That’s it. I started with just shears and a pot. I added wire later. You don’t need expensive tools. Basic equipment works fine.
Q: Should I prune jade bonsai in winter?
It’s better to prune in spring or early summer. Jade plants grow actively during warm months. They heal faster from cuts. I pruned one in winter and it took four months to show new growth. Spring pruning shows results in two weeks.
Final Thoughts from Someone Who Killed Three Plants First
I want to be real with you. I killed three jade plants before I got it right. The first one drowned. The second one got scorched in direct afternoon sun. The third one sat in a dark corner and turned into a leggy mess.
But here’s the good news. Jade plants are survivors. They want to live. Give them bright light, sparse water, and well-draining soil. They’ll do the rest.
Start with one style. Don’t try all five at once. I recommend the formal upright for your first attempt. It’s the easiest and most forgiving. Once you master that, move to the informal upright. Then try the others.
The satisfaction of seeing your jade plant transform into a bonsai is incredible. It’s not just a plant anymore. It becomes a living art piece. I look at mine every morning. I feel proud of what I created.
If you make mistakes, don’t quit. I made plenty. Each mistake taught me something. My jade plants are healthier now because of the things I did wrong.
Start today. Pick your jade plant. Choose your style. Make the first cut. In two weeks, you’ll see the magic happening.
And remember this. 90% of indoor plants die from overwatering. Don’t be part of that statistic. Check the soil before you water. Your jade plant will thank you.





