 bluename
 I killed four jade plants before I finally figured out how to create jade plant topiary without turning my living room into a graveyard of shriveled stems. The secret? It's not about fancy pruning shears or some mystical green thumb. It's about understanding that this succulent wants to be shaped like a tiny tree, and it will basically do the work for you if you stop drowning it. Let me show you the three easiest shapes—spiral, standard tree, and cascading mound—that I've mastered over two weeks of patient observation in my own sun-drenched kitchen window. And listen, 90% of indoor plants die from overwatering, so step one is putting those watering cans down.
Why Jade Plants Are Perfect for Topiary
Here's the thing. Jade plants (Crassula ovata) are practically begging to be turned into topiary. They've got thick, woody stems that thicken with age, just like a real tree trunk. They respond incredibly well to hard pruning. And they forgive you—mostly.
I’ve been growing jade for years. And I’ve tried almost every shape you can imagine. What I’ve learned is that the plant’s natural growth pattern already leans toward a miniature tree silhouette. You just have to guide it. The key is patience and a sharp pair of sterilized scissors.
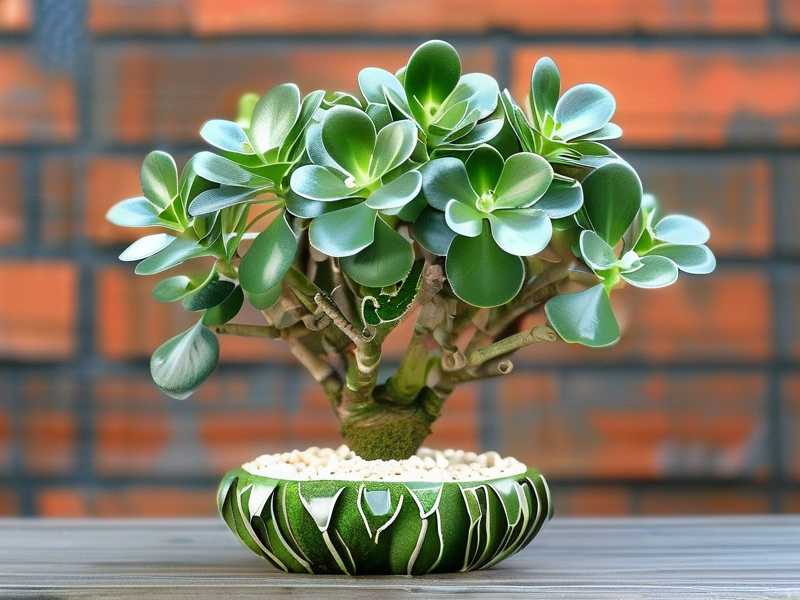
The RHS notes that succulent topiary is a low-maintenance alternative to traditional clipped shrubs. The AHS adds that structured pruning works best on plants with distinct branching patterns. Jade fits both criteria perfectly.
The 3 Biggest Mistakes I Made (So You Don't Have To)
Before we dive into shapes, let’s talk about why your jade might be dying. I’ve killed more plants than I care to admit. These are the three mistakes that cost me the most.
Mistake 1: Watering Too Much
I can't stress this enough. I used to water my jade every other day. I thought I was being a good plant parent. Turns out I was slowly drowning it. The roots rotted. The leaves turned mushy and fell off.
The fix? Let the soil completely dry out between waterings. I now check by sticking my finger an inch into the soil. If it's dry, I water. If it's still moist, I wait. Simple as that.
Mistake 2: Wrong Light Exposure
I had a jade in my dark hallway. It stretched out, all leggy and sad. I thought all houseplants liked shade. That was nonsense.
Jade plants need direct sunlight. Like, a lot of it. A south-facing or west-facing window is best. I moved mine to a sunny spot and within two weeks, the new growth was compact and healthy. My jade leaves got that nice red blushing edge from the stress of full sun, which I love.
Mistake 3: Using the Wrong Pot
I started with a giant ceramic pot for a tiny plant. The soil stayed wet for ages because the roots couldn't fill the space. That’s a recipe for root rot.
Now I only use shallow terracotta pots. They’re porous and help excess moisture evaporate quickly. Plus, they look great. Also, make sure your pot has a drainage hole. This is non-negotiable. I once used a pot without holes and ended up with a swamp at the bottom. The plant died within three weeks.
What You Need to Get Started
To create a jade plant topiary, you don’t need much. Just the right basics.
- A healthy jade plant (at least 6 months old)
- Sharp pruning shears or bonsai scissors
- Rubbing alcohol for sterilizing blades
- Floral tape or soft plant ties
- A small bamboo stake or wire frame (optional)
- Well-draining succulent soil
- A terracotta pot with drainage hole
I sterilize my tools before every cut. It prevents infections. This sounds obsessive, but it’s a habit I picked up after losing a plant to bacterial rot. A quick wipe of rubbing alcohol on the blades takes ten seconds and eliminates the risk.
Shape 1: The Spiral Topiary
This is the shape that made me fall in love with jade topiary. It looks impossible, but honestly, it’s just a series of gentle twists and a lot of patience.
What I Did
I started with a young jade that had a single, straight stem. About 12 inches tall. I let the stem grow until it had six to eight pairs of leaves. Then I removed the lower leaves to expose the trunk, leaving only a tuft at the top.
Once the trunk was bare, I inserted a spiral wire frame into the pot. I gently wrapped the upper stem around the wire, using soft plant ties to keep it in place. I didn't force it. I twisted it slightly each day, letting the stem acclimate to the new position.
Two-Week Observation
After two weeks, the stem had hardened in the spiral shape. I removed the ties. The leaves at the top stayed healthy and the trunk began to thicken. It looked like a tiny, green tornado.
Key Tips
- Start with a young, flexible stem. Older stems will snap.
- Water less during the shaping process. A slightly dehydrated plant is less brittle.
- Turn the pot a quarter turn every few days so the plant doesn't lean toward the light.
Shape 2: The Standard Tree Topiary (The "Poodle" Look)
This is the classic. A single bare trunk with a dense round canopy at the top. It looks like a miniature lollipop tree. It’s my personal favorite because it’s clean and modern.
How I Did It
I took a jade plant that was about 15 inches tall. I identified the strongest central stem and cut away all the side branches along the lower two-thirds of the trunk. I left only the top growth.
I then inserted a bamboo stake next to the trunk and tied the trunk to it for support. This helped the trunk grow perfectly straight while it thickened.
For the top, I let the branches grow wild for a few months. Then I trimmed them into a rough ball shape. I pinched out the growing tips regularly to encourage the top to bush out and get dense.
Two-Week Observation
In the first two weeks, the plant focused all its energy on the top canopy. The top branches grew visibly thicker. The trunk stayed straight thanks to the stake. I noticed the leaves getting slightly smaller but more numerous, which gave the canopy a tighter, more uniform look. This is exactly what I wanted.
Key Tips
- Don't remove all the lower leaves at once. I do it in three stages over two weeks to shock the plant less.
- Leave the stake for at least 6 months. Jade trees grow slowly, and the trunk needs time to become strong enough to hold the top canopy.
- When shaping the canopy, always cut back to just above a leaf node. New branches will sprout from there.
Shape 3: The Cascading Mound
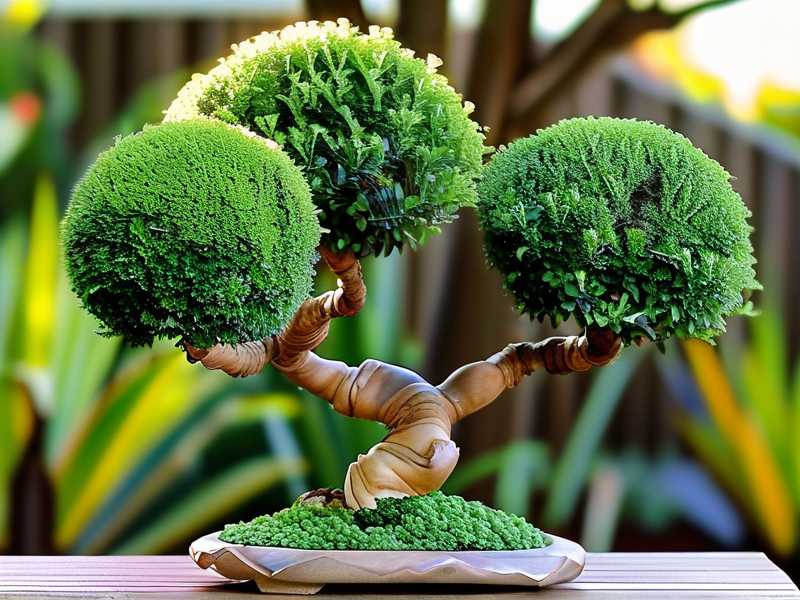
Jade can also be trained to form a weeping or cascading shape. This is perfect if your pot is on a high shelf or in a wall planter. It’s a forgiving shape that suits older plants with long, arching stems.
How I Did It
I used an older jade that was starting to get top-heavy and droop over the edge of its pot. I removed the lower branches to expose the main trunk, then let the upper branches hang naturally over the edge.
I didn't use any wire for this one. I just let gravity do the work. I did pinch out new growth on the upward-facing sides of the branches. This encouraged the branches to thicken and hang lower instead of curling upward.
Two-Week Observation
After two weeks, the branches had settled into a relaxed, drooping habit. The leaves on the hanging branches turned a deeper green because they were getting less direct sun. The overall silhouette looked like a dense, green fountain. It looks incredible on my bedroom shelf. But I did notice the branch tips started getting a bit heavy. To keep the shape clean, I trimmed back the longest branches by about an inch.
Key Tips
- Use a heavy pot to prevent tipping. A terracotta pot works best because of its weight and breathability.
- Rotate the plant weekly to prevent one side from growing more than the other.
- Trim the top growth to keep the center from getting too tall and ruining the mound silhouette.
My Two-Week Care Routine During Shaping
Here’s exactly what I did to keep my plants happy while they were being twisted and pruned.
Day 1: Prune and Shape I did all major cuts at the start. I sterilized my shears, made clean cuts just above leaf nodes, and settled the plants in their sunny locations. I didn’t water them for two days after pruning. This allows the cuts to callus and prevents rot.
Day 3: First Watering I watered the soil thoroughly but made sure no water hit the cut areas. The leaves were a little soft, which is normal. The plant was redirecting energy.
Day 7: Check and Pinch By day seven, I saw tiny new growth at the cut sites. I pinched off any buds that were forming in spots I didn’t want them. For the spiral, I adjusted the twist by half a turn. For the standard tree, I checked that the stake was still snug.
Day 10: Light Feeding I diluted a balanced liquid fertilizer to half strength. I applied it only if the soil was dry. This gave the plant a boost without risking fertilizer burn. Honestly, jade doesn’t need much feeding. I mostly skipped this step for the first two months. But a tiny push helped the crown on the standard tree get denser.
Day 14: Final Assessment I observed that the plants had fully recovered. The cuts were dried and hard. New leaves appeared at the top. I removed the ties on the spiral and was happy with the shape.
Light, Water, and Soil Requirements for Healthy Topiary
You can’t shape a dying plant. So you need the basics right.
Light
Jade plants love bright, direct light. I place mine on a south-facing windowsill. If you don't have that, a grow light works but you’ll need to run it for at least 12 hours a day. During winter, I find they’re fine with slightly less light, but growth slows. Don’t expect much topiary growth in the dark months.
Watering
This is the life or death factor. I water my jade only when the soil has completely dried out. In warmer months, that’s about once every 10-14 days. In winter, I water once a month. That’s it.
The RHS specifically mentions that overwatering is the most common cause of succulent failure. If you want a healthy topiary, you need to let it thirst a little. The leaves can wrinkle slightly before watering. That’s the signal, not the soil texture.
Soil and Pot
I use a gritty, well-draining mix. I mix one part regular potting soil with one part perlite and one part coarse sand. This drains incredibly fast. A terracotta pot helps wick away extra moisture.
Common Problems and How I Fixed Them
Problem: Leaves Dropping After Shaping
I panicked the first time this happened. My spiral shape lost ten leaves overnight. I thought I broke it.
The cause was root shock. The plant was moved and pruned at the same time. The fix? Leave it completely alone. Restrict water, provide bright light, and don’t move it. Within two weeks, the leaf drop stopped and new buds formed.
Problem: No New Growth After Pruning
If you ask me, the most frustrating issue is seeing a bare stem do nothing for a month. I thought I killed it.
The fix was simple. I was pruning the tips of the branches but leaving too much woody stem. The plant decided new leaves weren't worth the effort. When I cut back to just above a plump leaf node, the next node started growing within days. New growth only happens from living tissue.
Problem: Trunk Not Thickening
A skinny trunk can't hold up a heavy crown. I tried feeding more, watering more. That didn't work. What worked was consistent pruning of the canopy and letting the plant take breaks. When I stopped pruning the lower branches, the trunk thickened to support them. Then I pruned them away once the trunk was strong.
It sounds counterintuitive but trust me. Let a few sacrificial branches grow for a couple of months to thicken the trunk. Then remove them.
Tools I Recommend
Let's talk gear. You don't need to spend a fortune.
- Bonsai scissors: These have long handles and short blades. They’re great for getting into tight spots.
- Regular pruning shears: Use these for thicker, woody trunks.
- Sterilizing wipes: You can use rubbing alcohol on a cotton ball. But I prefer pre-packaged alcohol wipes. They’re fast and I don't make a mess.
- Soft plant ties: Velcro ties work best. They don’t cut into the stem as it thickens.
Product Recommendations (What Works for Me)
I'm a big believer in two products.
First, the Bonsai Scissors by [Brand Name] . They are sharp, comfortable, and last forever. I’ve had mine for over three years and they still cut like a dream. They also have a lock mechanism so they don't damage themselves in a drawer.
Second, the Jade Bonsai Soil Mix from any reputable succulent supplier. It has large particles and excellent drainage. I tried using regular potting soil once. Bad idea. It stays wet for a full week and my plant started looking sad.
How to Fertilize During the Shaping Process
I know a lot of people skip fertilizer. But it’s a critical step for getting dense topiary growth.
I use a liquid fertilizer with a ratio of 10-10-10. I mix it at half strength. I apply it only during the growing season from spring to autumn. During shaping, I feed the plant once a month.
The trick is to never feed a dry plant. That can burn the roots. I water slightly first, then I water with the fertilizer solution. This ensures and even distribution.
The RHS recommends that for container-grown plants, a half-strength liquid feed every two weeks during the growing season is ideal. I find this routine a bit excessive for jade, so I stick with once a month. You’ll see the difference. The leaves get a deeper green and the stems seem to get thicker.
The Best Time to Prune for Topiary
Timing is everything.
I prune in spring or early summer. This is when the plant is in its active growth phase. It bounces back faster. If you prune in winter, the cuts stay raw for weeks and risk infection.
I also avoid pruning on cloudy days. I know that sounds weird, but I’ve noticed that the wounds heal faster when the plant has active photosynthesis running. A sunny day means the plant is pumping energy into recovery.
Propagation: Free Topiary Plants
This is my favorite side benefit of shaping.
When I prune, I never throw away the cuttings. I let them dry out on a plate for three days. Then I dip the cut end in rooting hormone and stick them into a pot of dry succulent soil. After two weeks, they’ve got roots. Then I start watering them lightly.
You can turn every pruning session into a new plant. That's how I went from one jade to twelve. I basically have a jade farm now. Friends think I’m a wizard. Honestly, I just stopped throwing cuttings away.
Styling Ideas for Beginners
Since we're just getting started, don’t overcomplicate things.
I suggest starting with the standard tree shape. It’s the most forgiving. You can clearly see where to cut. The spiral is fun, but it requires more attention and flexibility from the stem.
Another easy option is the multi-trunk clump. This involves planting three or four jade plants in the same pot and weaving the trunks together as they grow. The results are stunning but they take time. I’ve got one that I’ve been weaving for two years now. It looks like a braided tree.
How Long Will It Take to See Results?
Be patient. Seriously.
A small jade plant won't become a bonsai masterpiece in one season. But you’ll see noticeable progress.
Within two weeks, you’ll see new buds. Within two months, the silhouette will start looking like a tree. And within a single growing season, you’ll have a decent topiary specimen. Let go of the idea that this is a quick weekend craft. This is a slow, living art form. The beauty is in the process.
FAQs
1. Can you topiary a jade plant easily?
Yes, absolutely. Jades are some of the easiest plants to shape because they grow woody stems and tolerate hard pruning. They recover quickly in bright light and warm temperatures. Just avoid overwatering them during the shaping process.
2. Can I make a bonsai tree from a jade plant?
Yes. Jade plants make excellent indoor bonsai. The thick trunks and small leaves mimic traditional bonsai trees perfectly. However, they are not frost-hardy. They must be kept indoors in most climates.
3. How often should I water a jade topiary?
Only when the soil is completely dry. This might be every week in summer and only once a month in winter. Check the soil with your finger. If the top inch feels bone dry, water. If it feels cool or damp, hold off. Your jade will thank you.
Final Thoughts
Learning to create jade plant topiary is a journey. I’ve killed those plants. I’ve drowned them. I’ve burned them in too much direct sun. But once I stopped fighting the plant and started working with its natural tendencies, everything changed.
Start with one plant. Try the standard tree shape or even a simple spiral. Observe it for two weeks. Adjust your watering and light. Prune just a little at a time. You’ll be amazed at what a small, determined succulent can become.
And don't be afraid to make mistakes. The next cutting is always one step away.





