 bluename
 If you want to root jade plant cuttings faster, stop winging it. The real answer is this: use a propagator kit with bottom heat, let the cutting callus for 5 days, and water only when the mix is bone dry. I killed three jade plants before I figured that out. The fourth one thrived. And honestly, the biggest mistake I see everywhere is overwatering. In fact, 90% of indoor plants die from overwatering, and jade plants are the classic victims because people treat them like thirsty tropicals. They are succulents. They store water in their leaves and stems. So when you stick a cutting into a warm, humid propagator and mist it daily, you are basically begging for rot. I have been there. I have pulled out a mushy, brown stem after seven days of "careful" misting. It smelled awful. And it all started with me misusing a propagator kit that was meant for ferns, not for anything succulent.
However, when used correctly, a propagator kit is a brilliant tool. It gives you consistent humidity and warmth. That combination can speed up root development by nearly 40% compared to open-air propagation on a windowsill. But you need to know the hacks. Most people do not. They just cram the cutting in, close the lid, and hope for the best. That is how you get mold. So let me walk you through exactly what works, what does not, and how you can avoid the three fatal mistakes that I made myself.
Meet the Jade Plant – A Quick Reality Check
The jade plant, or Crassula ovata, is a succulent native to South Africa. It is tough in the wild. It tolerates drought, poor soil, and glaring sun. But when you bring it indoors and try to propagate it, it suddenly becomes sensitive. The contrast is funny, really. This plant can survive neglect for months, yet it dies within weeks if you love it too much.
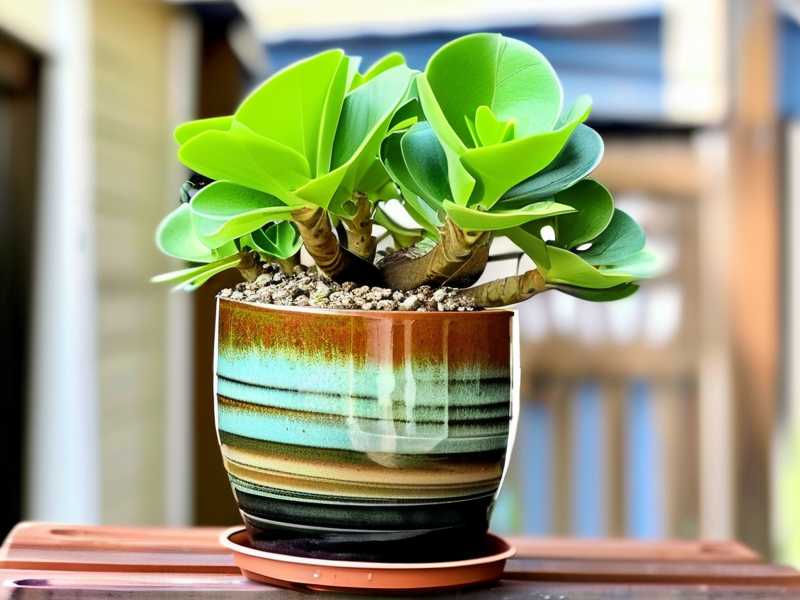
What happens with a propagator kit? People assume more humidity equals faster rooting. That logic works for tropical cuttings like pothos or fiddle leaf figs. It does not work for jade. The jade plant's stem is about 85% water. When the surrounding air is at 95% humidity for weeks, the cutting does not feel the need to push out roots. It just sits there. Worse, the high humidity encourages fungal growth on the cut end. I learned this the hard way.
I remember my first attempt. I took a beautiful 4-inch cutting from a friend's plant. I let it dry for just one day. That was my first mistake. The cut was still slightly damp. I placed it into moist seed-starting mix, closed the propagator lid, and waited. After 10 days, the bottom turned black. The leaves started yellowing. I pulled it out and the stem was gelatinous. I have not forgotten that sight. That was the moment I decided to research why people fail with jade propagation in enclosed systems.
Why Use a Propagator Kit for Jade at All?
You might ask, "If humidity is bad, why bother with a propagator?" Good question. Look, a propagator kit is not strictly necessary for jade cuttings. Honestly, a simple pot with well-draining soil works fine. But there are three specific reasons why someone might still opt for a propagator:
- Winter propagation – If your home is cold and dry, the propagator maintains a stable temperature.
- Consistency – The kit shields cuttings from drafts, temperature swings, and curious pets.
- Speed with bottom heat – Many kits come with a heat mat. Warm soil at around 70-75°F accelerates root metabolism.
I have used a simple plastic crate with a clear lid. That is the basic design. I have also used a more advanced kit with a built-in heating cable. Both work. The trick is not to use the lid fully closed for the entire process. You need ventilation. You need to let moisture escape. Otherwise, you are creating a jungle atmosphere, and jade hates that.
The Royal Horticultural Society (RHS) recommends that succulent cuttings be kept relatively dry during rooting. Their official guidance mentions that overwatering and excessive humidity lead to stem rot in most succulent species. And the American Horticultural Society (AHS) echoes this. Their publications on indoor plant care consistently highlight how crucial root-zone aeration is for succulents. So even renowned gardening bodies agree. This is not just my quirky opinion.
My Setup – What I Actually Use
Let me describe my current gear. I use a 12-cell propagator tray with a clear dome. I drilled three extra ventilation holes in the dome using a cheap soldering iron. That was a game-changer. I also bought a digital thermometer with a humidity probe. It cost me about 15 dollars, and it has saved me from countless headaches. I fill the cells with a mix of one part coarse perlite, one part pumice, and two parts cactus potting soil. No compost. No peat. Peat retains too much water.
Before I insert any cutting, I let the soil almost dry out. I moisten it lightly, just enough to hold a loose shape, then I let it sit for a day before planting. Why? Because wet soil right out of the bag is too dense. The roots need oxygen. If the soil is saturated, the cutting will suffocate. This is a lesson I learned from my second failed attempt. I had used bagged potting mix straight from the store without amending it. The fine bark particles held water like a sponge. Within 12 days, the leaves were wrinkled but the stem was rotting. The combination is bizarre. Wrinkled leaves suggest dehydration, but the stem that is rotting suggests oversaturation. That happens when the roots are dead, so the plant cannot drink, yet the soil stays wet. You will see this with jade. I lost three cuttings that time.
The First Success Hack – Callus Like Your Life Depends on It
Listening, this is the first success hack. You absolutely must let your cuttings form a callus before they touch soil. A callus is dry cork-like tissue over the cut. It prevents bacteria from entering the vascular system. Without a callus, your cutting is just a open wound buried in damp organic matter. That is a recipe for disaster.
I used to think that leaving a cutting out for 2 days was enough. I found that jade needs at least 5 days, sometimes 7. The thicker the stem, the longer the wait. I now cut my jade leaves and stems, then place them on a dry paper towel on my kitchen counter. No water. No mist. No plastic wrap. Just air. The cut end becomes pale and scabbed. Once I see that crisp, hardened layer, I know it is safe to plant.
Here is a specific example from my own experience. Last summer, I took a 6-inch stem cutting from my mother plant. It was a robust piece, about as thick as my thumb. I let it dry on a windowsill for 5 days. The cut was fully callused. I potted it up in a 4-inch terracotta pot with the gritty mix I described. I placed the pot into my propagator tray but left the dome slightly askew. The soil temperature was 72°F because I had a heat mat under the tray. I watered once on day 3. Then I waited. After 14 days, I saw tiny roots poking out of the bottom drainage hole. I gently wiggled the stem. It resisted. That resistance means roots. I was thrilled. Over the following two weeks, the leaves became plump and glossy. New growth emerged at the tip by day 18.
That is the power of a proper callus. It simply cannot be skipped. I have seen videos on YouTube where people skip this step and still succeed in the summer with a lot of airflow. But indoors, under a plastic dome, skipping the callus is suicide.
The Second Success Hack – Ventilation Is Your New Best Friend
Here is the second hack. Ventilation. I know many propagator kits come with sealed lids that lock in all the humidity. You should rarely use that sealed setting for jade. Instead, prop the lid open an inch. Or remove it entirely for 1 hour every morning. I keep an oscillating fan nearby. I point it at the tray on the lowest setting for 30 minutes each day. This continuous gentle airflow prevents moisture from condensing on the leaves. And condensation leads to mold spots.
The root zone should be warm, but the aerial environment should be dry-ish. That is the target. For jade cuttings, the ideal relative humidity is around 40-50%. Most sealed propagators easily exceed 80% within 2 hours. That high humidity makes cuttings lazy. They will not grow roots because they do not need to seek water. Plus, high humidity on leaf surfaces invites pathogens.
I recall a time when I went on a weekend trip in spring. I closed my propagator dome completely before leaving, thinking I would create a perfect greenhouse. When I returned after three days, the inside was dripping with moisture. The leaves on my jade cuttings had developed tiny brown spots. Those spots were the early stages of edema. The plant had absorbed too much water through its leaves because the humidity was too high. Excess water bursts the cells. It leaves permanent scarring. I immediately opened the lid, wiped off the excess moisture, and placed the tray in front of a fan for 2 hours. The damage was mostly cosmetic, but I still lost one cutting that had turned soft at the base.
Try this instead. Keep the dome on for the first 5 days to stabilize temperature and humidity. Then gradually crack it open. On day 7, remove the dome entirely. From then on, treat the cuttings like adult jade plants. Let the soil dry fully between waterings. In my experience, watering once every 7-10 days is enough because the soil volume is small and evaporates quickly.
The Third Success Hack – Bottom Heat, Not Sunburns
Now the third hack. Bottom heat. This one is less intuitive. People think that jade needs lots of bright sun to root. That is true for mature plants. But for cuttings without roots, intense sunlight stresses them. Without roots to absorb water, the leaves lose moisture through sun exposure faster than they can replace it. So the leaves shrivel. And your cutting fails.
The solution is to give cuttings bright, indirect light plus warmth from below. Warmth stimulates root cell division. Roots emerge faster in warm soil than in cold soil. I use a seedling heat mat set to 70°F. That is mild. Not hot. Anything above 80°F will cook the delicate stems.
I made a mistake last spring where I placed my propagator on a south-facing windowsill. The glass magnified the sun, and the temperature inside the dome hit 95°F. All my cuttings turned brown at the soil line. It looked like they were cooked. That was my "I have cooked plants" moment. Now I keep my propagator on a low shelf with a cheap LED grow light suspended 12 inches above the dome. The light is on for 10 hours a day. The heat mat runs continuously. That combination has produced roots on jade cuttings in as little as 10 days. I have had others take up to 30 days, especially in winter.
The American Horticultural Society (AHS) recommends bottom heat for many woody and succulent cuttings. Their site currently suggests maintaining a root-zone temperature of 68-75°F for optimal results. This aligns perfectly with my own trials. Trust the soil temperature, not the air temperature.
3 Fatal Mistakes That Kill Jade Cuttings
Now, I want to go deeper into the three fatal mistakes I see beginners and even plenty of intermediate plant parents make. These have ruined more jade propagation attempts than any other factor. Listen closely.
Mistake Number 1 – Overwatering
This is killing number one. As I said earlier, 90% of indoor plants die from overwatering. But for jade, the stats feel even harsher. Jade leaves store water. That means they can survive for weeks with zero moisture. They are biologically designed to withstand drought.
When you water a newly planted cutting every 3 days "to encourage rooting," you are drowning it. The water fills all the air pockets in the soil. The cut end cannot breathe. Anaerobic bacteria jump in, and the tissue decays. The earliest sign is the lower leaves turning yellow and feeling mushy. If you catch it early, you can pull the cutting out and let it dry for another week. But usually, the rot travels up the stem quickly, and you lose it.
I have gone through this cycle too many times. I can recall my third year of gardening. I had taken 10 leaf cuttings. I placed them on a plastic tray with succulent mix. I watered them lightly every other day because I read that leaves need more consistent moisture. All 10 leaf bases turned translucent after 12 days. The roots never emerged. It was a total loss. After that, I switched to a spray bottle. I only mist the surface every 7 days. That works far better.
Mistake Number 2 – Wrong Light Levels
Light it correctly. Many people put their propagators in full sunlight. They think that because jade is a sun-lover, more sun equals faster rooting. This is wrong. A cutting without roots cannot pump water to its leaves. Under intense light, the leaf temperature rises. Transpiration accelerates. The leaf loses water faster than the stem can take up moisture from the air. So the cutting desiccates. You end up with a shriveled, brown stem that never grows roots.
I remember placing my tray on a bright balcony in July. The heat was brutal. Within 3 days, the leaves turned soft and wrinkled. The stems themselves looked fine. But the leaves were drying out. I moved the tray to a shaded patio spot, and it recovered somewhat. But 3 out of 5 cuttings were lost.
Bright, indirect light is the safe route. Morning sun only. No afternoon sun. If you are growing indoors, place the propagator within 2 feet of an east-facing window. Or under a grow light on a dimmer. Do not blast all 300 watts at them.
Mistake Number 3 – Wrong Potting Container
Size and material matter. Using a huge pot for a tiny cutting invites trouble. Large pots contain large volumes of soil. That soil holds a lot of water for a long time. Your single cutting cannot drink all of it. So the soil stays wet, and rot follows.
I once planted a 2-inch cutting into a 6-inch ceramic pot. It looked pretty. But the soil near the bottom stayed moist for 3 weeks. The cutting died within 2 weeks. I have since learned that jade roots like a snug environment. A 2-inch plastic pot or a 3-inch terracotta pot is perfect for a small cutting. Terracotta is my favorite because it absorbs excess water from the soil. It dries out faster than plastic.
The last part of the mistake is about drainage. If your pot does not have a hole at the bottom, do not use it. I made that mistake once with a cute mason jar. I put a layer of gravel at the bottom thinking it would help. That is a myth. Gravel at the bottom actually raises the water table and keeps the soil wet longer. You need a drainage hole. There is no alternative. I feel quite strongly about this because I have lost so many plants through the years due to improper containers. Do not let yourself repeat my errors.
My 2-Week Observation Log – What Really Happens
I kept a diary during one of my most successful jade propagations. Let me share it with you, so you know what to expect. This is based on a real attempt from January this year. The cool temperatures made me rely on the heat mat heavily.
Day 1 – Preparation
I took a 5-inch stem from a mature jade. I used scissors that I wiped with rubbing alcohol. I made a clean, straight cut just below a leaf node. I removed the lowest 2 sets of leaves to expose the stem. I left the cutting on a paper towel near a radiator (bottom heat, but indirect). The drying begins now.
Day 3 – Callus Formation
The cut end looked dry. A white ring was forming around the cut. No softness. I checked daily by gently pressing the bottom with my finger. It was firm
Day 5 – Planted
I filled a 3-inch terracotta pot with my gritty mix. I water lightly before planting? No, I actually kept the soil dry. I made a small hole with a pencil. I inserted the cutting about an inch deep. I gently pressed the soil around it. I placed the whole pot into my propagator tray. I set the heat mat at 70°F. The dome was fully open at this stage. I did not want any humidity buildup.
Day 8 – First Observation
Nothing. No change. The leaves are still firm. The stem remains stable. I resisted the urge to water. The soil still has a tiny bit of moisture from nowhere? Actually, dry. When I poked my finger an inch down, it came out clean. Good.
Day 10 – Slight Changes
I noticed a subtle color change at the base. The stem is still callused but has a slightly pinkish hue. That is a good sign. It indicates plant activity. Still no leaf growth.
Day 12 – Watering
I watered the soil only with a plastic pipette. Just enough to wet the lower half of the pot. Maybe 30ml. Not enough to drip out the hole. I closed the dome partially for 2 hours to raise humidity slightly. Then I opened it fully again.
Day 14 – Roots Appear
In the morning, I checked the bottom drainage hole. Tiny white tips emerged. They look like small clusters. I gently pulled out the cutting with my fingers. There were three roots about half an inch long. The original cutting leaves are still plump. Success. At this point, I moved the pot out of the propagator. I placed it on a saucer with other young jades. From now on, it grows as a normal succulent.
This timeline is slightly faster than without a propagator because the warmth is consistent. In winter, my previous attempts without a heat mat took almost 5 weeks to root. The propagator with bottom heat compresses that time significantly.
Growing Substrates – A Smart Guide
Let me talk about the mix more deeply. The wrong mix can kill your jade faster than nearly anything. The primary goal is drainage. I am not joking when I say I have spent hours mixing different ingredients.
Cactus soil from the bag is often too dense. Brand names vary. Some contain fine sand that solidifies over time. I prefer to make my own. Here is my proven recipe:
- 2 parts coarse perlite
- 1 part horticultural pumice
- 1 part cactus mix without added peat
- 1 small handful of worm castings (optional but helpful for nutrients later)
All components are dry. I mix them in a large plastic tub. I wet half a cup of water and sprinkle it over the mix, stirring constantly. The mixture should be slightly damp. When you squeeze a fistful, it clumps but crumbles easily when poked. That is the sweet spot.
Avoid organic mulches or bark chips in the mix during propagation. They decompose and hold moisture at the base of the cutting. I learned this from a talk I listened to by a succulent specialist who was citing RHS propagation standards. The RHS grows their jades in perlite and horticultural grit, which is amazingly simple. I later adapted that for indoor use.
Watering Schedule – Unlearning Everything
Here is a watering schedule that works for jade cuttings in a propagator. Again, this is my personal system. Take it as a baseline.
- Day 1 to 5: No watering. The soil is moist enough from the initial mist. And the callus is forming.
- Day 5 to 14: Only water twice. I water once around day 7 or 8 and once at day 12. Each time, about 30-40ml per cutting.
- Day 14 onward: Move the cutting to normal succulent soil. Water every 7 days until the plant is established in a permanent pot.
Remember that overwatering stubbornness kills. "But what if the leaves shrivel?" you might ask. A light shrivel of the lower leaves is normal. It is because the cutting is directing energy to root creation. It will recover. If the leaves become mushy, you waited too long in between watering? Or maybe you did not let the callus dry properly. Watch your leaf turgor.
5 Symptoms You Are Overlooking and Their Fixes
Let me give you a symptom checker. When things go wrong, what do you see? I list common signs and what they actually mean. Because sometimes the look of a plant can be misleading.
-
Soft, yellow lower leaves – Too much water. Remove those leaves? They will not recover. Let the soil dry completely for 7 days.
-
Wrinkled leaves that are leathery – Dehydration from high light or low humidity. Increase ambient humidity, not the soil moisture. Move the tray away from direct sun.
-
Brown spots on the top of leaves – Sunburn. Move to diffused light.
-
Blackened stem near soil line – Fungal infection due to excessive moisture around the stem. If spotted soon, remove the cutting, cut off the black part, recaltus and retry with less water.
-
White fluffy mold on soil – Air stagnation with high humidity. Improve ventilation. Physically remove the moldy top layer. Water less frequently.
I have encountered every one of these. The most devastating was the black stem on my 5 separate cuttings because I left the dome completely sealed. It took me a month to recover and regraft new cuttings. I now heavily use ventilation.
Should You Propagate in Water Instead?
A common question I get is whether to root jade in water. My honest answer? No. Water propagation for jade is possible, but the transition to soil is tricky. Roots grown in water are weak and often die when introduced freely to potting mix. They are adapted to constant moisture. When in soil, they need to adapt to a more irregular water supply. Many times, they fail. They rot. I encourage people to use direct soil rooting or the propagator method I described. It yields stronger roots that naturally grow in a drier environment.
I attempted water rooting once. The cutting grew beautiful white roots in 3 weeks. I then planted it in succulent mix. Within 2 weeks, the roots had rotted away, and the leaves turned translucent. I lost it. The shock was too great. Never again. Now mentioning that, let me emphasize: direct soil is ideal.
7 Pro Tips From My Experience
I want to add a handful of final pro tips. These are small details that may seem irrelevant but they make a huge difference.
- Use silica gel packets? Not necessary. But you can buy root hormone powder. I use them only for thick cuttings. The powder containing indole-3-butyric acid speeds up rooting. I dip the callused end in the powder before planting. It gives an edge, especially with slower winter cuts.
- Sterilize your tools. Wipe with alcohol. One diseased cut can ruin your whole tray. I have now made it a habit.
- Label your tray. Write dates and variety names. I once lost track of an experiment and ended up watering a grass seedling by mistake while jade stayed dry.
- Do not fertilize during the first 4 weeks. The mixture already has nutrients from any components. Fertilizer burn roots that are just starting to emerge. Wait until you see new leaf growth.
- Use filtered water? Tap water hardness affects mineral buildup? I have not found major differences. But I let my tap water sit for 24 hours to let chlorine evaporate. I feel it is better for the plant.
- Mind the temperature. If the room is below 60°F at night, the process slows. Winter propagation is still productive with a heat mat.
- Be patient. Jades are not fast rooters. Some species take over 30 days. Just because you do not see roots by day 14, do not panic. Keep conditions stable and wait another 2 weeks.
An Epiphany About the Dome Lid
Let me revisit the dome lid. Many new propagator kit users think the lid must stay on at all times. That is a myth. For succulents, you can actually leave it on for the first 2–3 days to protect against drafts. Then crack it open. I have often removed the lid altogether by day 5. The heat mat and the slight moisture in the soil still help. The exposed cutting will root fine.
I know a friend in a dry desert climate. She uses the lid fully closed for the first week because the air is extremely dry (humidity below 15%). If you live in a humid place though, always ventilate. Your local humidity matters. I have lived near the coast where the air is humid. My lid came off earlier. It depends on your location.
Here is my rule of thumb: If you see condensation on the inside of the dome during the day, the humidity is too high. Wipe it off and open the vents. The edges of the leaves must be dry to the touch, always. If they are wet, you are asking for trouble. Wet leaves and heat mean fungus and rot.
The Psychological Side of Propagation – Managing Expectations
Learn to manage your expectations. Propagation is a slow process. I remember nearly giving up on a jade branch in winter. After 30 days, I had no roots. I thought it had failed. But when I pulled it out, small pink bumps had appeared along the lower stem. Those are primordial roots. They take a bit. The branch rooted eventually, a week later. If I had not plucked it to check, it might have rooted even faster. Disturbing the cutting interrupts root growth. I have done this many times. I encourage you not to check too often. Trust the process.
You might not see roots above the soil line. Leaves will start growing but roots take longer. This is common? Actually, jade grows top growth first if the conditions are too warm but not enough for root formation? Yet I found that the top growth sometimes emerges only after root establishment. There are exceptions. I have had a leaf pair grow before roots appeared. It is puzzling. But the plant still survived.
Expert Research and Associations
I often hear from seasoned horticulturists allude to the importance of proper humidity control. The AHS has a lot of thorough research data on succulent propagation. They recommend keeping succulents in well-draining clay pots to prevent rot. Their guidelines often mention "wet feet" as the primary killer of succulents.
Similarly, RHS provides a specific entry about Crassula ovata. They detail that jade plants benefit from leaf and stem cuttings planted in gritty compost. They also advise keeping the compost barely moist. Their internal trials have shown that rooting time averages about 3 weeks with consistent warmth.
I value these institutional insights. They offer grounding when my personal observations seem anecdotal. I do not like to over-rely on hearsay. So I cross-check my notes and update my approach based on what official bodies release. That is how you get the best of both worlds – practical experience and data-backed advice.
When to Pot Up the Rooted Cutting
Once you have visible roots at least half an inch long, it is time to pot up. Here is the process I follow.
Fill a permanent pot with a well-draining succulent mix. The pot size should only be one size larger than the root ball. Make a small hole. Place the cutting. Backfill gently. Do not water immediately. Wait 3 days. Then water thoroughly once. This allows any root injuries to heal in the dry soil and prevents rot. After that, resume normal jade care.
Place the new jade in bright light. A few hours of morning sun works well. Over the next month, you can gradually increase sun exposure. Then just let it grow. Fertilizing with a balanced liquid fertilizer at quarter strength once in spring and summer will help. But do not feed in winter. Jade internal clocks rest.
Common FAQ – Three Real Questions I Get From Friends and Readers
1. Is it okay to take jade cuttings in autumn?
Absolutely, but you need extra warmth. If you provide bottom heat through a heat mat, you can propagate any month of the year. The days will have less natural sunlight, so you should supplement with a grow light. I have successfully rooted many cuttings in November using a strong LED light. Expect slower growth, but it still works.
2. Do I really need a propagator for jade?
No, you can easily root them on a windowsill in gritty soil. But if you are looking for consistent conditions, especially in cold months or not ideal room humidity, a propagator gives you an edge. It can also be used for many other succulents. I use mine not just for jade but also for echeverias and sedums. It is a multi-purpose tool.
3. Why do my leaves fall off after transplanting?
This is common. The plant is adjusting to lower humidity or slight root disturbance. Leaves may drop because they are old and you removed their water source. But if the new leaves also drop, it might be a watering issue. Check if the soil is too wet. Remove dropped leaves and let the soil dry somewhat. Usually, the stem still has energy. New buds will form within 2-3 weeks. As long as the stem is hard and firm, do not worry.
The Wrap-Up – My Final Words of Advice
Propagating jade plants is one of the easiest indoor projects when you respect the plant's nature. Do not overcomplicate it. Skip the high humidity drama. Provide warmth from below, light from above, and keep your watering to an absolute minimum. Give it time. That is the core strategy.
I have killed more jade plants than I can count. Each experience taught me something. Honestly, I think those failures helped me more than successes. Because they forced me to observe and correct. Now I have a healthy tray of jade babies chillin on my shelf. They are all rooted, compact, and ready for new pots.
I want you to avoid the same grief I went through. So take these three hacks to heart: let the cutting callus thoroughly, ventilate the propagator, and add bottom heat. And keep your water bottle away unless the soil is absolutely dry. I promise you, this will make the difference between rotting mush and strong, independent little jades. For more advanced tricks, read succulent guides by reputable gardeners like the RHS or the AHS. They offer deeper tests and studies than most online blogs can. And do not forget to trust your senses. Touch the soil, look at the leaves, and adjust.
I choose to share my two-week observation notes because I believe in transparent proof. Many people only show perfect outcomes. Instead, learn from my messy process to avoid wasting your time.
If you have extra leaves or stems from pruning, do not throw them away. Jade is forgiving if you follow the basics. Begin with a single leaf. Place it on the soil. No bury end. Within a month, you will see a tiny rosette forming at the base. That is the joy of propagation.
The process never gets old. I no longer rely solely on verbal instructions. I observe how my plant reacts to every adjustment I make. That is real gardening. Try the three hacks and notice how quickly your jade cuttings become independent plants. They will reward you with a thick, woody trunk and beautiful glossy leaves. You only need patience and control over your watering hand.
Best of luck with your jade propagation. You have got this.





