 bluename
 How to Repot Dwarf jade plant: 2 Small-Pot Transplant Guides
If your dwarf jade plant is looking cramped, root-bound, or simply slowing down, the answer is repotting. 90% of indoor plants die from overwatering, but a surprising number also suffer from being stuck in the wrong pot. Let me give it to you straight: you need a pot that is only 1 to 2 inches larger in diameter than the current root ball. That's it. I’ve killed more plants than I care to admit by jumping into oversized pots. Let me show you the exact two ways I repot my dwarf jade, step by step, so you avoid my mistakes.
Why Repotting a Dwarf Jade is Different from Other Succulents
Dwarf jade, or Portulacaria afra, isn't a true jade plant, but that doesn't matter to most of us. What matters is its root system. It’s shallow, fibrous, and loves to be snug. People often treat it like a jade plant, which is a huge mistake. Honestly, the dwarf jade has tiny, delicate roots compared to the thick, chunky roots of a standard jade.
I used to think all succulents needed the same gritty mix and big breathing room. I couldn't have been more wrong. In my experience, the dwarf jade thrives in a small pot. It actually responds to tight quarters by building stronger, finer roots. This is why I only recommend the two small-pot methods below. There is no need for a giant ceramic urn, no matter how pretty it looks on Instagram.
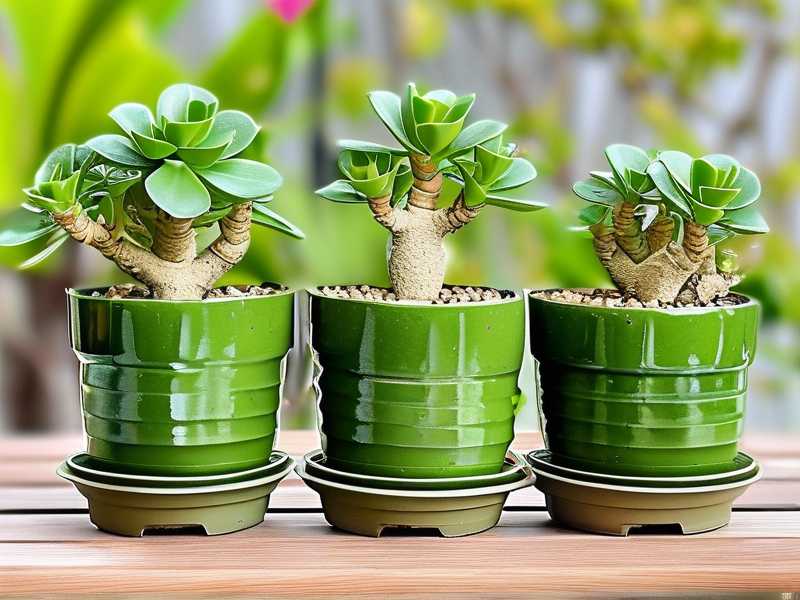
The Critical Mistake: Oversized Pots Hold Too Much Moisture
Let’s talk about the root of the problem. Most of us, myself included at one point, think a bigger pot means more room for roots to grow. The truth is, a bigger pot holds more soil. More soil holds more water. More water means the roots stay wet for too long. That’s the formula for root rot.
I learned this the hard way. I had a beautiful dwarf jade bonsai. I repotted it into a pot that was maybe 3 inches larger in diameter. I felt so proud. Within two weeks, the leaves started to yellow and drop. The branches became squishy at the base. It was rotten. The pot was too big, the water sat around the edges, and the roots drowned. I lost a plant I’d kept alive for three years. Now, I stick to the 1-2 inch rule religiously.
The 3 Fatal Mistakes Beginners Make with Dwarf Jade
Before we even talk about the soil or the steps, you need to know these three things. I see these all the time in beginner posts on gardening forums.
Mistake #1: Overwatering After Repotting This is the number one killer. You repot, you water, and you assume the plant needs a drink to settle in. With dwarf jade, that’s a death sentence. The roots are always slightly damaged during repotting. When you water immediately, the open wounds are submerged in soil bacteria. I did this exactly once. The stem turned black at the soil line within 10 days. Wait 5 to 7 days before the first deep soak. This gives the roots time to callus over any breaks.
Mistake #2: Light Placement Shock You might think the plant needs rest after a stressful repot. Actually, the opposite is true. If you move your dwarf jade to a low-light spot after repotting, it stops photosynthesizing effectively. That leads to root dormancy. Then, when you finally water it, the roots aren't active. They just sit there, getting cold and wet. I tried the "shade recovery" phase once. The leaves wrinkled and lost their gloss. They didn't plump up again until I moved it back to full sun. Keep it in the same bright spot it was in before. Dwarf jade needs that sunlight to kick-start root regeneration.
Mistake #3: Using the Wrong Pot Material I see so many people use glazed ceramic pots for everything. That's fine for some plants, not for dwarf jade. Glazed pots slow down evaporation a lot. You need a pot that breathes. Terracotta is your best friend. The unglazed clay wicks moisture away from the soil. Also, people forget about drainage holes. This sounds obvious, but I once bought a cute pot from a boutique that had no holes. I was a beginner. I drilled a hole, but I cracked the pot. Well, that crack turned out to be a disaster; the root system grew through the crack and anchored to the tray. When I went to lift it later, I snapped the taproot. So, get a proper terracotta pot with one decent hole. Simple.
The "Wait 7 Days" Guide (The Dry Repot Method)
This is the method I use for 90% of my repotting projects. It’s the safest for beginners because it significantly reduces the risk of rot. It focuses on working with dry soil.
Step 1: Stop Watering a Week Before
I usually stop watering my dwarf jade about 7 days before I plan to repot. You want the soil to be completely dry. This is crucial. When the soil is dry, the soil crumbles off the roots easily. Plus, the roots themselves become slightly soft and more pliable. They are less likely to snap or tear. I always say, a thirsty plant repots better than a hydrated one.
Step 2: Gently Loosen the Root Ball
I take my dry plant and I squeeze the sides of the plastic nursery pot. Then, I turn it upside down, supporting the stem with my fingers. The plant usually slides right out. After that, I gently tease apart the old soil. I use my fingers or a chopstick. You don't need to get every grain of old soil off. Just free up the outer root system. If you see a thick mat of roots circling the bottom, that’s a sign it was root-bound. I gently pull those apart so they can grow outward instead of in a circle.
Step 3: Check for Bad Roots
While the roots are exposed, I take a good look. A healthy dwarf jade root is firm and off-white or tan. A bad root is brown, mushy, or black. It will often thin and break off easily. I take my sterilized scissors and snip off any mushy or dried-up roots. I did this last season and found a whole section of the root system had died from a lack of watering. It was crispy. I cut it off. The plant didn't even notice, and new roots grew right from the cut.
Step 4: Potting with Dry Soil
Now, here’s the part where the two guides differ. For this dry method, I do not wet the soil before potting either. I fill the new terracotta pot (only 1-2 inches bigger) with fresh, dry, well-draining succulent mix. I make a hole in the center, place the plant in, and backfill. I tap the pot on the table to settle the soil. I don't press down hard. I just let it sit dry.
Step 5: The Crucial 7-Day Wait
This is the hardest part for me. I want to water it. I want to see it settle. But I wait. I wait a full 7 days. For the first week, the plant lives off its stored moisture in the leaves. The exposed roots are dry the whole time. This allows any tiny breaks in the roots to form a hard callus, which prevents bacteria from entering through the wounds. After the 7th day, I finally water it deeply, letting water run out of the drainage hole.
The "Wet Method" (For Emergency Root Rot)
This method is for when something goes wrong. I only use this if I suspect the roots are already rotting or if I dropped the pot and broke the root ball. It’s a bit grosser, because we work with moisture.
Step 1: Unpot and Clean the Roots Completely
This time, the plant might be in damp soil. You have to be careful. I usually soak the root ball in a bucket of water to wash away all the dirt. This gives you a perfect, naked view of the roots. Since you're already calling this an emergency, you need to see everything.
Step 2: Aggressive Pruning
If you do this wet method for rot, you need to be aggressive. I hacked off almost half the root system of my sick dwarf jade once. It was scary. I laid the bare roots out on a paper towel. I let the whole plant sit in a dry, shaded spot for 24 hours. I know, it sounds counterintuitive. But this "air drying" step is essential. It dries out the core of the roots and the cuts. I actually started doing this with all my wet repots, not just emergencies. It makes the roots start generating new growth faster.
Step 3: Pot in Slightly Moist Mix
This is the main difference from the dry guide. I use a mix that is just barely damp. I’m talking a touch of humidity in the soil, but no dripping water. I prepot my Portulacaria afra in this soil. I do not water it at all afterward. The slight moisture in the soil particles will draw the dry roots to seek out water, creating new little root hairs.
Step 4: Observation Phase (2-Week Monitoring)
For this wet method, I really watch the plant. I keep it in bright, indirect light for the first 48 hours, then move it back to direct sun. I check the leaves daily. If they start to plump up, I know the roots are reconnecting. If they stay wrinkly after two weeks, I know I'm in trouble.
The 2-Week Observation Report: What I Saw
I recently repotted my own dwarf jade using the dry method. I want to give you a play-by-play of what happens after you do the work. It’s the waiting game that many people fail at.
Day 1-3: Honestly, it looks okay. The leaves are still firm. The soil is bone dry. I almost watered it on day two because the leaves looked slightly less shiny. I stopped myself. It’s normal for the leaves to lose that glossy look for a few days. It’s just stress.
Day 4-5: I notice the edges of the older leaves feel a little thin. This scared me at first. I thought I had under-watered. I poked the stem with my finger. It was still rigid, not mushy, which is a good sign. The plant is using its own leaf water reserves. Keep waiting.
Day 6: I check the roots by sticking a wooden skewer through the drainage hole. It came out clean. Good. I also see that a few of the smaller branches near the bottom are starting to look slightly less vibrant. This is the "stress phase". Don't panic.
Day 7: This is the big day. I water it deeply. I use a watering can and pour it slowly over the whole surface. I even fill the tray and let it soak up from the bottom for about 15 minutes. Then I empty the tray. I leave it on the sink.
Day 8-10: Progress! I can literally see the stems becoming more rigid. The leaves are plumping up. By day 10, the leaves have that tight, glossy, round appearance again. I know the roots are active. I give it a gentle wiggle, and it holds firm in the soil.
Day 14: The new growth is visible! I see tiny, bright green, glossy leaves emerging at the tips. This is the "okay, it worked" moment. I usually start a light feeding schedule at this point, using a diluted liquid fertilizer at half strength. The plant has absorbed the water from day 7, the roots have pushed into the new soil, and the cycle continues.
Choosing the Right Pot and Soil: My Exact Recipe
You can't repot without the right gear. I learned that my succulent soil mix is too dense straight out of the bag. Here is what I use now.
I mix 2 parts of a quality succulent mix with 1 part of coarse perlite and 1 part of small pumice stone. I don't recommend using sand. Sand often solidifies and clogs the pores. Pumice is great because it holds water inside its porous surface but drains externally. My dwarf jade roots love this. The pot I always choose is terracotta. It's ugly, but it works. I pick a pot where the top diameter is 1 inch larger than the root ball. That's my rule. I never "up-size" more than that.
Prepping the Root Ball: The "Naked" Method vs. The "Shrink-Wrap" Method
Another choice you have when repotting is how much old soil you remove.
The Naked Method (Full Bare Root): This is harsh but effective. I wash the roots completely. This gives you a chance to check every single root. I only do this when I suspect disease or if the soil is completely broken down. It takes the plant longer to recover, usually a week longer, but it resets the system.
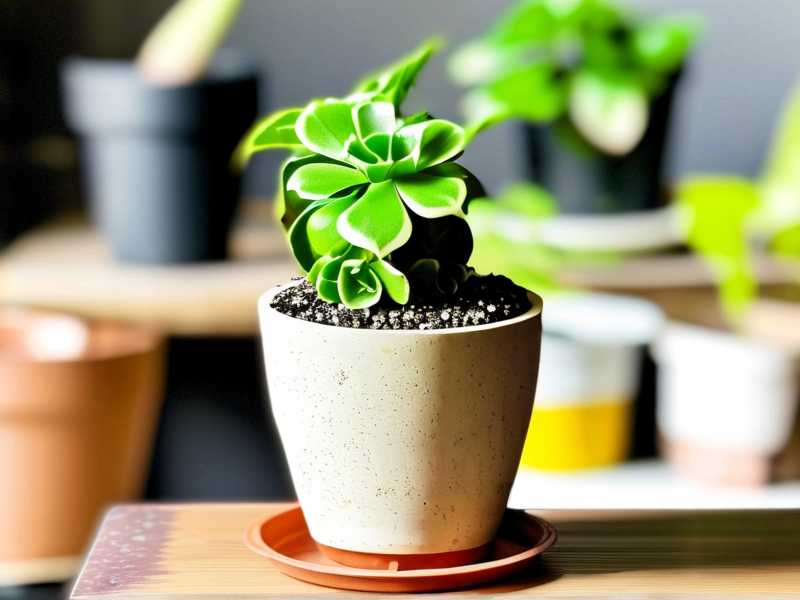
The Shrink-Wrap Method (Partial Bare Root): This is what I do for most of my healthy plants. I leave about 30% of the old soil stuck to the roots. This keeps the "good bacteria" and the mycorrhizal networks intact. I find the plant recovers much faster with this method. It’s less of a shock. I simply shake off the loose soil, but I don't wash the roots. Then I plant it in the fresh mix. I saw this technique mentioned in a RHS newsletter about container planting, and it changed my success rate instantly.
The "Shallow Bowl" Special Technique
Here is a trick I use for my larger dwarf jades. Since they have shallow roots, I bypass the deep pot entirely. I use an "azalea" pot. It’s the type of pot used for bonsai; it is much wider than it is deep. I put a layer of coarse gravel at the bottom (about half an inch), then I put a piece of fiberglass screen over the drainage hole to prevent soil loss.
I plant the jade in this shallow bowl. The root system spreads horizontally. This mimics their natural habitat perfectly. I water slightly more often because the soil volume is small, but the plant looks incredible. The trunk thickens faster in a shallow pot because the roots have nowhere to go but outward and the trunk stays compact. The AHS has some great articles on container gardening with shallow-rooted succulents that back up this practice. I also find that shallow pots warm up faster in the sun, which triggers faster root growth.
Troublingshooting: What to Do When It Dies (Yes, It Happens)
I have killed enough dwarf jades to write a book. But there is always a rescue mission possible. If your plant starts to drop leaves and the trunk gets soft, take it out of the pot immediately.
I did this just last spring. I found the bottom half of the roots were black mush. I cut the stem right above the rot. I had a stick of bare green stem left. I let it dry on my kitchen counter for 4 days. The cut end callused over. Then I stuck it in a dry terracotta pot with dry soil. I kept it in the shade. Honestly, I thought it was a goner. But after 3 weeks, I felt a slight resistance when I pulled it. Roots had formed. The plant is a survivor. So don't throw it away. If the stem is still firm, you can save it. The leaves will shrivel, but the stem will push out new buds.
Watering and Light Schedule After Repotting
Let’s just make this crystal clear. After repotting, you don't go back to a strict calendar schedule. You go back to the "squeeze test".
I wait 7 days, then I water. After that, I wait until the leaves feel a bit soft or look slightly less inflated. That is my signal. The "wrinkle test" is reliable. When the leaves show faint vertical wrinkles, I water. During the following 2 weeks after repotting, I probably water only twice. The rest of the time, the plant is soaking up all that sun on my south-facing windowsill. Dwarf jade is a full-sun plant. I don't use grow lights or anything fancy; a sunny windowsill works.
Preventing Pests During the Stress Period
One thing I'll tell you is that a recently repotted plant is stressed. Stressed plants attract pests.
I made this mistake with my first repot. I put the freshly potted jade outside to "recover". Then I brought it in. Two weeks later, I had mealybugs in the nooks of the branches. Once you have mealybugs, it's an uphill battle. I now keep my newly repotted plants isolated for 2 weeks. I wipe the leaves and stems with a damp cloth every week. This gets rid of any eggs or bugs before they establish. A strong jet of water from the sink sprayer is also a great, chemical-free way to remove bugs.
When to NOT Repot Your Dwarf Jade
Listen, this is just as important as knowing how to repot. Do not repot in winter. The plant is dormant. The roots are inactive. If you repot and cut roots in winter, they won't heal. They will just sit in wet soil and rot. I repot in spring or early summer. The plant is actively growing. New roots sprout within days. Also, never repot a plant that has just been watered. Always let it dry out first. If the plant is flowering, wait until the blooms fade. Cutting roots while the plant is putting energy into flowers will cause massive bloom drop.
The Top 3 Questions People Ask Me (And My Answers)
I often get asked the same things about this process. Let me clear up the confusion.
Can I use a glass jar or a mug for my dwarf jade? I wish people would stop doing this. Glass has no drainage. Mugs have no holes. Yes, I have tried to make the mug method work by putting rocks at the bottom. I put a layer of charcoal and rocks. It still flooded the root system because water has no way to escape except through the plant's own transpiration. The roots were swimming. I lost that plant. Please, only use a pot with a drainage hole. If you love the mug, use it as a decorative outer shell. Put a plastic nursery pot inside the mug. But for the dwarf jade itself, it needs that hole to breathe.
How long after repotting should I fertilize? Never fertilize right after repotting. The fresh soil has nutrients in it. Plus, fertilizer can burn delicate new roots that are just starting to grow. I wait at least 2 weeks. Usually, I wait for the signal of new growth. If I see tiny new leaves, that means it has settled in, and I can start feeding. If you fertilize too early, you'll see the leaf tips turn brown and crisp. That's salt burn.
My plant is tall and top-heavy. Does that matter? It does if it falls over. When you repot a top-heavy dwarf jade, you need to anchor it. I use a few small pebbles on the top of the soil to hold the trunk in place. I have also used a small, decorative wooden stake. You don't have to tie it tight. Just give it a little support. After about a month, the roots will grasp the soil, and you can remove the stake. It saves you from picking up a plant that has rolled off the shelf and lost half its branches.
I really hope this guide saves you some heartache. Repotting a dwarf jade is a chore, but it’s the single best thing you can do to keep it alive for decades. Remember the small pot, the gritty soil, the 7-day wait. That’s the whole secret. It took me a few wobbly, rotting attempts to get it right. Trust me, your little green buddy will thank you for it. Just stick to the process, and you'll be fine.





